GIGABYTE Active OC Tuner allows active switching between AMD Precision Boost Overdrive and OC mode on AMD Ryzen processors.
It is available exclusively on select GIGABYTE X570S motherboards including the GIGABYTE X570 AORUS Xtreme 2.0, GIGABYTE X570S AORUS Master, GIGABYTE X570S AORUS Pro AX, and GIGABYTE X570S AERO G. It is also more widely available on GIGABYTE X670/B650 motherboards.
GIGABYTE Active OC Tuner Overview
AOCT is short for Active OC Tuner and is GIGABYTE’s very clever way of solving one of AMD’s biggest problems when overclocking.
While Precision Boost Overdrive provides the best benchmark performance in single and low-threaded benchmark applications, the best multi-threaded performance is achieved by manually overclocking. So, you have to compromise best single threaded performance or best multi-threaded performance.
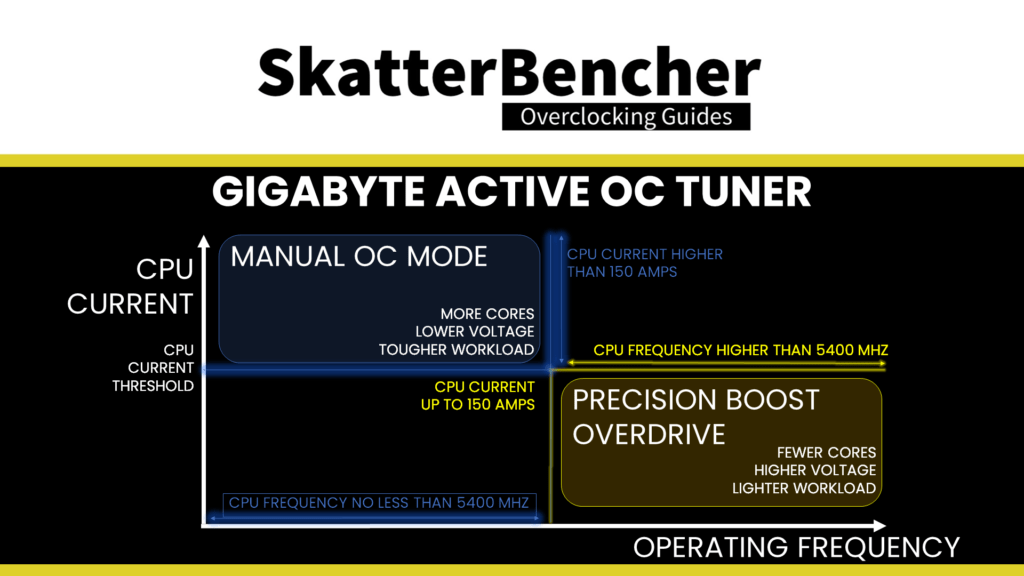
GIGABYTE Active OC Tuner gives us the best of both worlds, allowing the system to actively switch between Precision Boost Overdrive and manual OC Mode. It’s most easy to conceptualize AOCT as retaining all automatic Precision Boost benefits but with a manually configured frequency floor for all-core workloads.
GIGABYTE Active OC Tuner Configuration
AOCT requires little additional configuration work. We need to know two things:
- What is the lowest frequency we will allow
- At which point do we want AOCT to switch between PBO and OC Mode
Sadly, we cannot simply configure a minimum frequency and have the system switch based on that. Instead, we need to use a proxy metric: a specific current or temperature threshold. There is no perfect method of determining the ideal threshold, so I’ll show you one example using Cinebench R23.
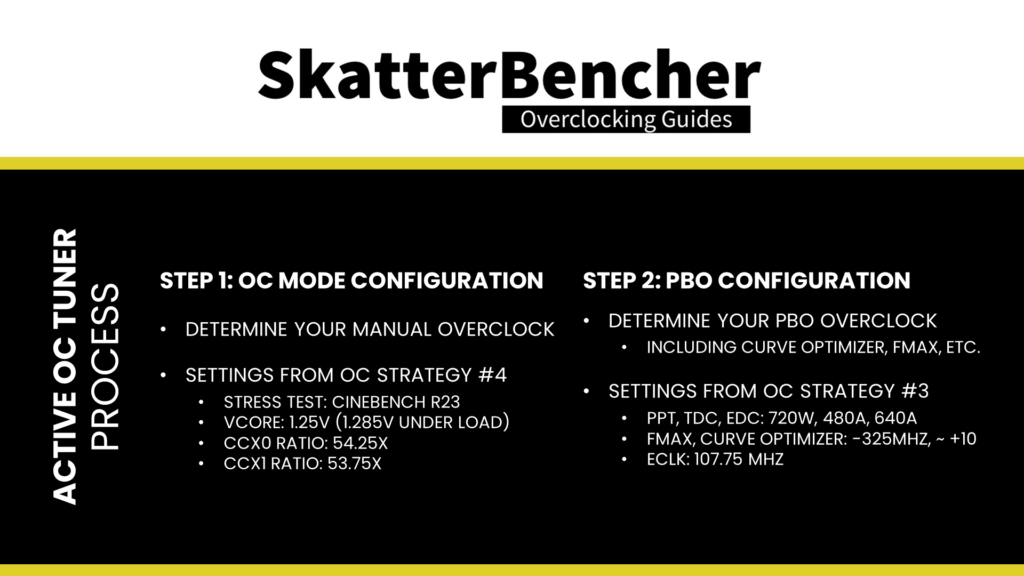
The first step is to determine your desired manual overclock. The fastest way to get to this point is by selecting your stress test tool of choice and finding the maximum CPU voltage within your thermal budget. Afterward, you can find the maximum stable frequency for that voltage and temperature.
The next step is to apply all your Precision Boost Overdrive tuning settings, including any custom Curve Optimizer or Fmax Override settings.
In the image below you can see the example from SkatterBencher #45.

Then, go into the operating system and open your stress test tool and HWiNFO. We aim to find where the Precision Boost frequency drops below our target manual overclock of 5400 MHz and check the current use. In HWiNFO, usually, we would monitor the VRM current. Unfortunately, it’s not available on this version of the software. So, instead, we monitor the CPU Package power and Vcore. Our current value will be the power divided by voltage.
Then we start the Cinebench R23 stress test and change the affinity to 1 thread in Task Manager. Now monitor the core clock frequency. It will be higher than our target of 5400 MHz. Now you can gradually increase the active thread count. When you reach 5400 MHz or below, check the CPU Package power and Vcore. The combination of these values will be our input for the AOCT Current Threshold setting.
In my case, we reach the frequency of 5400 MHz at about 20 active threads. The CPU package power reads 200W at a voltage of 1.3V. So the Current Threshold value for Active OC Tuner will be around 150A.
So, to reiterate what’s happening: Active OC Tuner will actively switch between OC mode and Precision boost when the CPU current hits 150A. Anything above 150A engages manual OC mode; anything below 150A will engage Precision Boost.

GIGABYTE Active OC Tuner with ECLK
On Raphael processors it’s possible to use a high reference clock frequency. This may impact your AOCT configuration
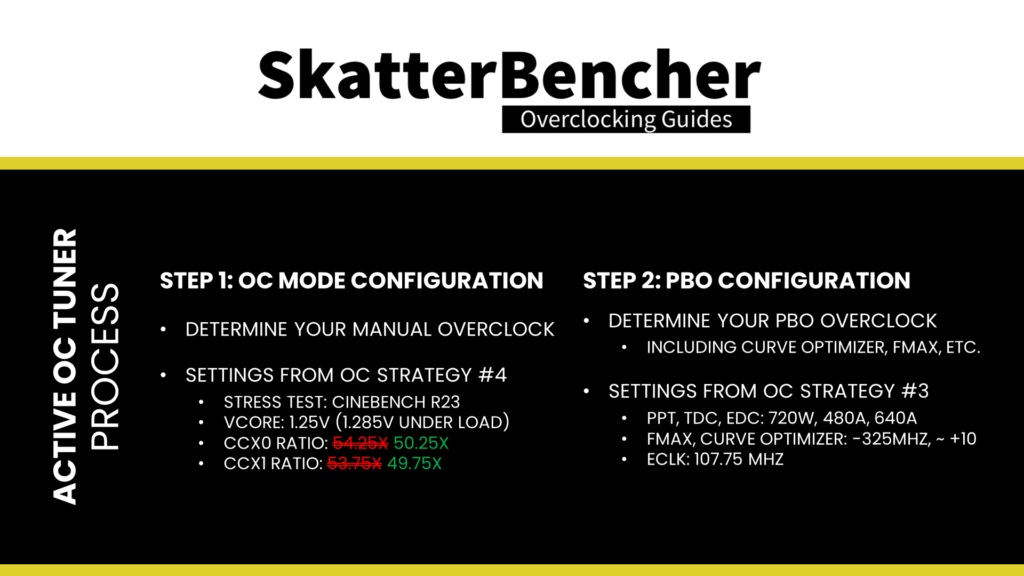
In the below example, I use an adjusted ECLK frequency of 107.75 MHz. When Active OC Tuner switches between PBO and OC mode, it does not change these settings. So, we must adjust our manual overclock settings accordingly:
- CCD0 CCX0 Ratio from 54.25 to 50.25
- CCD1 CCX0 Ratio from 53.75 to 49.75

GIGABYTE Active OC Tuner in SkatterBencher Guides
We use GIGABYTE Active OC Tuner in the following SkatterBencher guides: