Let’s talk 6.7 GHz Core i9-13900KS Raptor Lake
I show the BIOS configuration and some benchmarks with my 6.7 GHz Core i9-13900KS CPU cooled by the EK-Quantum Delta² TEC.
It’s becoming a tradition that every time a major CPU launches, I upload a video discussing the overclocking techniques and capabilities. While it’s not a major launch, Intel releases the Core i9-13900KS flagship Raptor Lake processor today. The main talking point of the KS is that it’s the very first desktop processor boosting to 6 GHz out of the box.
I already prepared a SkatterBencher overclocking guide with the ROG Maximus Z790 Hero motherboard. In this video, however, I want to share my initial overclocking experience and results and zoom in on, let’s say, more benchmark-oriented overclocking than daily overclocking.
For those who are just here to see the money shot: I ran the 13900KS P-cores at 6.7 GHz idling in Windows and about 6.2 GHz in an all-core gaming workload.

For those who want more details, I’ll first review the BIOS settings I used and then show some benchmark footage. But first, the system specifications!
6.7 GHz Core i9-13900KS System Specifications
| Item | SKU | Price (USD) |
| CPU | Intel Core i9-13900KS | 725 |
| Motherboard | ASUS ROG Maximus Z790 Apex | 700 |
| CPU Cooling | EK-Quantum Delta² TEC EK-Pro QDC Kit P360 EK-Quantum Surface S360 | 540 778 98 |
| Thermal Paste | Thermalright TFX Extreme | 20 |
| Fan Controller | ElmorLabs EFC-X9 | 40 |
| Memory | G.SKILL Trident Z5 32GB DDR5-7200C34 | 310 |
| Power Supply | Antec HCP 1000W Platinum | 110 |
| Graphics Card | ASUS ROG Strix RTX 2080 TI | 880 |
| Storage | Kingston SSDNow KC400 512GB SSD | 240 |
| Chassis | Open Benchtable V2 | 200 |
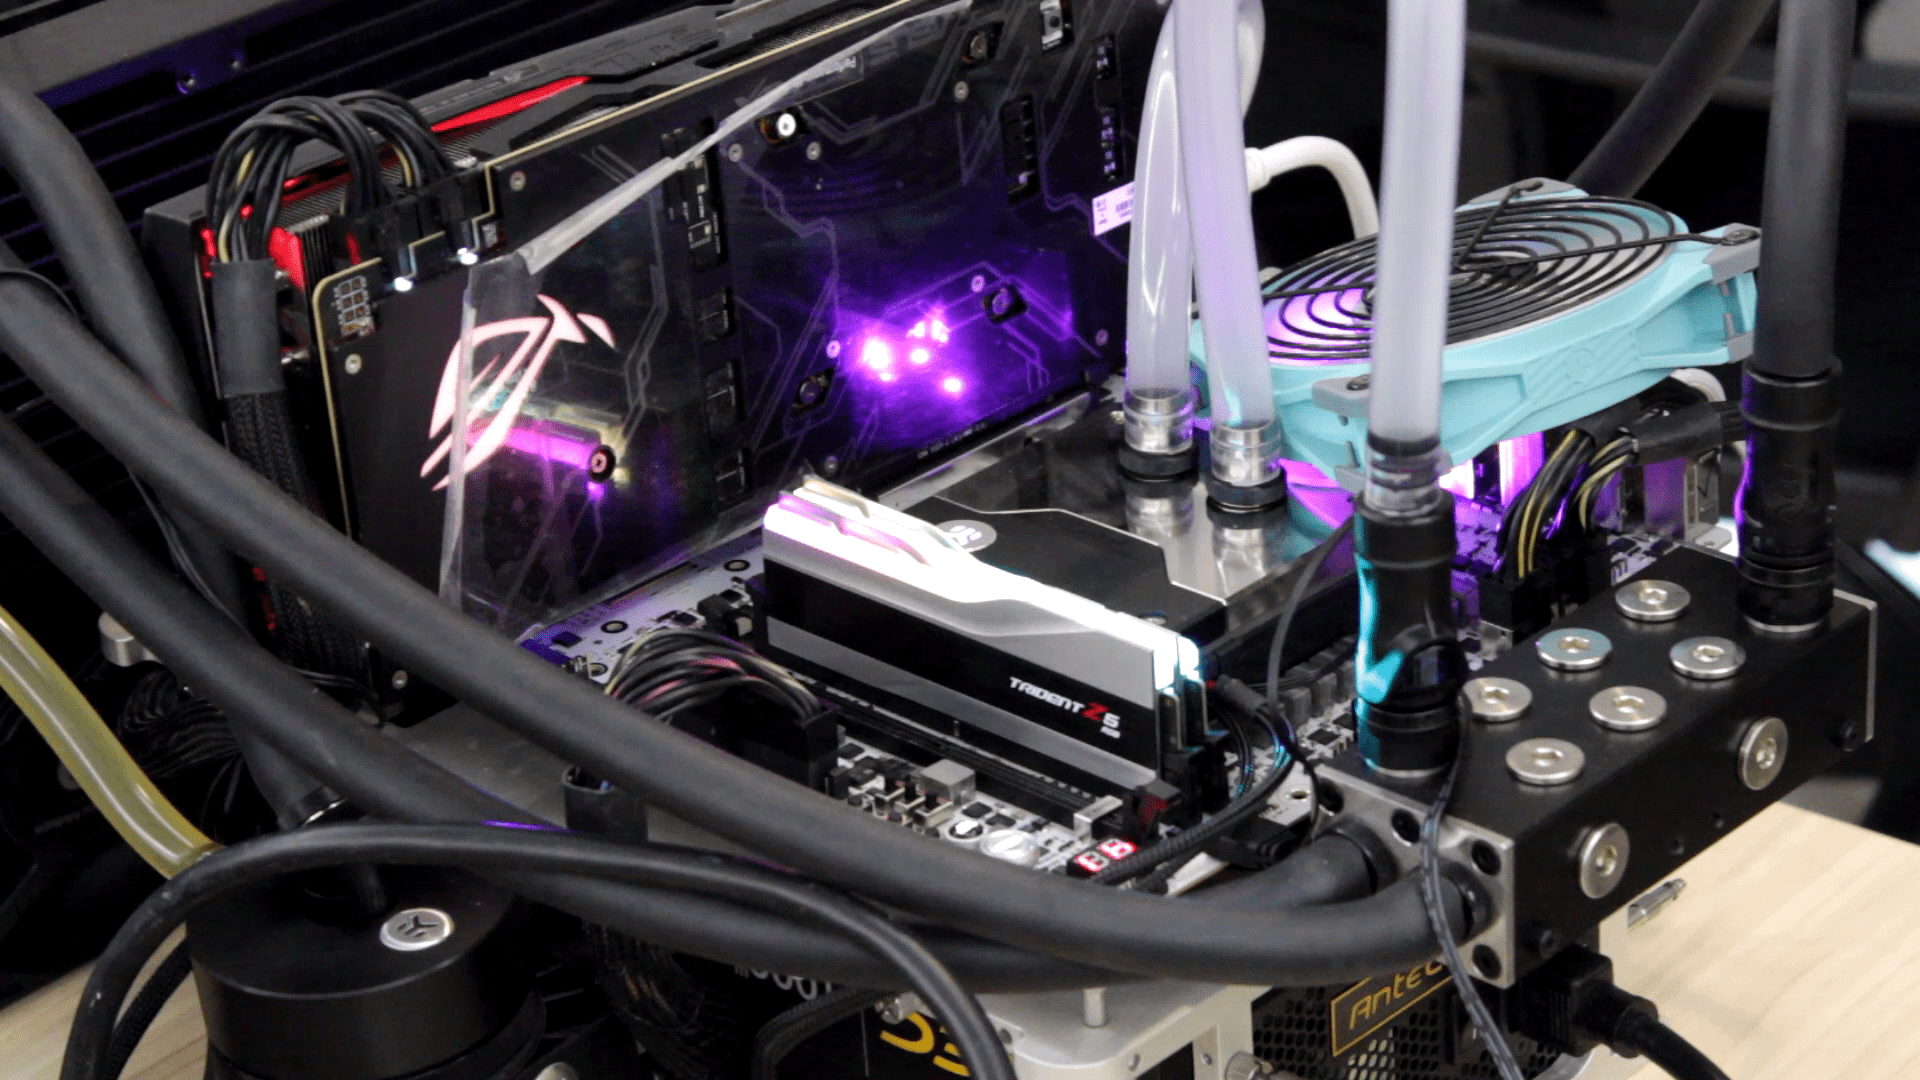
As you can see, I used very similar hardware as I used in previous SkatterBencher videos. I can add some clarification to some of the specific hardware choices:
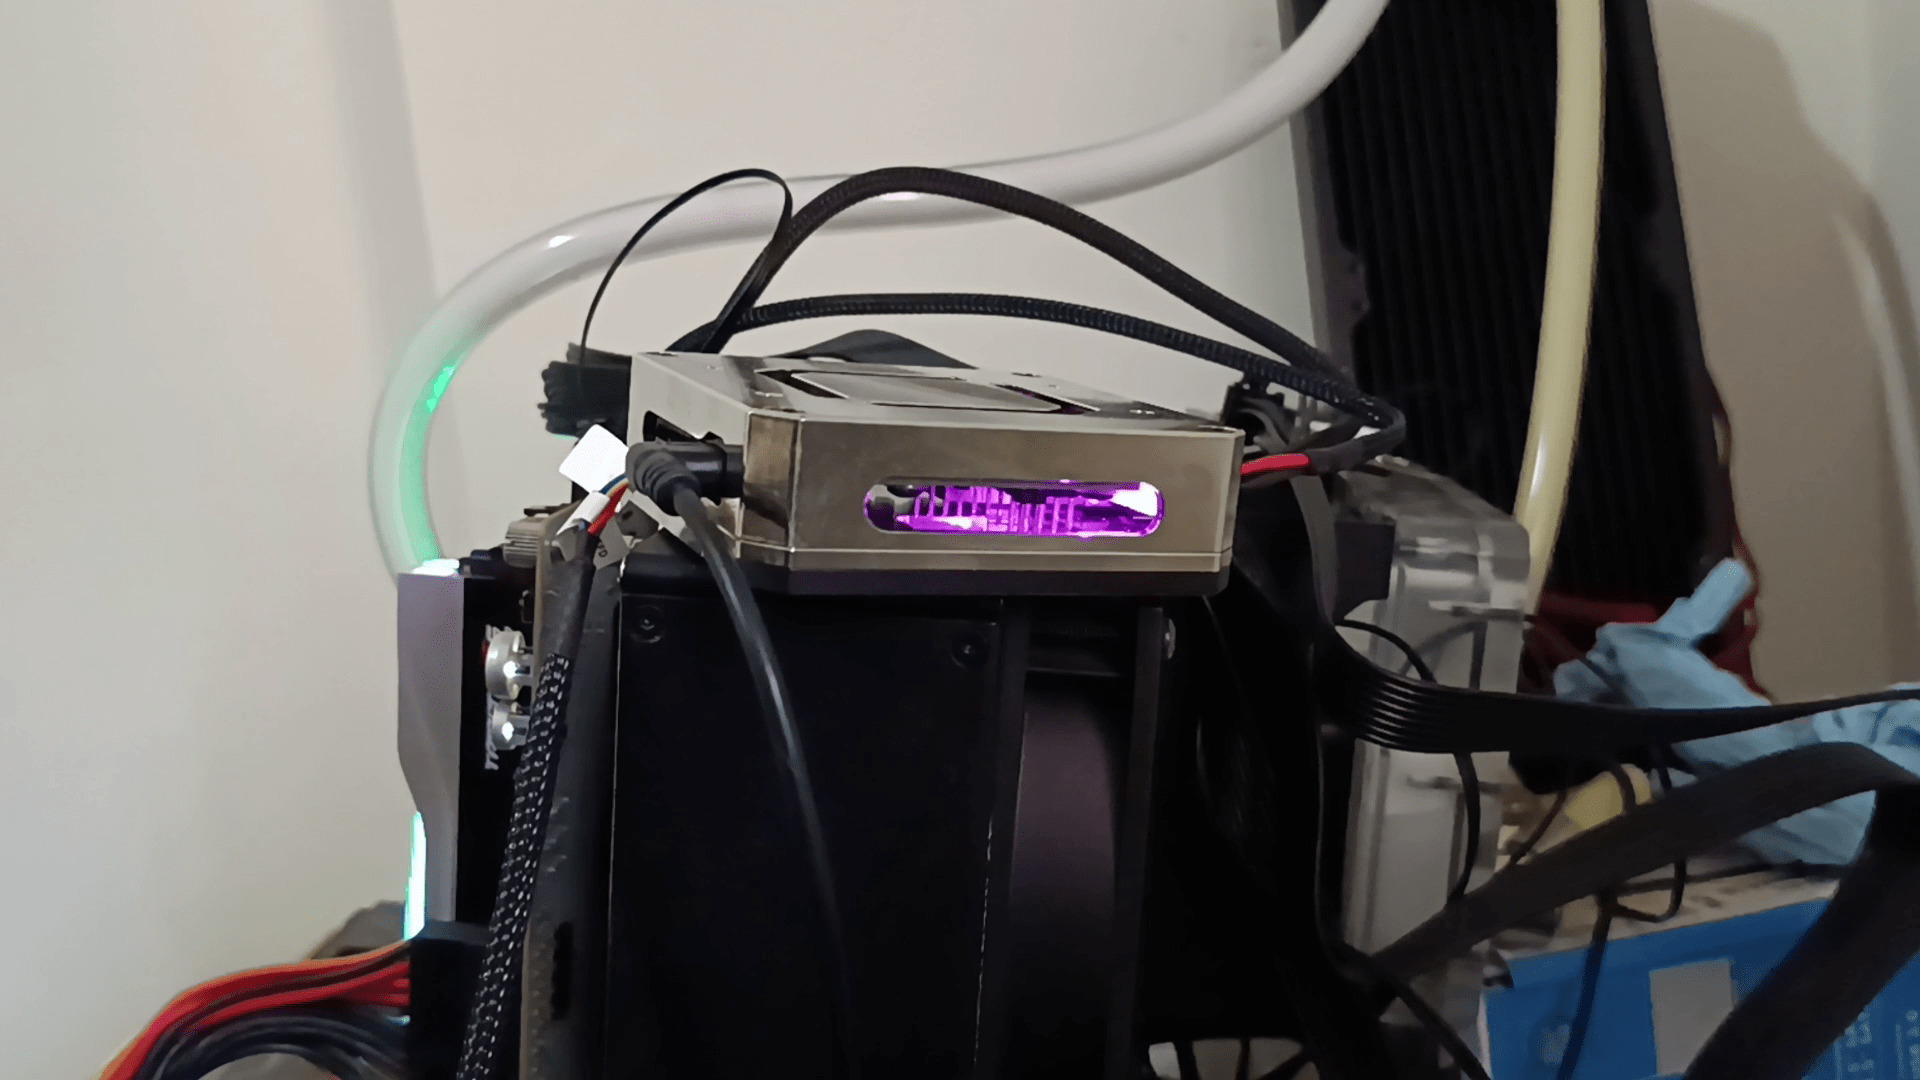
I use the EK-Quantum Delta² TEC water block to leverage Intel’s Cryo Cooling Technology. The Delta² TEC implements the latest generation Cryo technology, and I already used it in SkatterBencher #52 with the Core i9-13900K processor.

I added an additional 360 radiator in the loop just in case the added heat from the Delta² TEC plus the Core i9-13900KS would be too much for just a single radiator.
The ElmorLabs EFC-X9 is an evolution of the original EFC, which I’ve used in many previous SkatterBencher guides. The X9 supports up to nine independent PWM fans and can supply 4.5A per header or a maximum of 20A total. Additionally, there are two external temperature sensor connectors, plus an onboard ambient temperature and humidity sensor. There’s also dedicated EFC software to control the device.
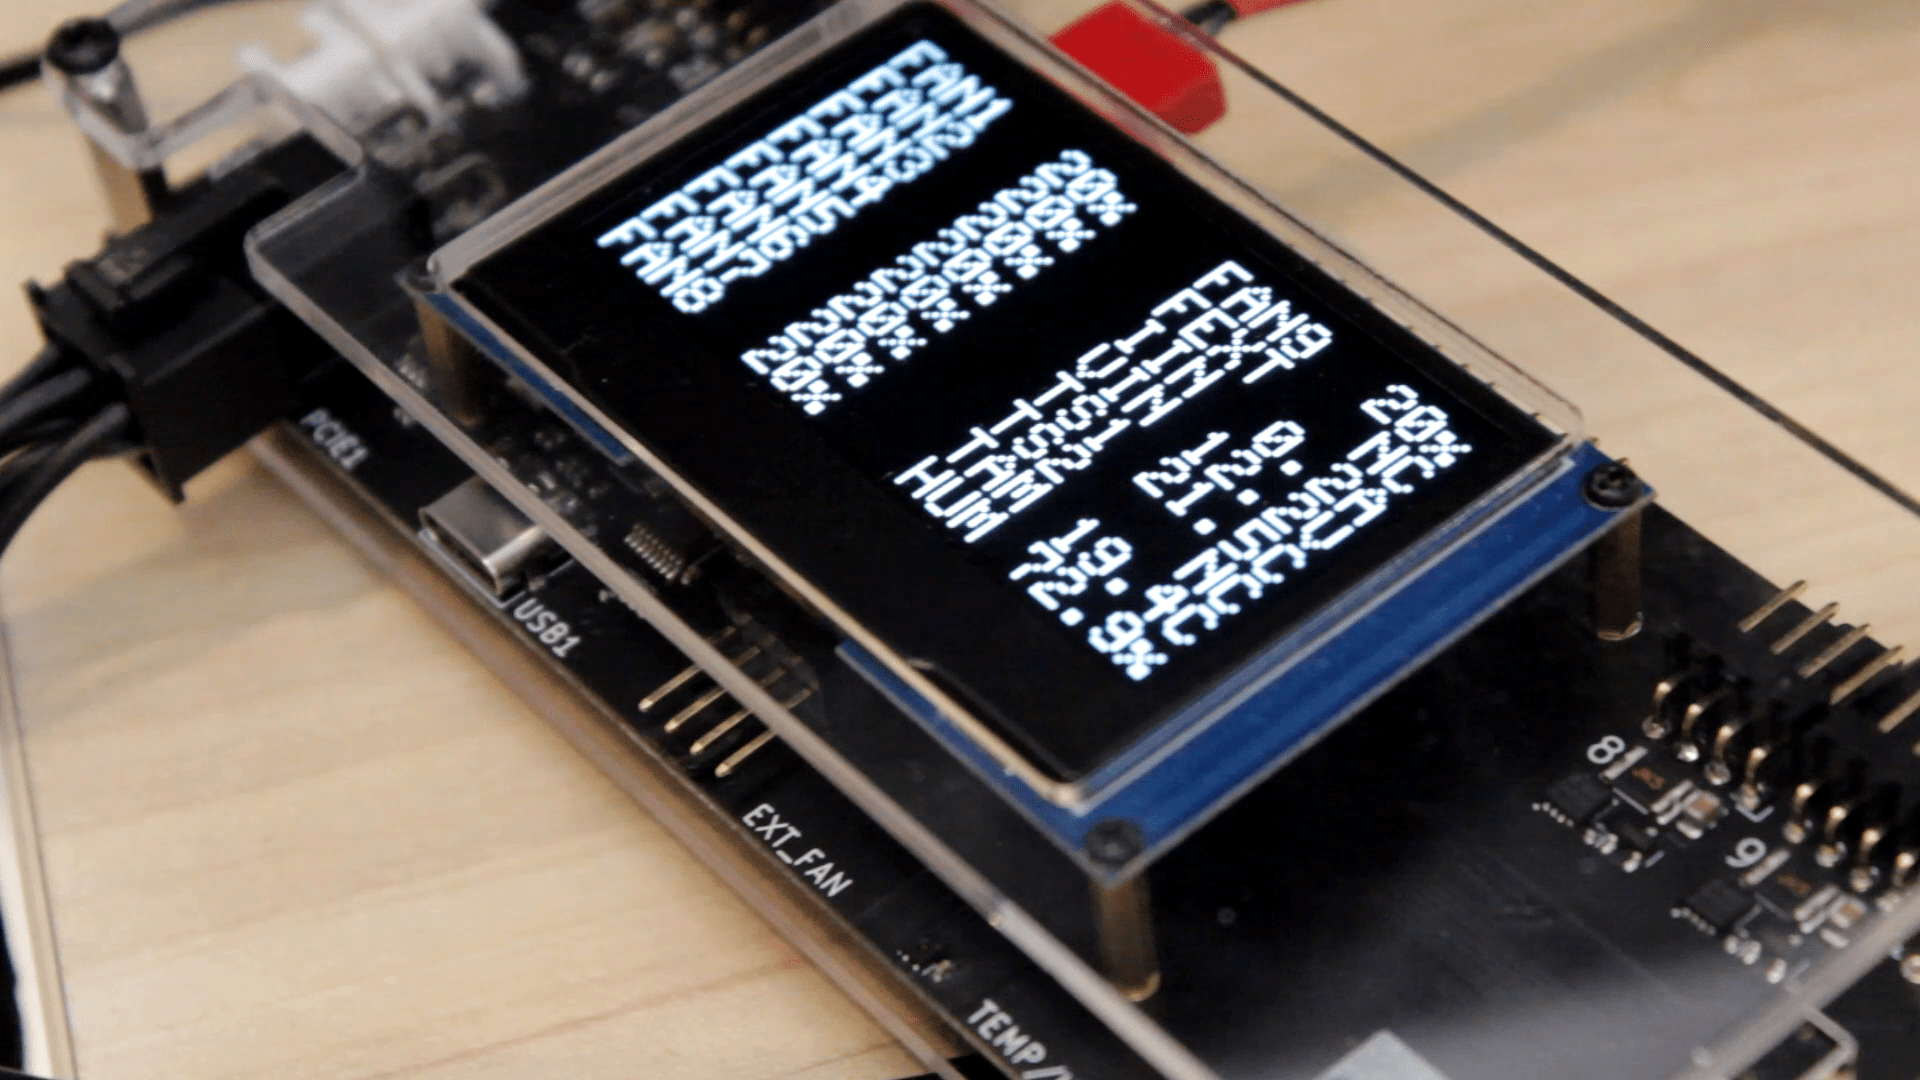
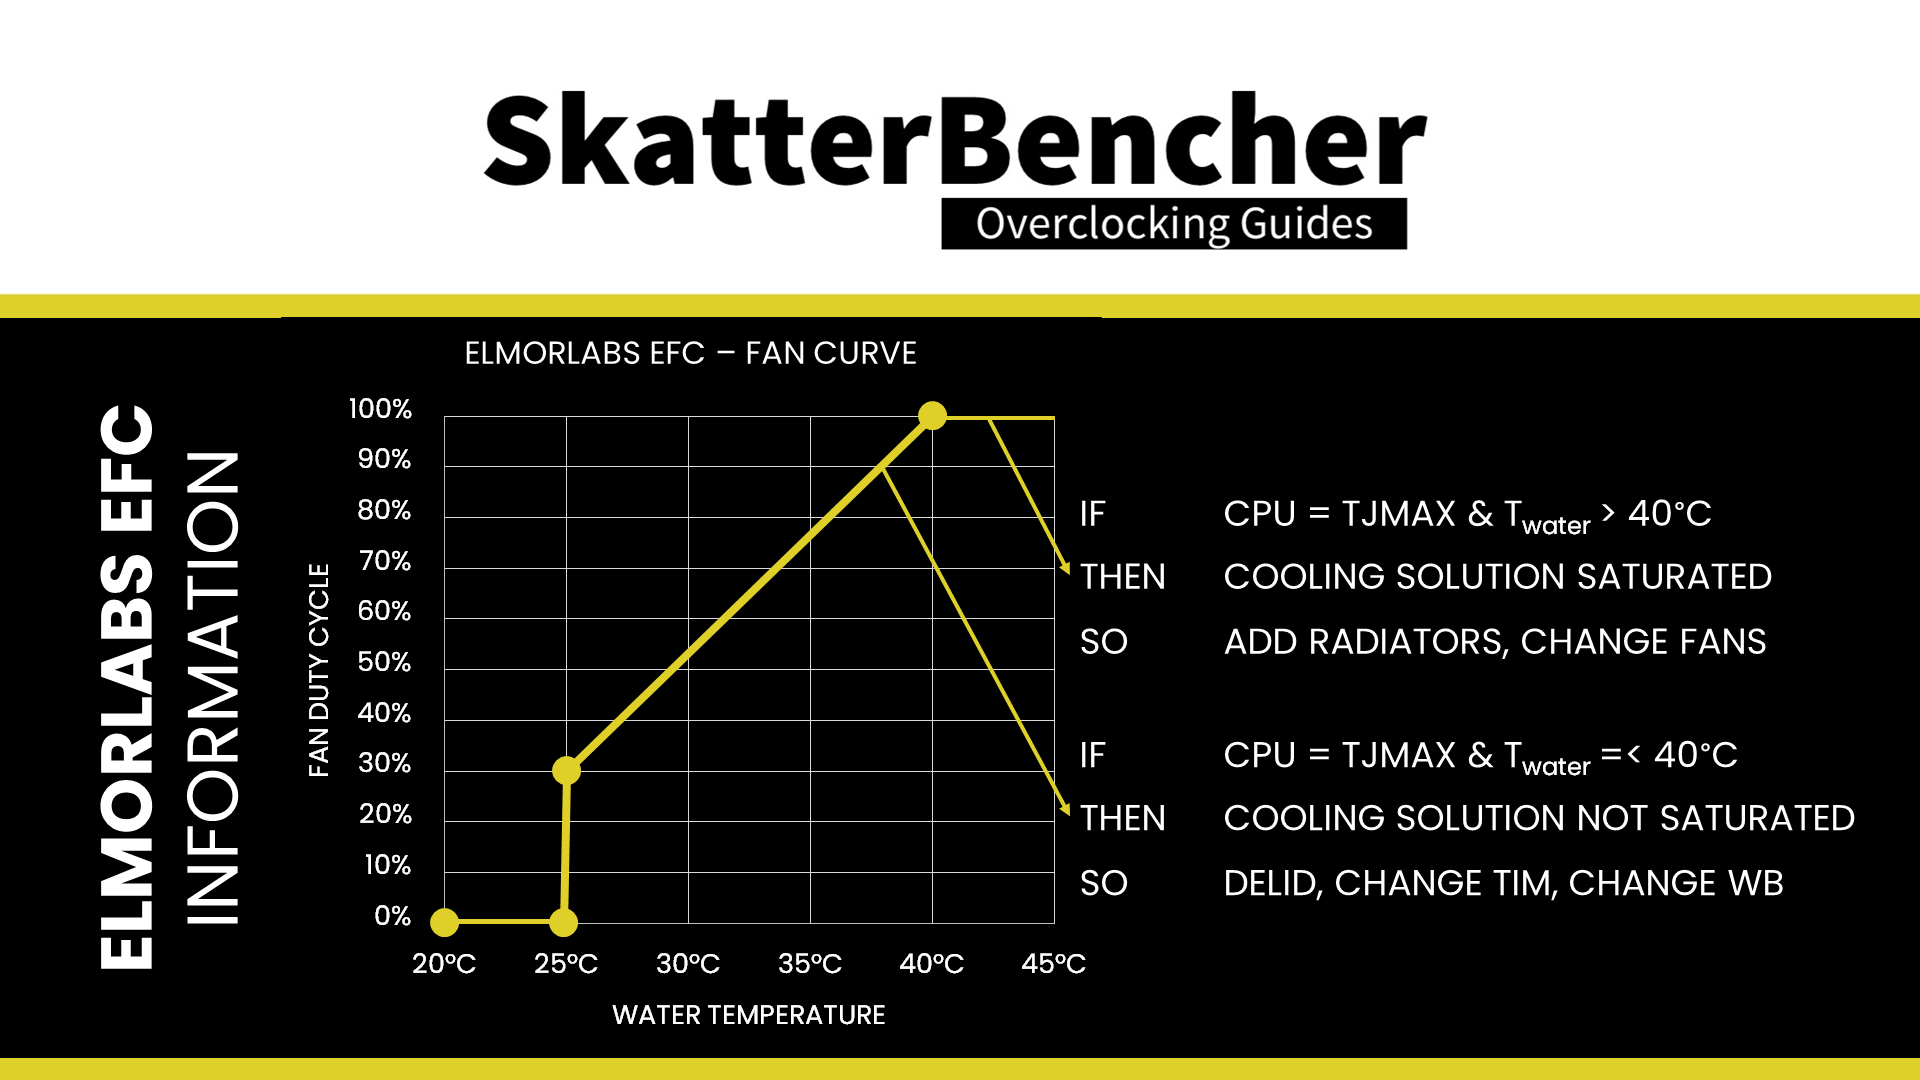
As usual, I map the fan curve to the water temperature and have the fans scale from 0 to 100% fan duty cycle from 25C to 40C water temperature.
6.7 GHz Core i9-13900KS BIOS Configuration
Like in SkatterBencher #52, I want to focus on P-core overclocking and thus disable the E-cores. Now I’ll walk you through my BIOS configuration and provide some notes and comments along the way.
Of course, please note that this is primarily for entertainment purposes and not the whole picture. Please don’t outright copy these settings and apply them to your system. If you want to learn how to overclock this system, please check out the upcoming longer SkatterBencher video.
First, let’s go to the Extreme Tweaker menu.
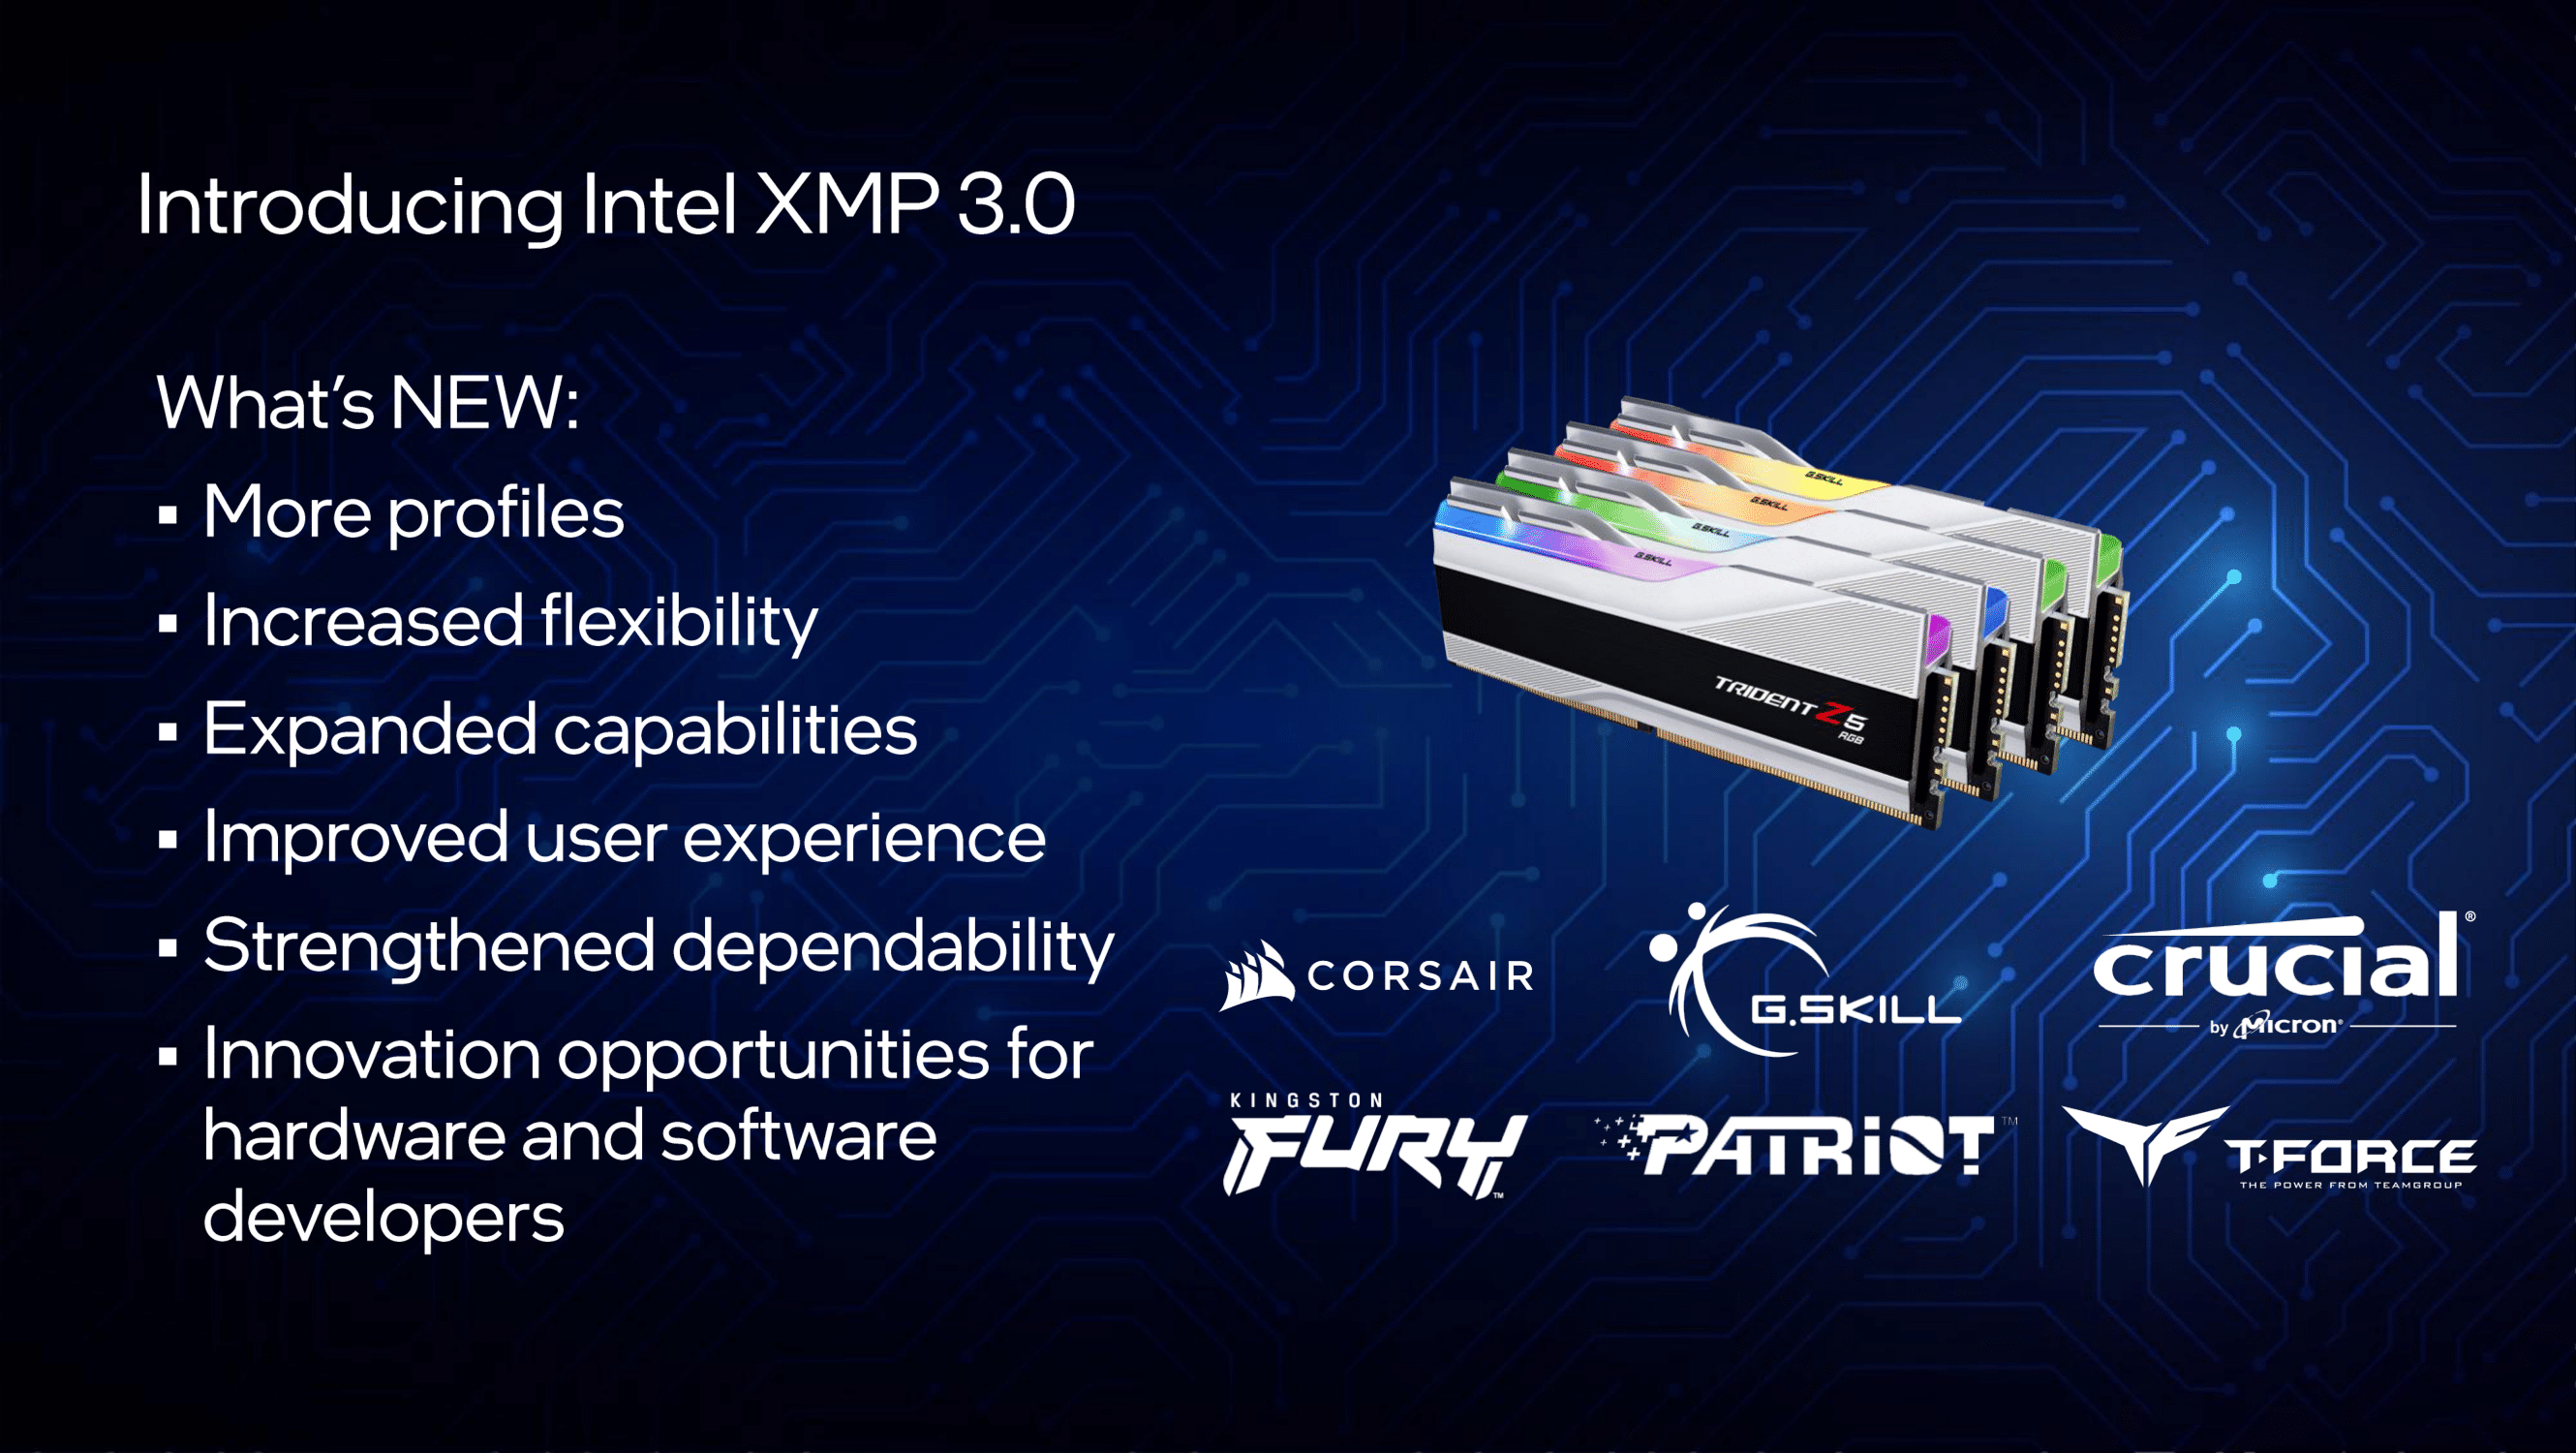
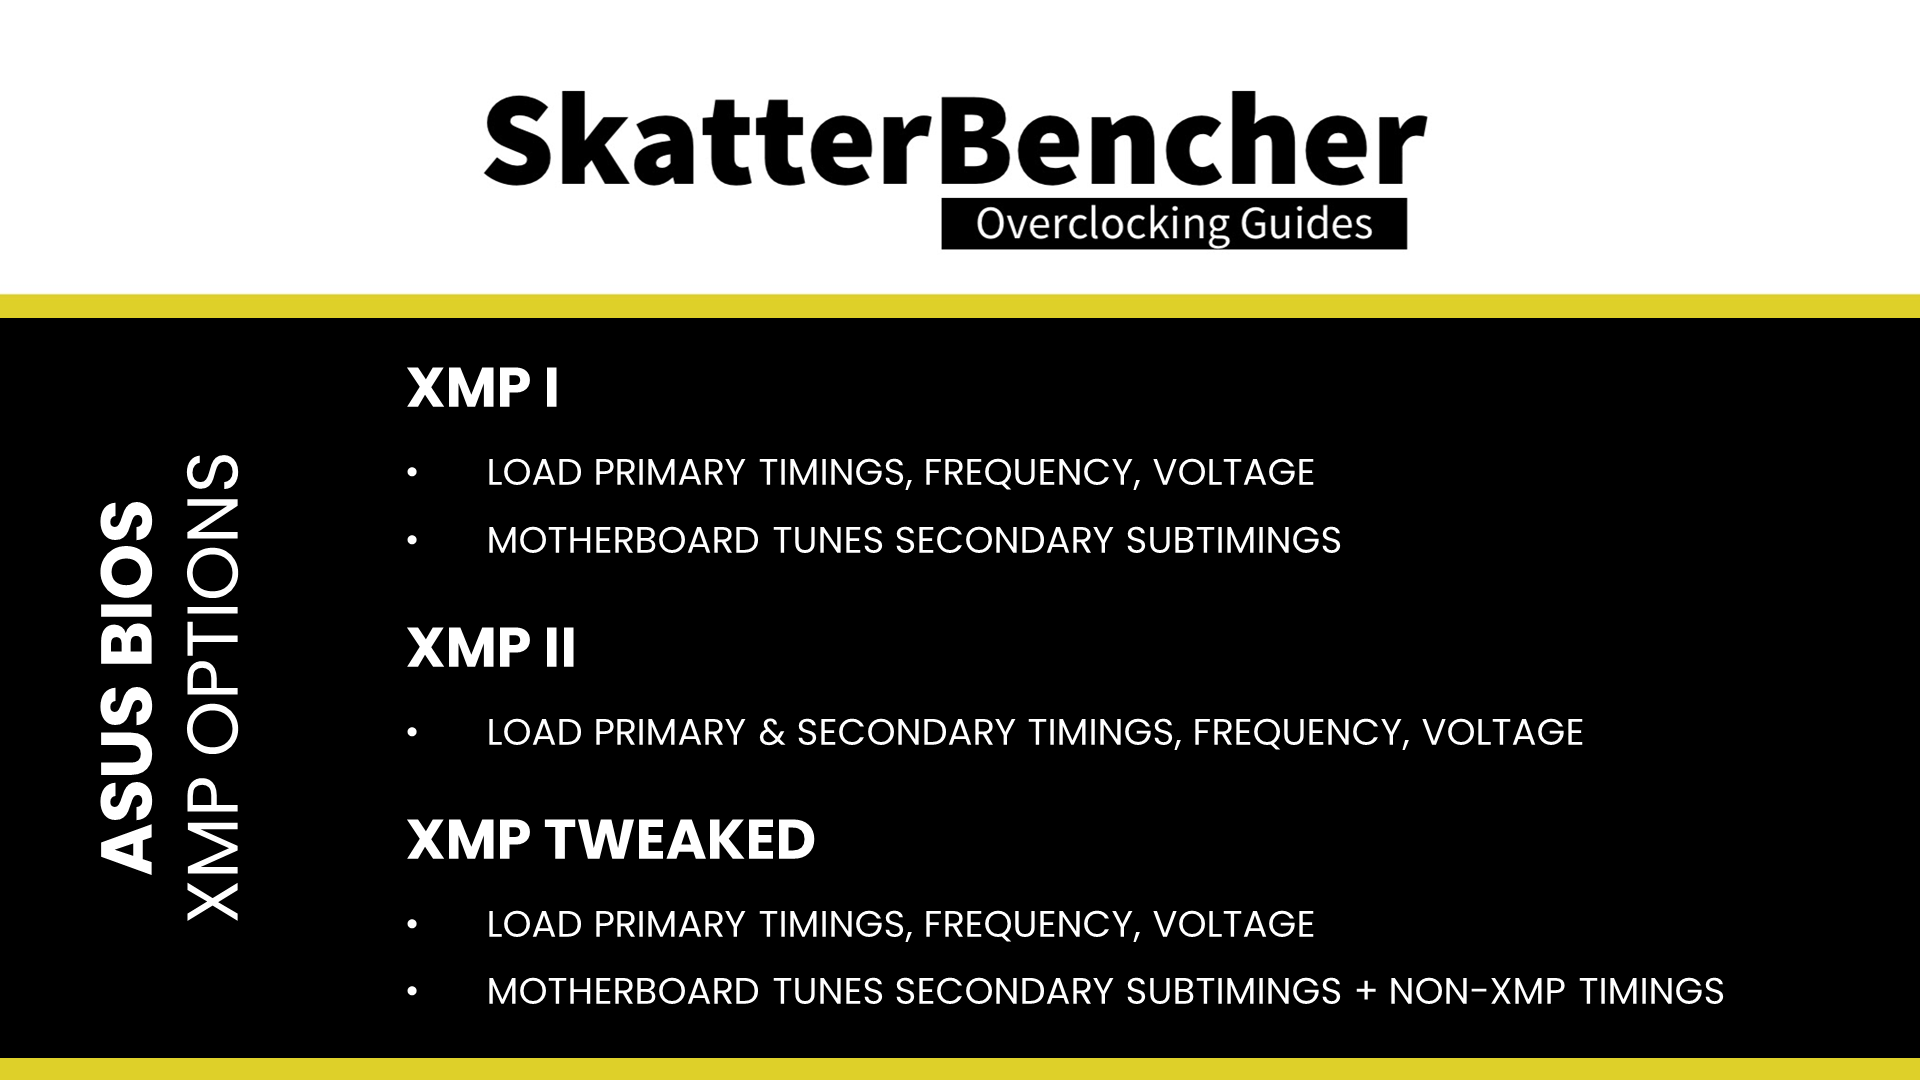
Set Ai Overclock Tuner to XMP II. That enables the Intel Extreme Memory Profile 3.0 technology and makes the DDR5 memory run at its rated speed of DDR5-7200. Selecting XMP II means the motherboard loads the complete XMP profile, including some secondary timings.
Set BCLK Frequency to 100.1. That is a simple workaround when the Raptor Lake V/F Points don’t work correctly in combination with 100 MHz BCLK.
Leave ASUS MultiCore Enhancement to Auto. This option is, by default, set to Enabled and unleashes the Turbo Boost 2.0 power limits. That makes the CPU run at unlimited power indefinitely.
Set DRAM Frequency to DDR5-7607MHz. This means we are overclocking the G.SKILL memory to DDR5-7600. As we adjust the BCLK frequency, it also affects the memory frequency. Note that because we enabled XMP, it will still run the XMP primary and secondary sub-timings.
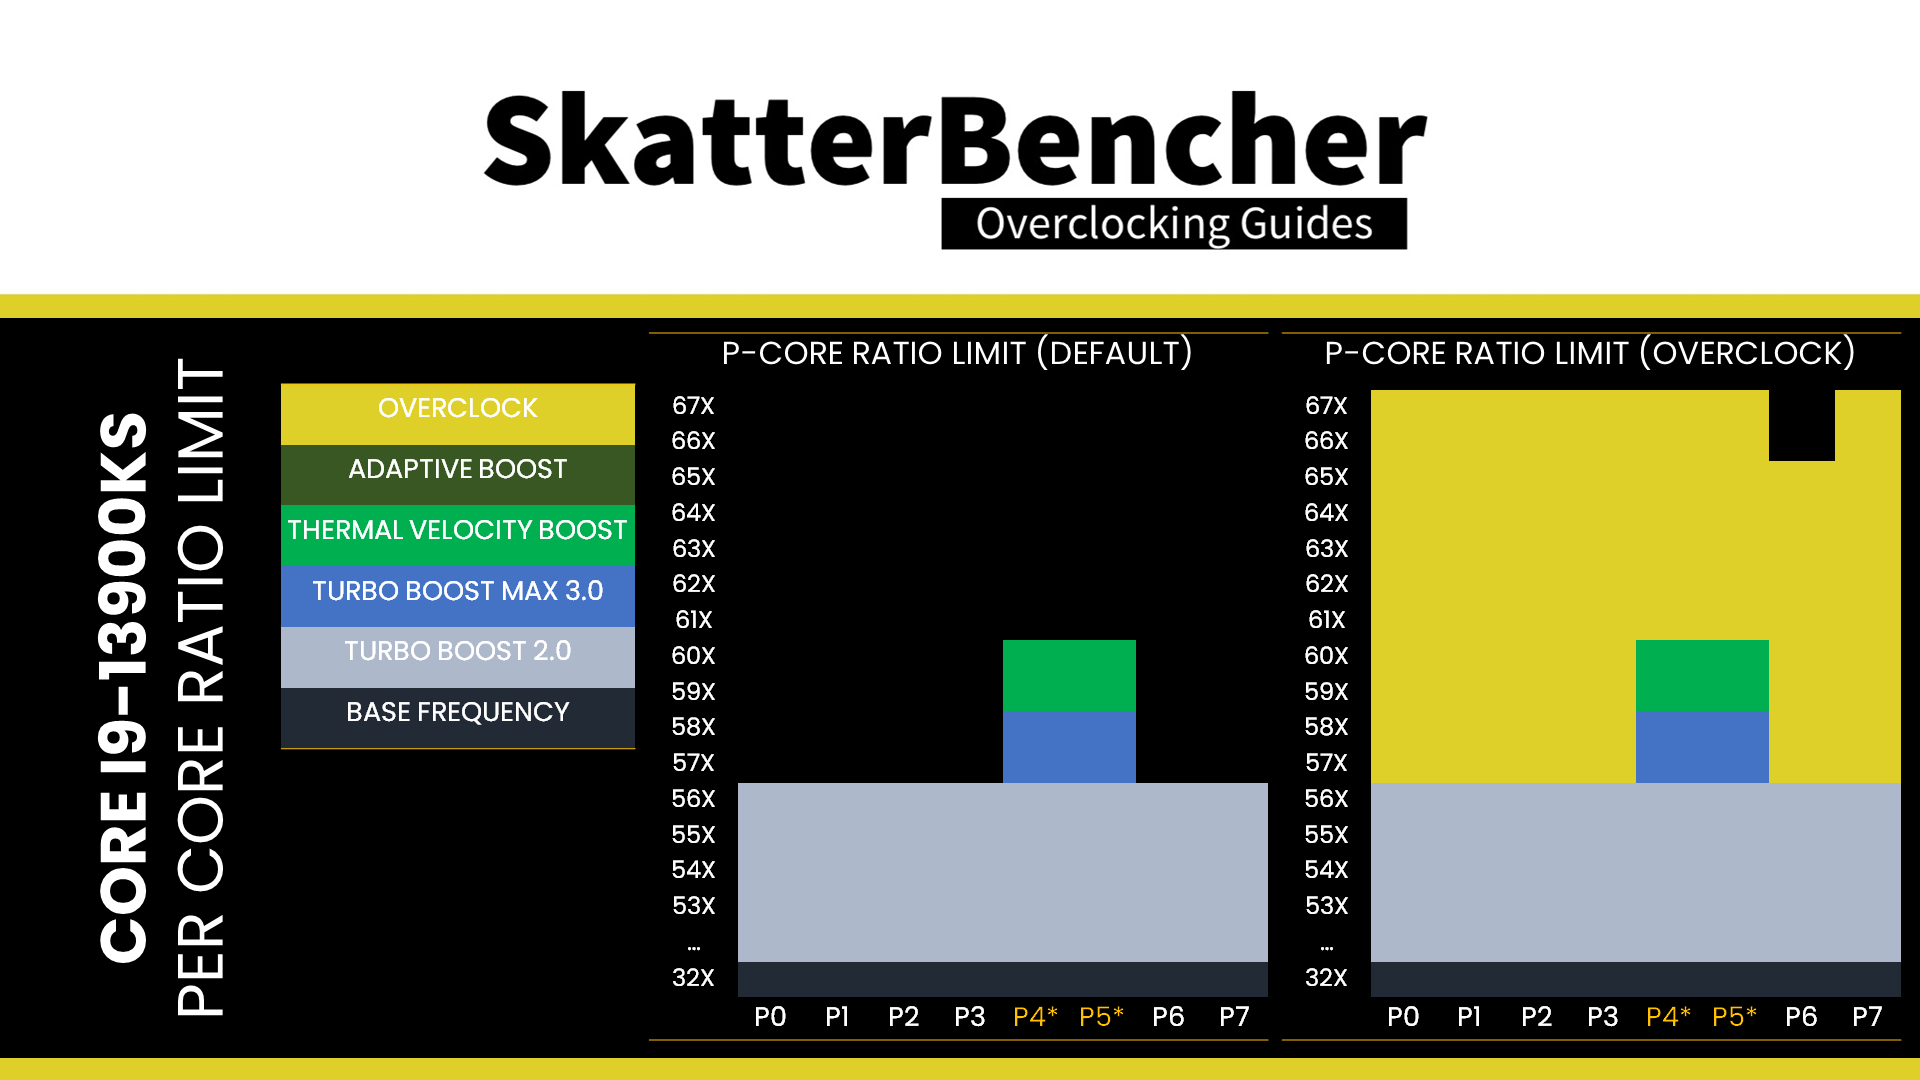
Set Performance Core Ratio to By Core Usage. That enables us to configure a dynamic P-core overclock as we can configure the maximum allowed P-core ratio for a given number of active P-cores.
- Set 1-Core and 2-Core Ratio Limit to 67
- Set 3-Core Ratio Limit to 65
- Set 4-Core and 5-Core Ratio Limit to 64
- Set 6-Core Ratio Limit to 62
- Set 7-Core and 8-Core Ratio Limit to 61.
This configuration will boost the CPU to 6.7 GHz when up to 2 P-cores are active and up to 6.1 GHz when all 8 P-cores are active.

Enter the Specific Performance Core submenu. Here we can limit the maximum ratio for each P-core individually and define a core-specific adaptive voltage. The ratio limit is enforced even if the by-core usage turbo ratio configuration would allow for a higher P-core frequency. We create custom V/F curves for each core by setting a core-specific adaptive voltage. The adaptive voltage is mapped to the core-specific ratio limit. The CPU then interpolates the voltage for ratios between the per-core ratio limit and the next V/F point, which is 60X.
- Set Performance Core0 to Core7, except Core6, Specific Ratio Limit to 67
- Set Performance Core6 Specific Ratio Limit to 65
For all Performance Core,
- Set Specific Voltage to Adaptive Mode
- Set Offset Mode Sign to +
- Set Additional Turbo Mode CPU Core Voltage to 1.5
Leave the Specific Performance Core submenu
Enter the AVX Related Controls submenu. Now we can adjust the AVX negative ratio offset, which lowers the P-core ratio when using AVX. The Offset is referenced against the Per P-core Ratio Limit, which we’ll configure later.
- Set AVX2 Ratio Offset to per-core Ratio Limit to User Specify
- Set AVX2 Ratio Offset to 5
Leave the AVX Related Controls submenu
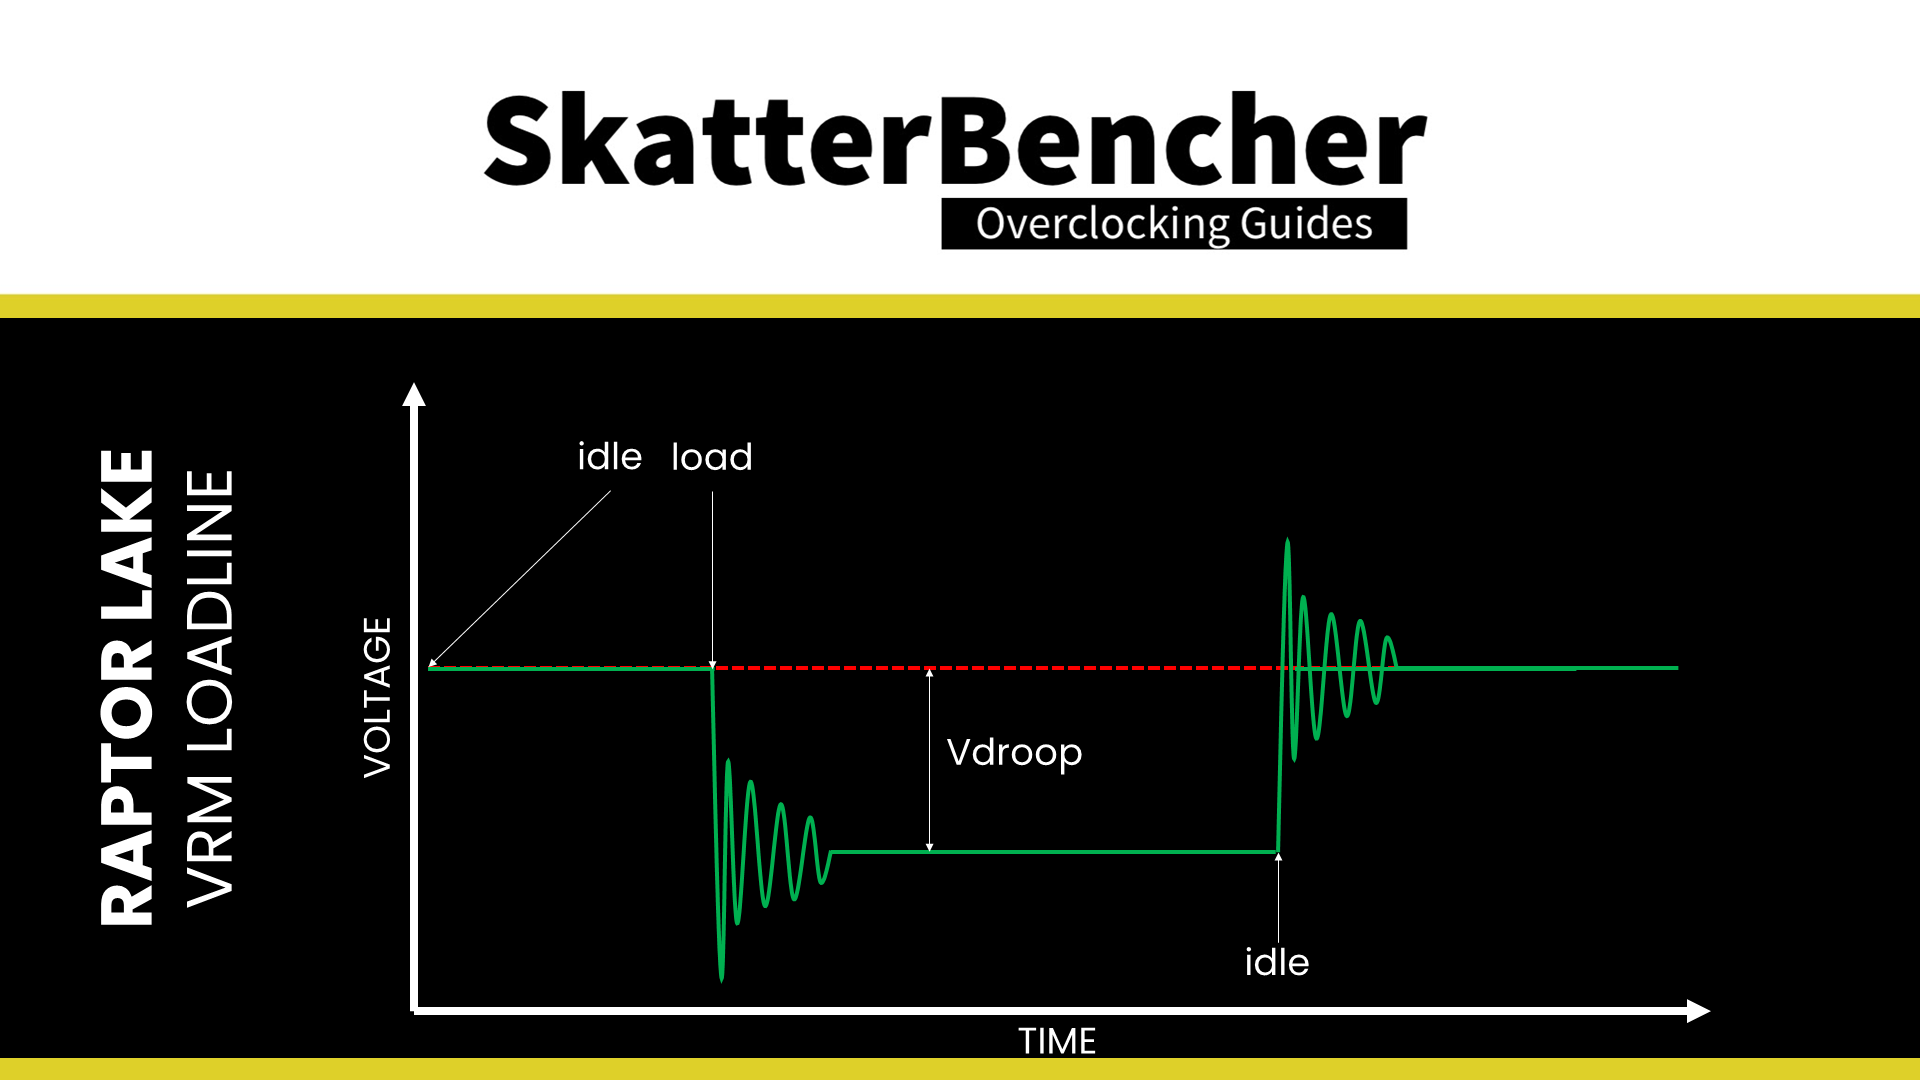
Enter the DIGI+ VRM submenu. Here we can make changes to the voltage regulator configuration. We adjust the VRM loadline to minimize the Vdroop. That is the voltage reduction when the CPU goes from idle to full load. We choose the VRM loadline with the smallest Vdroop, so the effective voltage deviates the least from our manually configured CPU voltage-frequency curve.
Set CPU Load-line Calibration to Level 8
Leave the DIGI+ VRM submenu
Enter the Internal CPU Power Management submenu.
Set Regulate Frequency by above threshold to disabled. This feature is a part of the ASUS AI Overclocking toolset. It allows you to configure a maximum temperature for the CPU. Once the temperature exceeds the target temperature, the motherboard reduces the CPU frequency by adjusting the Turbo Boost power limit parameters. By default, this feature is enabled and set to 90 degrees Celsius.
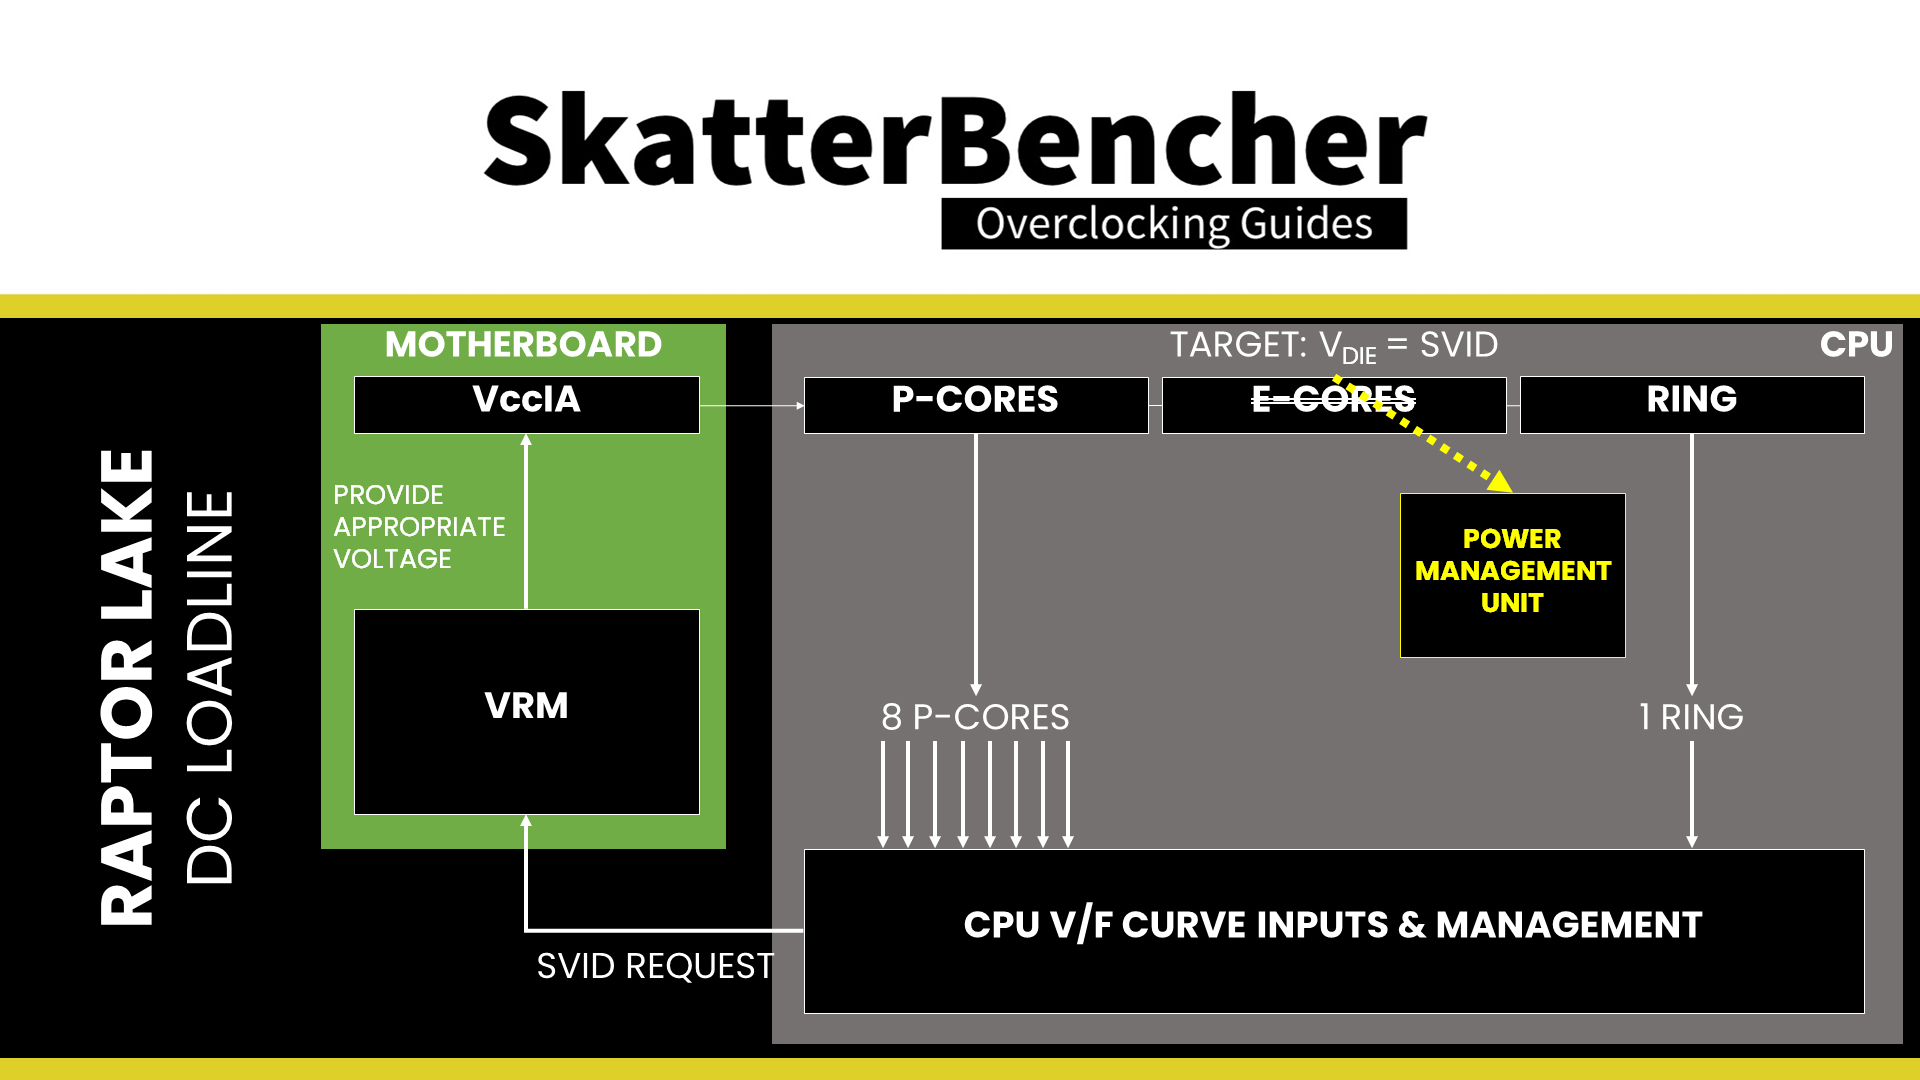
Set IA AC Load Line to 0.01. By defining the AC DC loadline, we can make the CPU adapt its voltage management to the motherboard’s electrical impedance. The AC loadline adjusts the voltage request from the CPU to the voltage regulator. In contrast, a properly tuned DC loadline ensures the CPU’s internal power management appropriately adapts to the AC and VRM loadline configuration. By setting the AC Load Line to the lowest, we tell the CPU not to deviate from the programmed voltage-frequency curve when issuing the VID request to the voltage controller. As a result, we can tightly configure the CPU’s voltage-frequency curve using the V/F Points later on.


Leave the Internal CPU Power Management submenu
Enter the Thermal Velocity Boost submenu
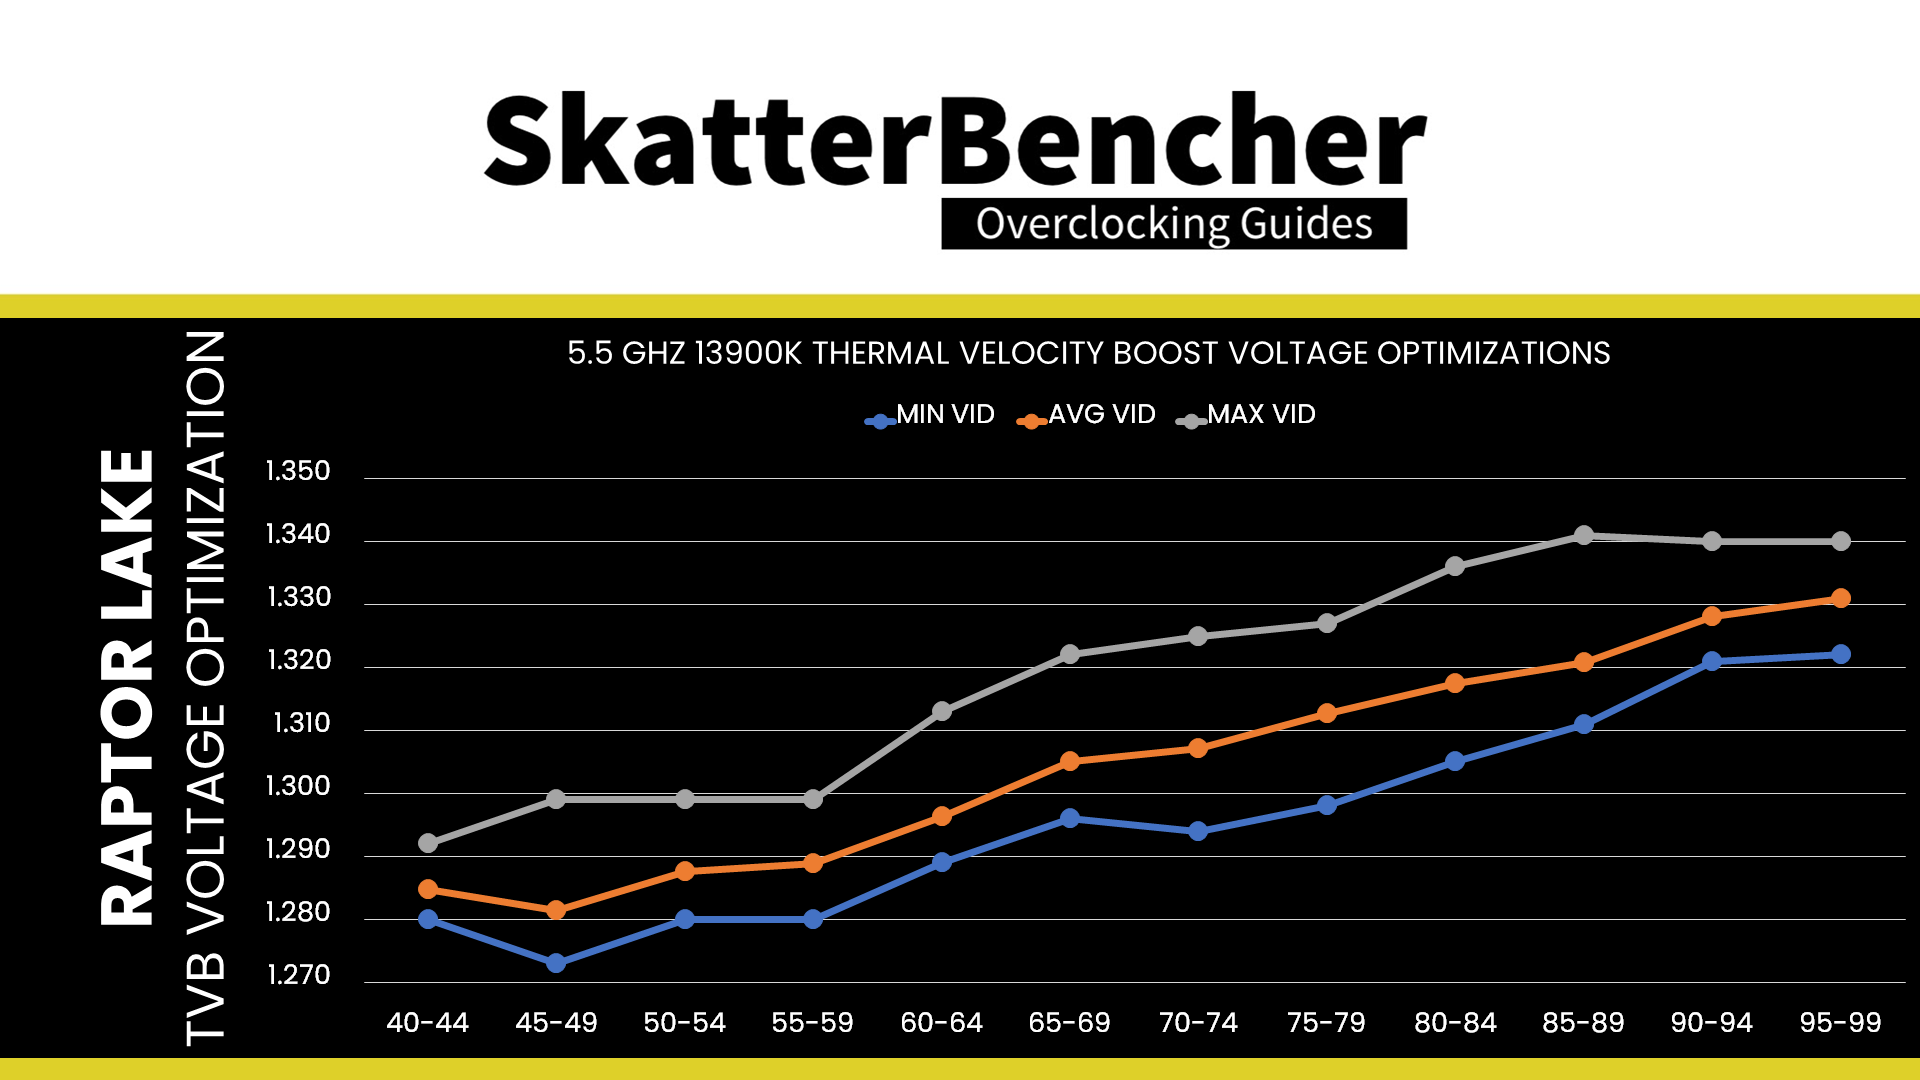
Set TVB Voltage Optimizations to Disabled. That prevents the CPU from automatically reducing the voltage based on its current operating temperature. This feature is useful when relying on the default voltages and ratios. However, it may cause instability when manually tuning the voltage-frequency curve.
Set Overclocking TVB to Enabled. The easiest way to think of OCTVB is to limit or clip the maximum allowed CPU ratio based on the operating temperature. The hotter the CPU, the more you clip the CPU ratio. OCTVB is based on the by core usage Turbo Ratio configuration. For each number of active cores, you can define two temperature points, each with a unique number of “down-bins’. A down-bin is essentially the number of ratios you want to drop.
- Set 1-Core to 8-Core Active to Enabled
- For 1-Core to 3-Core Active, set Temperature A to 10
- For 4-Core and 5-Core Active, set Temperature A to 40
- For 6-Core to 8-Core Active, set Temperature A to 70
- For each Core Active, set Negative Ratio Offset A to User Specify
- For 1-Core and 2-Core Active, set Ratio Offset A to 3
- For 3-Core to 8-Core Active, set Ratio Offset A to 1
- For 1-Core to 3-Core Active, set Temperature B to 50
- For 4-Core and 5-Core Active, set Temperature B to 70
- For 6-Core to 8-Core Active, set Temperature B to 80
- For the other Core Active, set Ratio Offset B to 1
Leave the Thermal Velocity Boost submenu
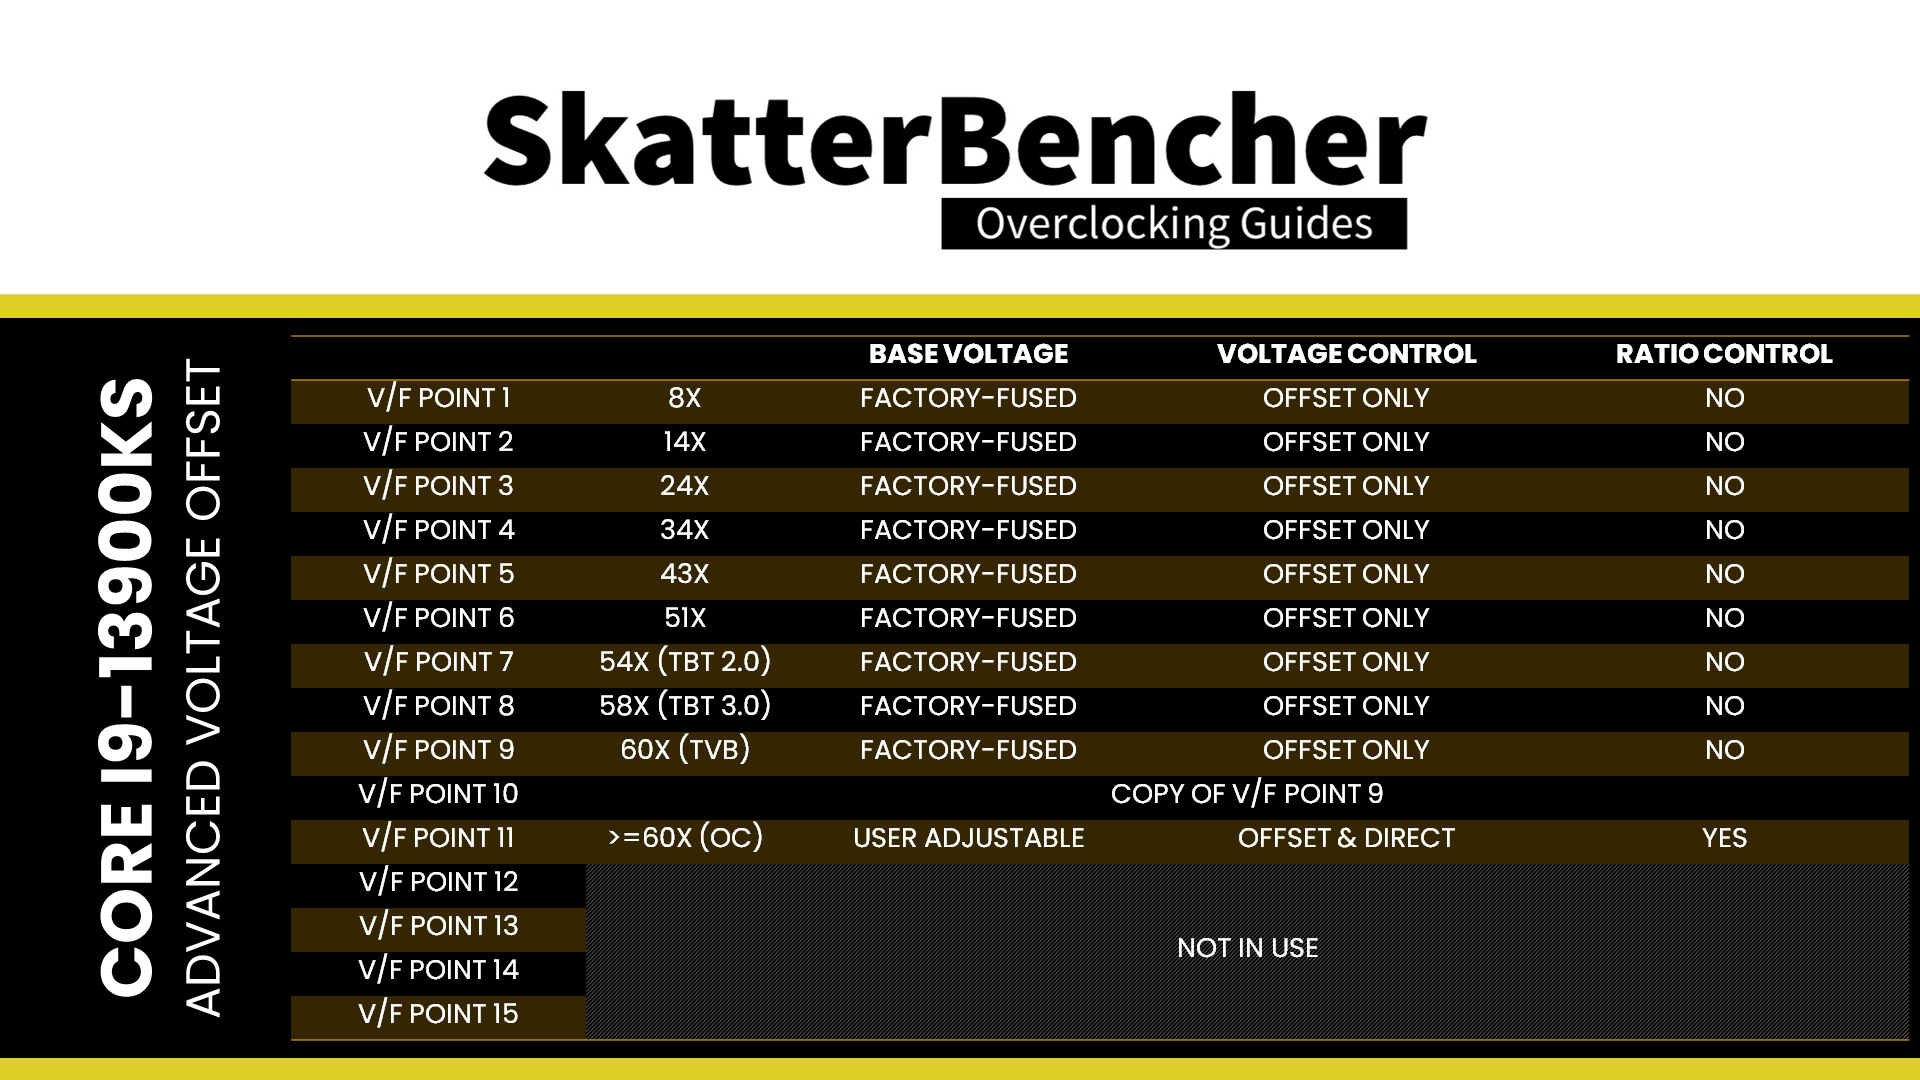
Enter the V/F Point Offset submenu. Here we can configure Intel’s Advanced Voltage Offset feature, more commonly known as V/F Points. This feature extends the Adaptive Voltage mode by allowing end-users to undervolt or overvolt specific points of the CPU’s factory-fused voltage-frequency curve.
The V/F Points for the 13900KS are slightly different from the 13900K. V/F Point 8 is mapped to 58X instead of 57X, and V/F Point 9 is mapped to 60X instead of 58X. The other V/F Points are the same as the 13900K.
- Set V/F Points 7 to V/F Points 10 to minus
- Set V/F Point 7 Offset to 25mV
- Set V/F Point 8 Offset to 150mV
- Set V/F Point 9 Offset to 35mV
- Set V/F Point 10 Offset to 35mV
This configuration’s goal is to undervolt the voltage-frequency curve at the range of ratios used during multi-core workloads. That helps reduce the operating voltage in those workloads, which reduces the temperature and increases the frequency headroom.
Leave the V/F Points submenu
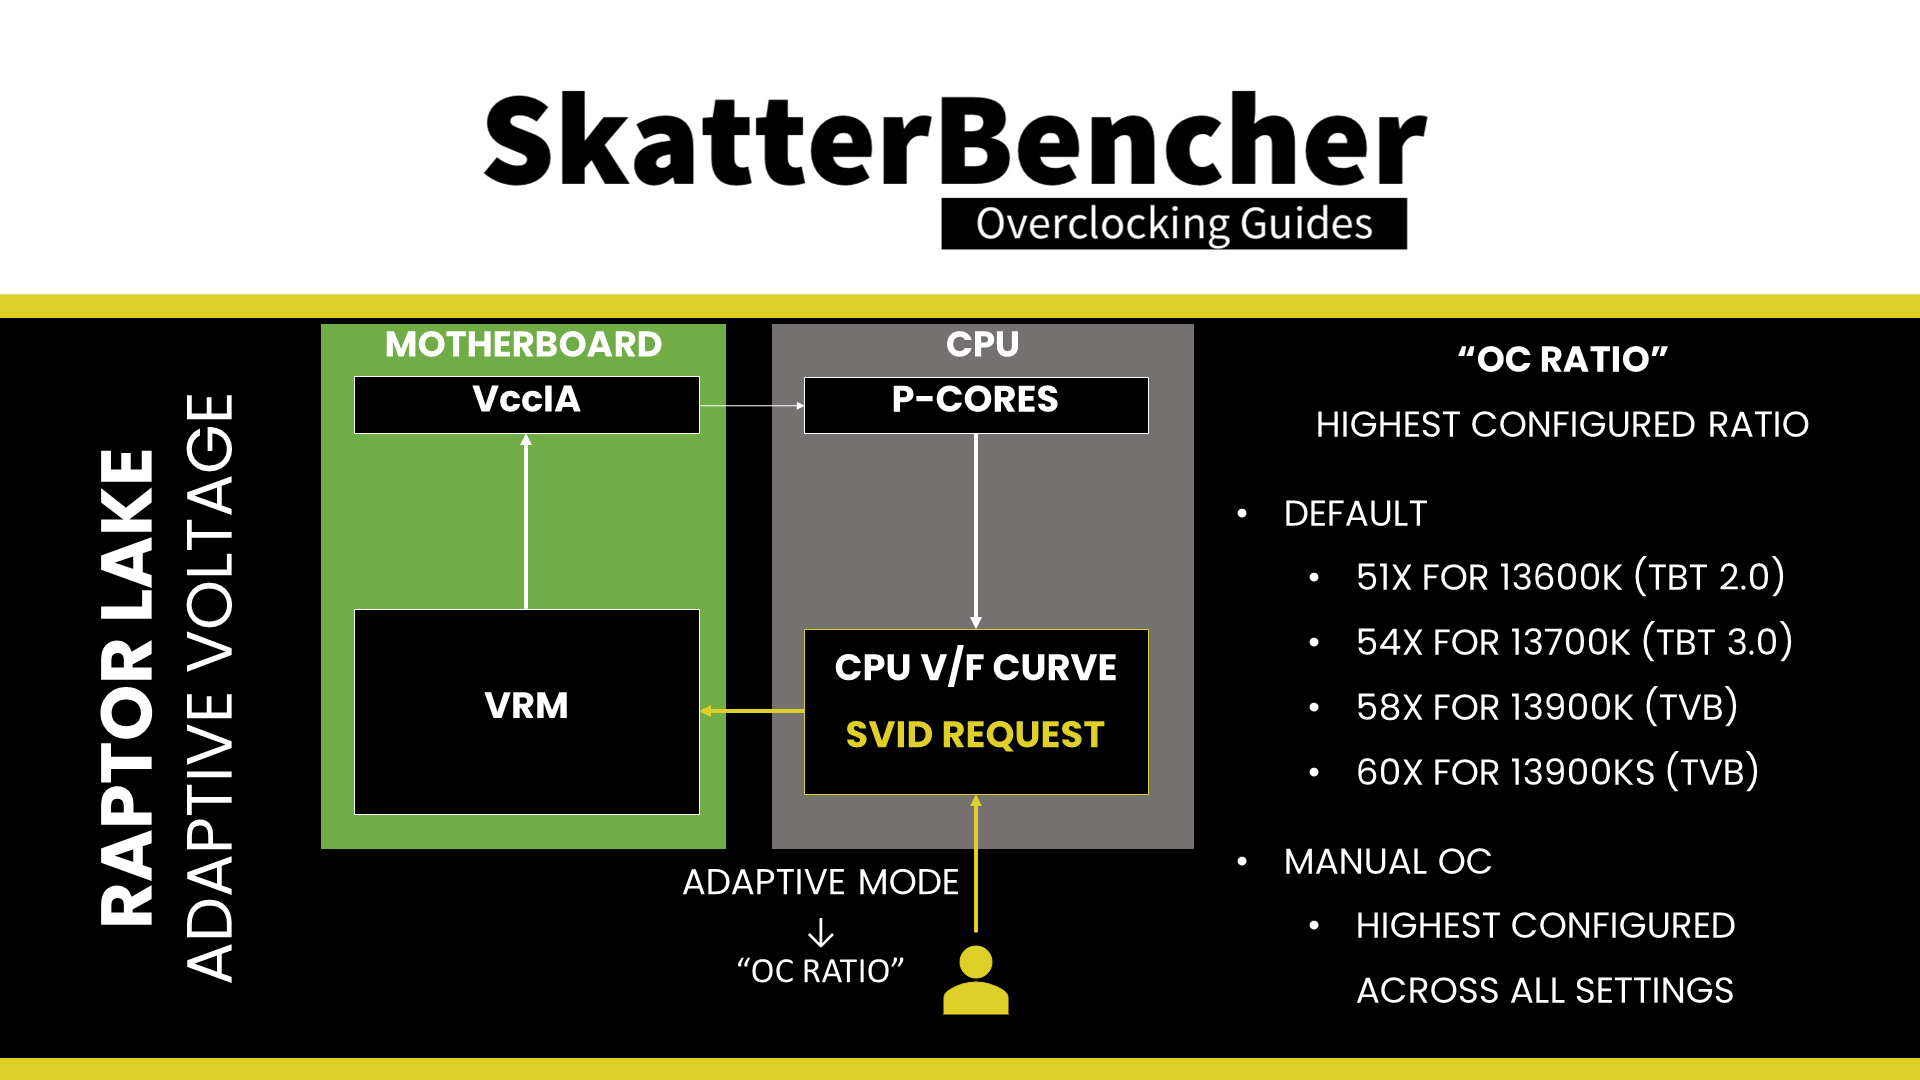
Set Global Core SVID Voltage to Adaptive Mode. This allows us to control the voltage associated with the highest point of the voltage-frequency curve. The adaptive voltage set maps to what’s called the OC Ratio. The OC Ratio is equal to the highest configured CPU ratio. In our case, that’s 67X. The voltage between 67X and the next V/F Point, 60X, is interpolated by the CPU. Since we set the adaptive voltage for each core specifically already, we don’t have to put this value. However, it’s good practice to set it because it prevents the motherboard auto-rules from overriding it.
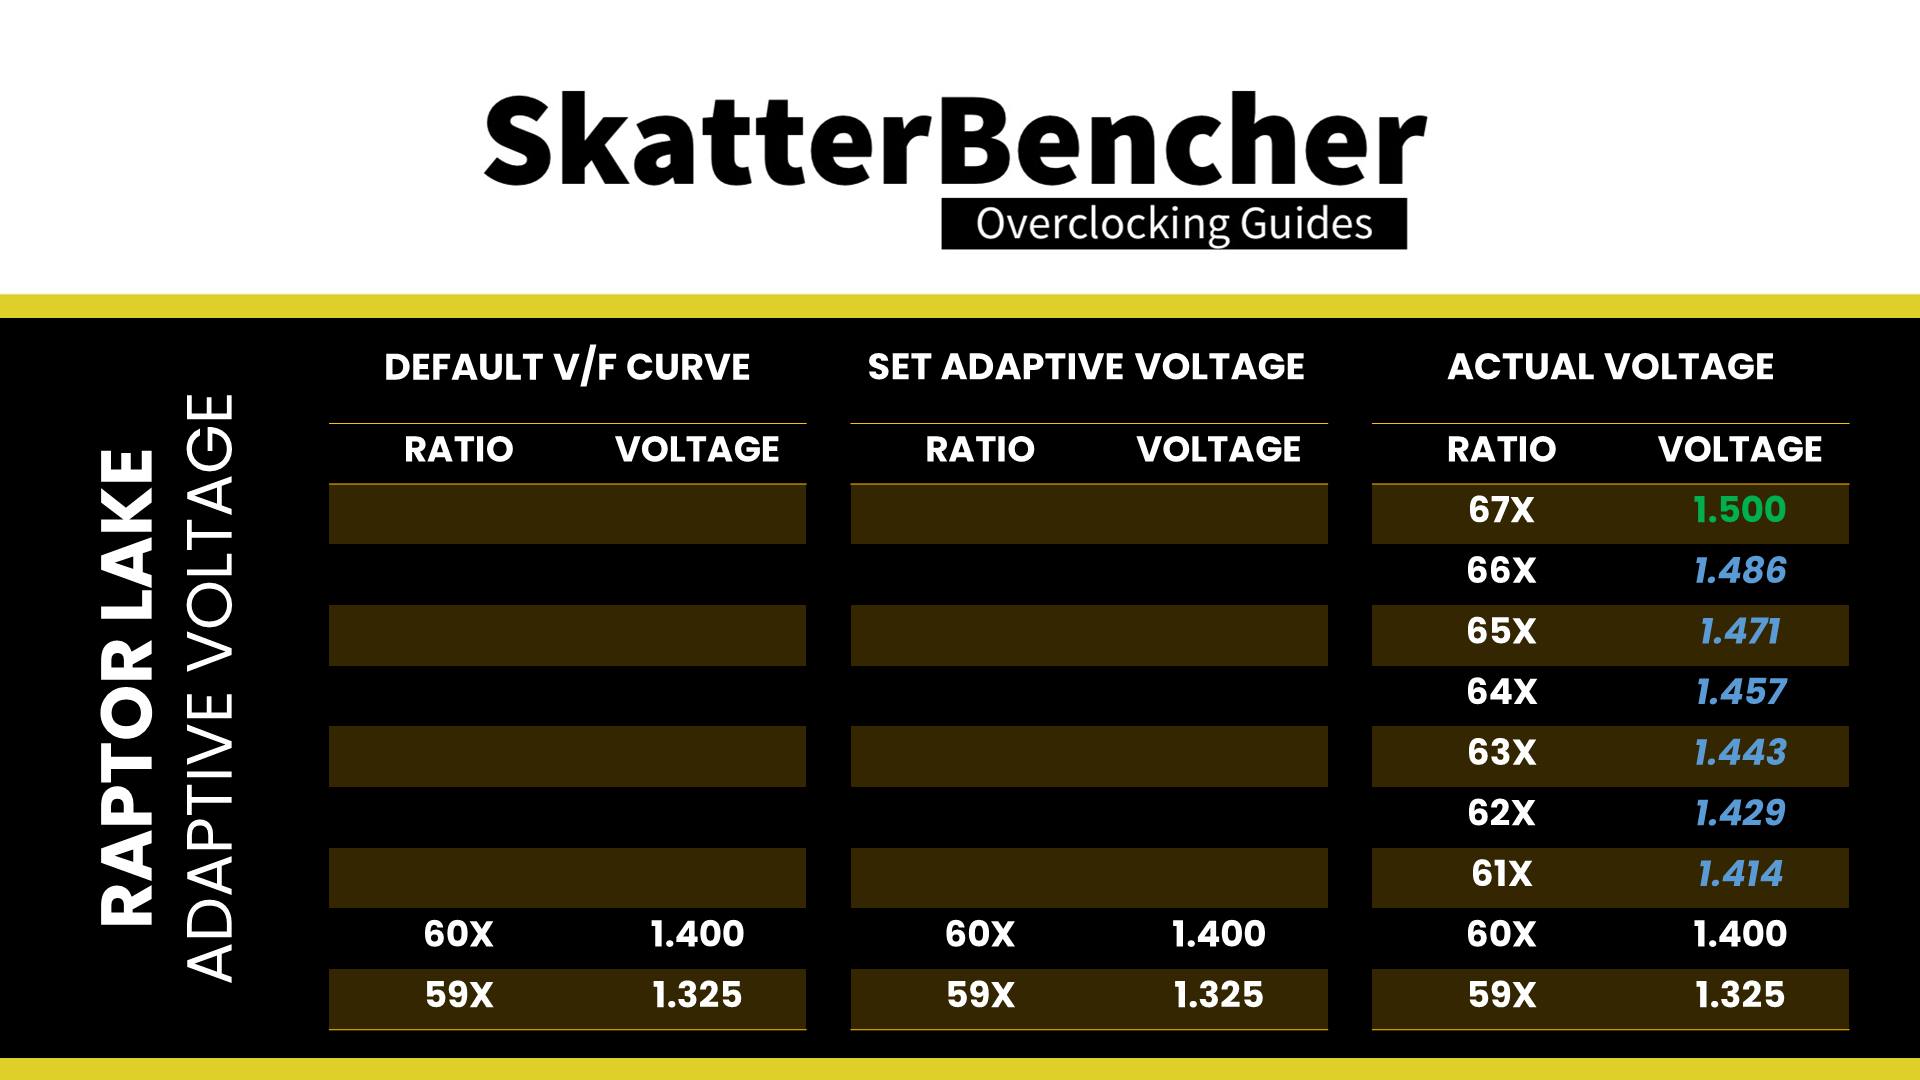
Set Offset Mode Sign to +
Set Additional Turbo Mode CPU Core Voltage to 1.500
Set High DRAM Voltage Mode to Enabled
Set DRAM VDD Voltage to 1.45
Set DRAM VDDQ Voltage to 1.45
Go to the Advanced Menu
Set Active Efficient Cores to 0. That disables all sixteen E-cores present on the Core i9-13900KS.
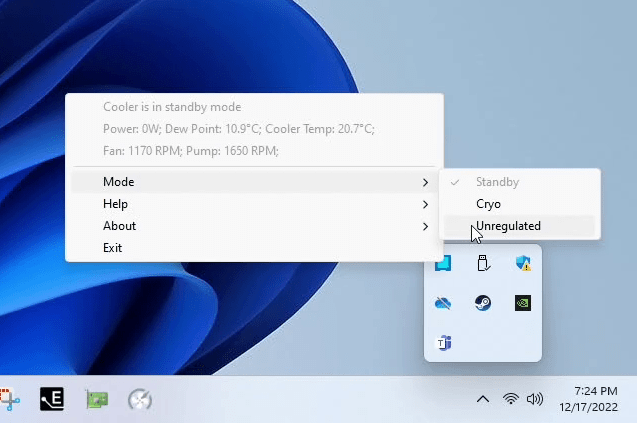
Then save, exit the BIOS, and boot into the operating system. Here we set the Cryo Cooling to Unregulated mode. That will make the EK Delta² TEC operate at the maximum power of 210W.
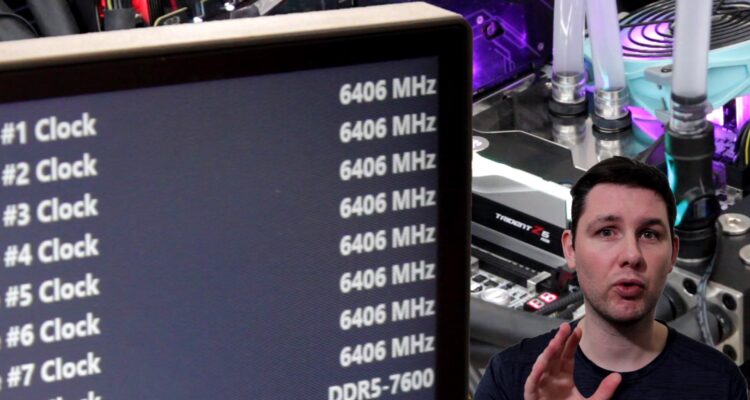
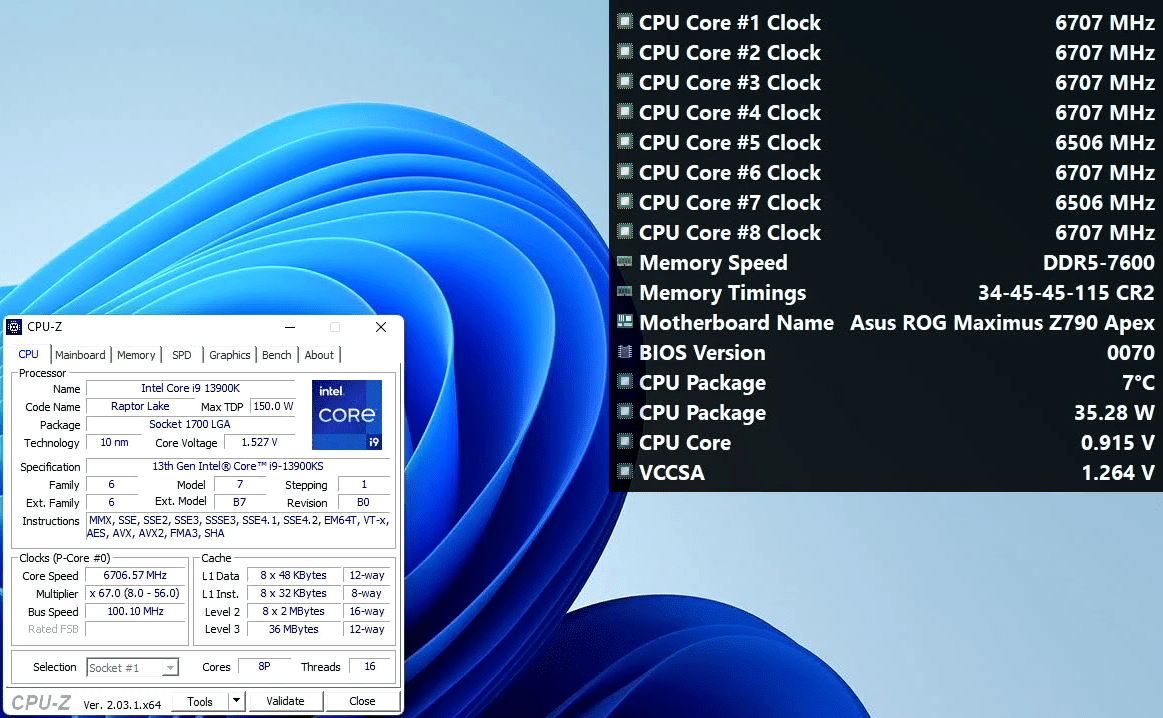
After letting the system idle for a while, we can see all P-cores except P-core 6 boost to 6.7 GHz when the CPU temperature is below 10 degrees Celsius.
6.7 GHz Core i9-13900KS Benchmark Results
Now that we configured the BIOS let’s run some benchmarks and see how the CPU frequency changes with different workloads.
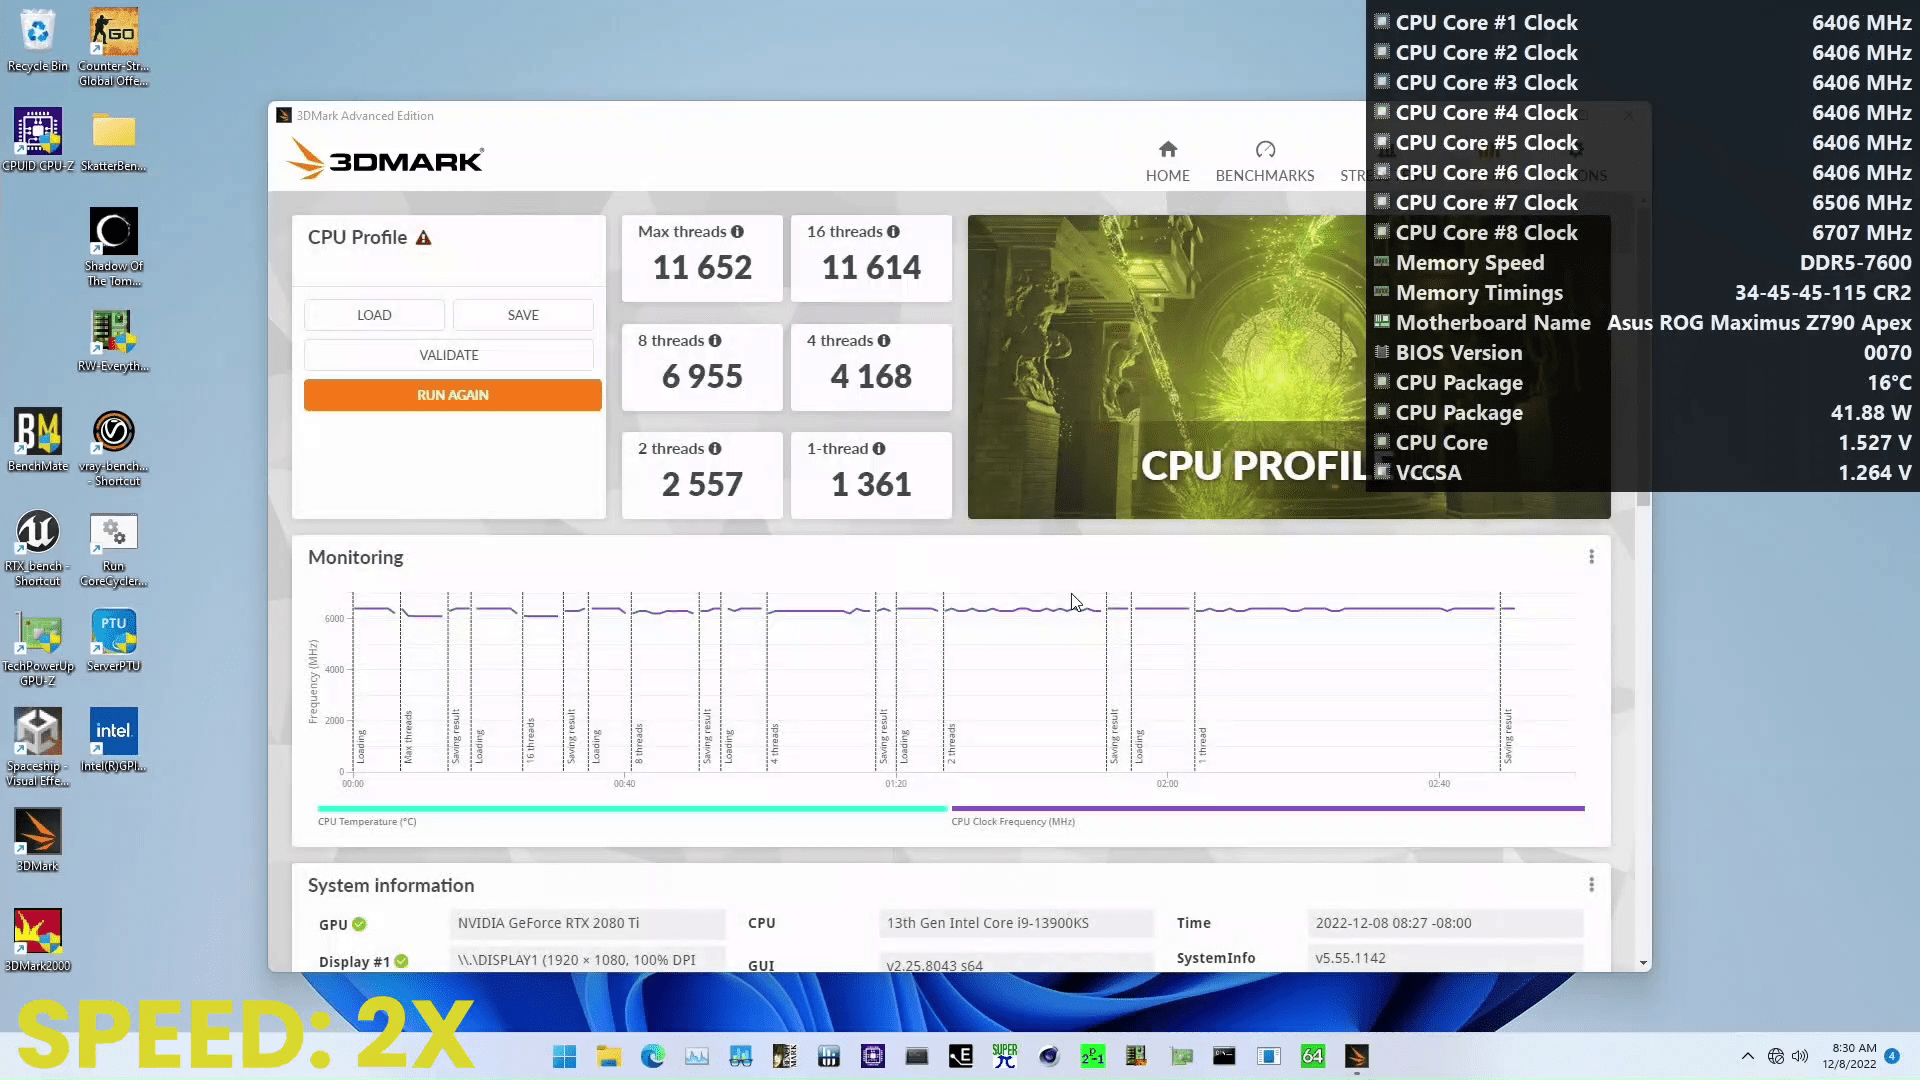
3DMark CPU Profile
3DMark CPU Profile is a benchmark that loops the same workload but with decreasing amount of threads. Therefore, it’s an interesting benchmark to test the performance of a CPU with a dynamic overclock profile. By the end of the benchmark, you can see that the CPU cores are already running at 6.4 to 6.7 GHz as the temperature is nearing 10 degrees Celsius.
3DMark Night Raid
3DMark Night Raid is a standard DirectX 12 benchmark featuring two graphics and one CPU benchmark. It is my go-to 3DMark workload for the SkatterBencher guides. I had the benchmark looping on display in the ASUS meeting room during the 9 GHz OC session. The point of the display was to show the Core i9-13900KS running at 6.4 to 6.5 GHz in a 3D workload.
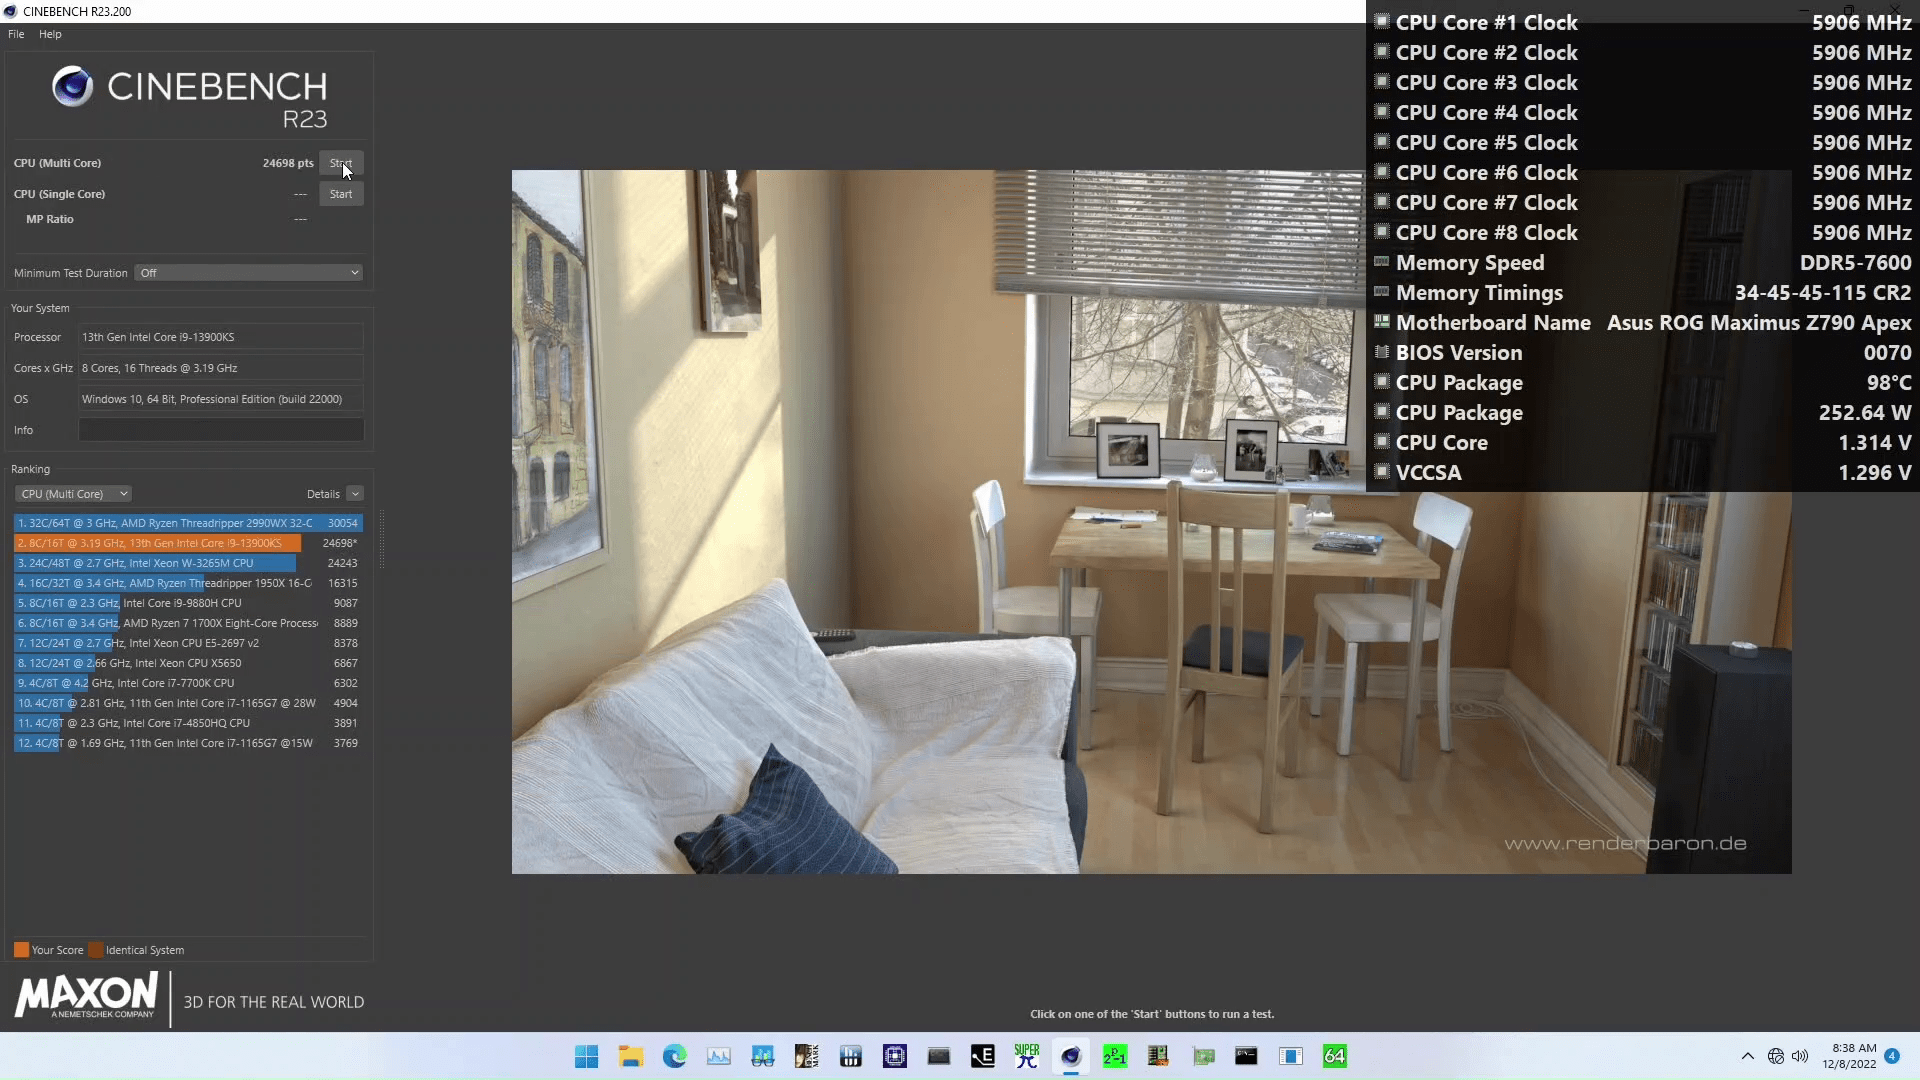
Cinebench R23
Cinebench R23 is another classic overclocker’s benchmark, demonstrating the CPU performance capability in a render workload. In a previous video on this channel, I showed 100,000 points in Cinebench R23. For this system, the point is mainly to show how the OCTVB and thermal throttling functions work.
You can see the system idle at 6.5 to 6.7 GHz. When we start the multi-core workload, the processor frequency immediately drops to 6.1 GHz. Then, as the temperature rises, it falls to 6.0 GHz and 5.9 GHz. The final score is 24,698 points, not too shabby, with only 8 P-cores.
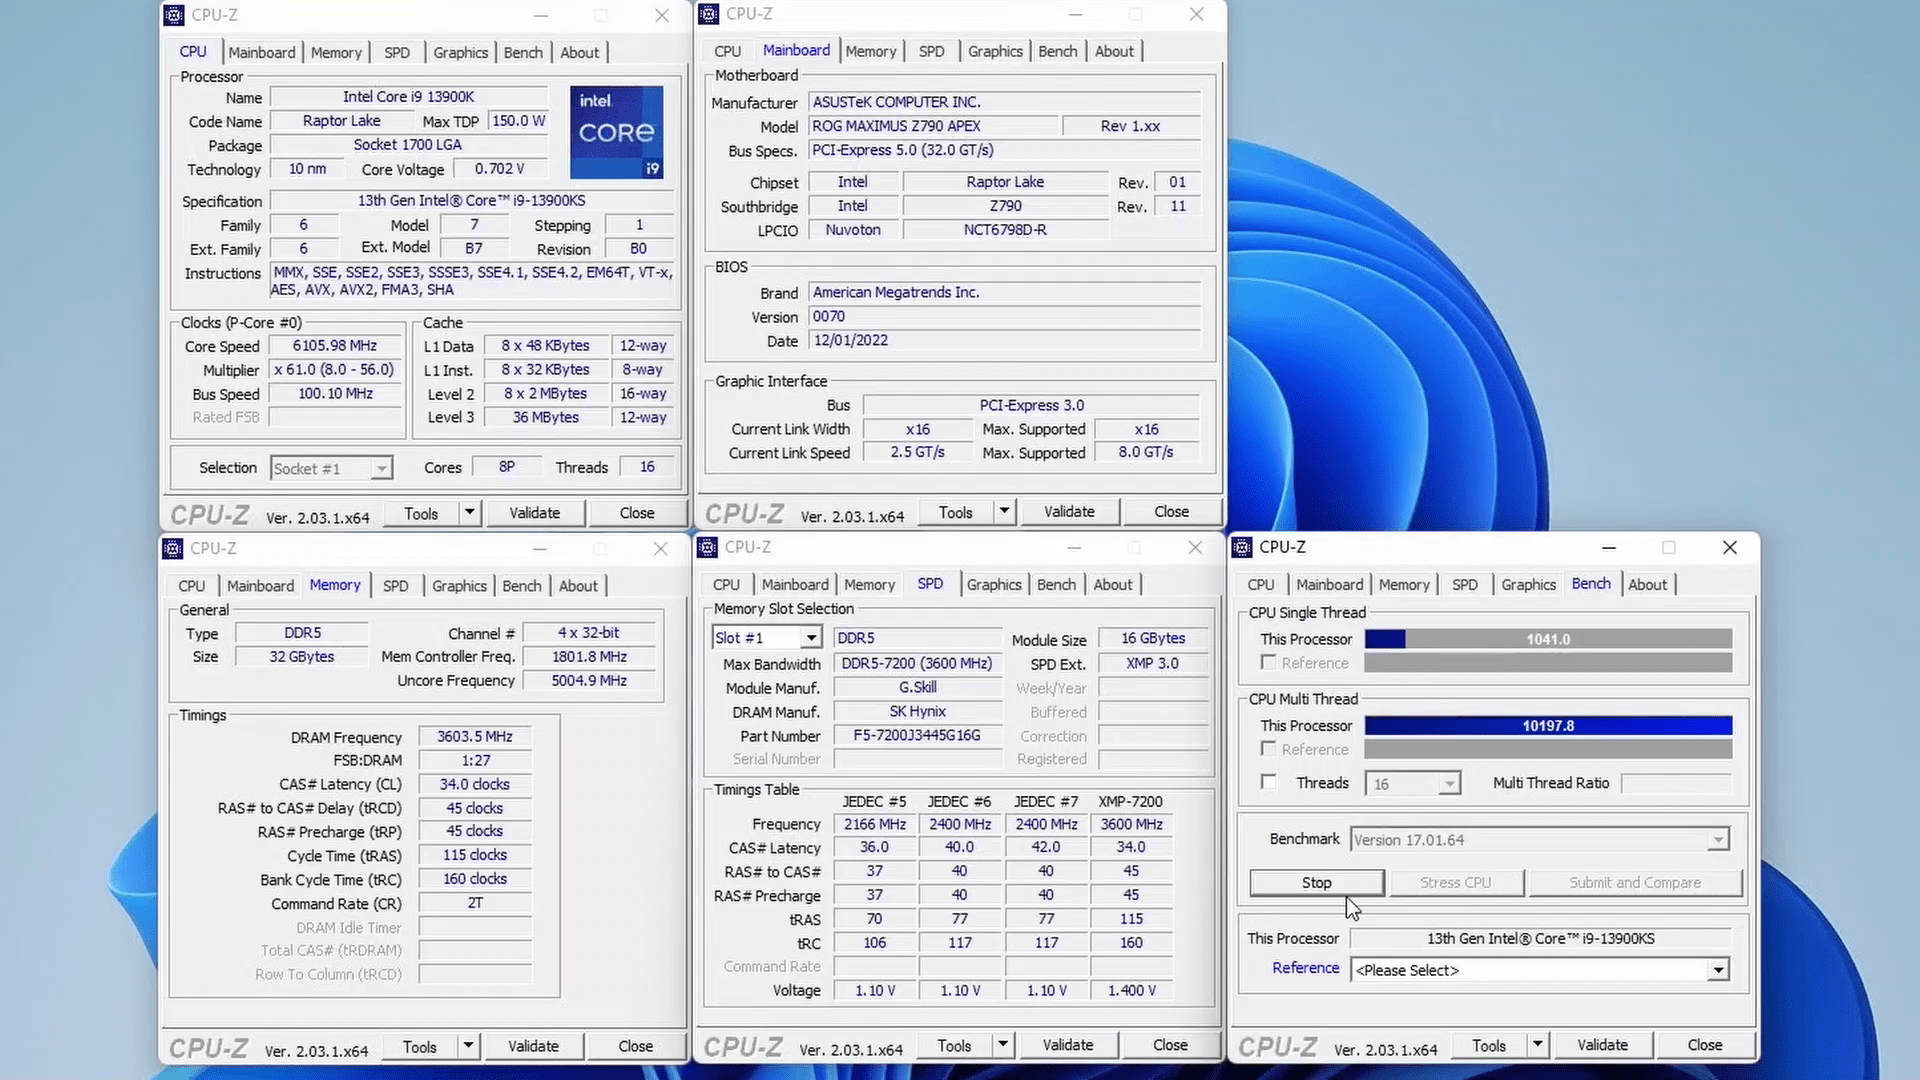
CPU-Z
The next benchmark is also a classic: CPU-Z. This recording is from earlier testing, so it’s not from the BIOS configuration I showed earlier in the video. However, I wanted to include it since it shows well over 1,000 points for single-threaded and over 10,000 points for multi-threaded performance. If I recall correctly, the frequency is 6.4 GHz for a single-threaded workload and about 6.1 GHz for an all-core workload
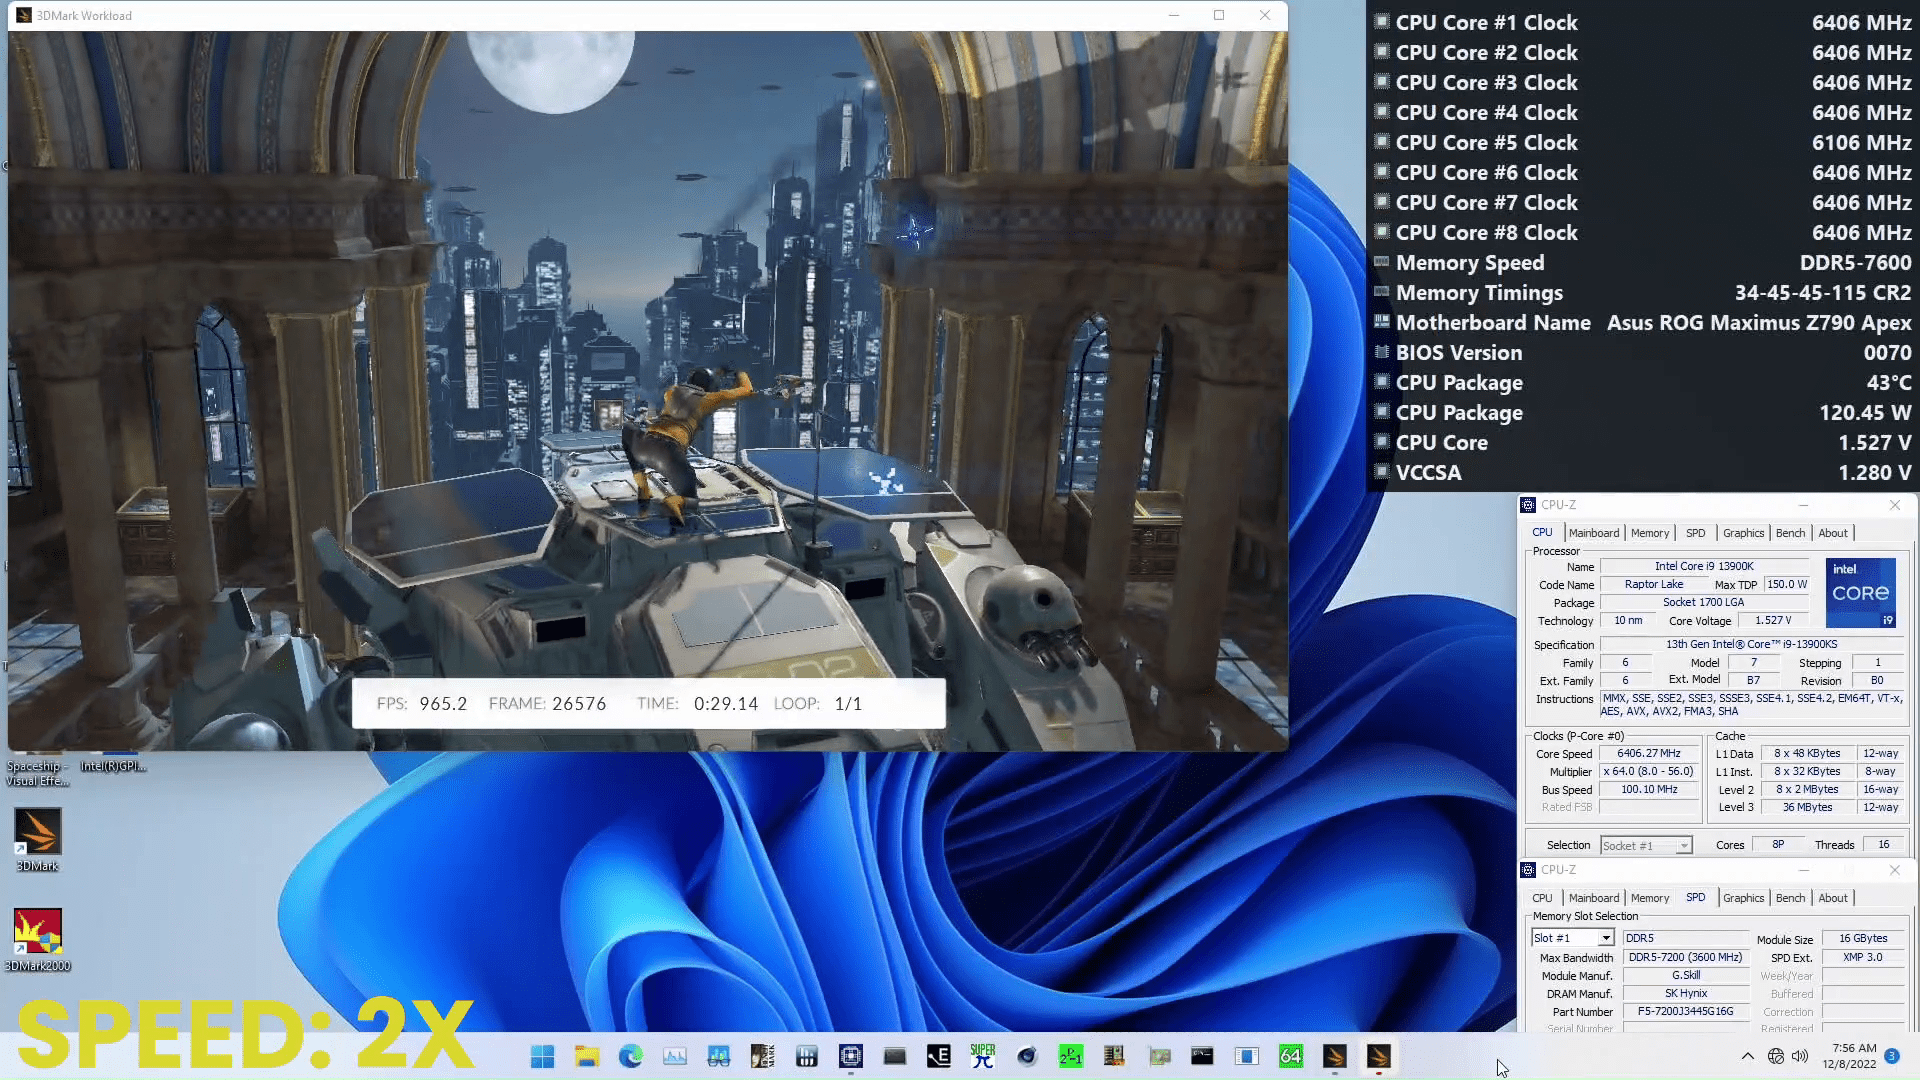
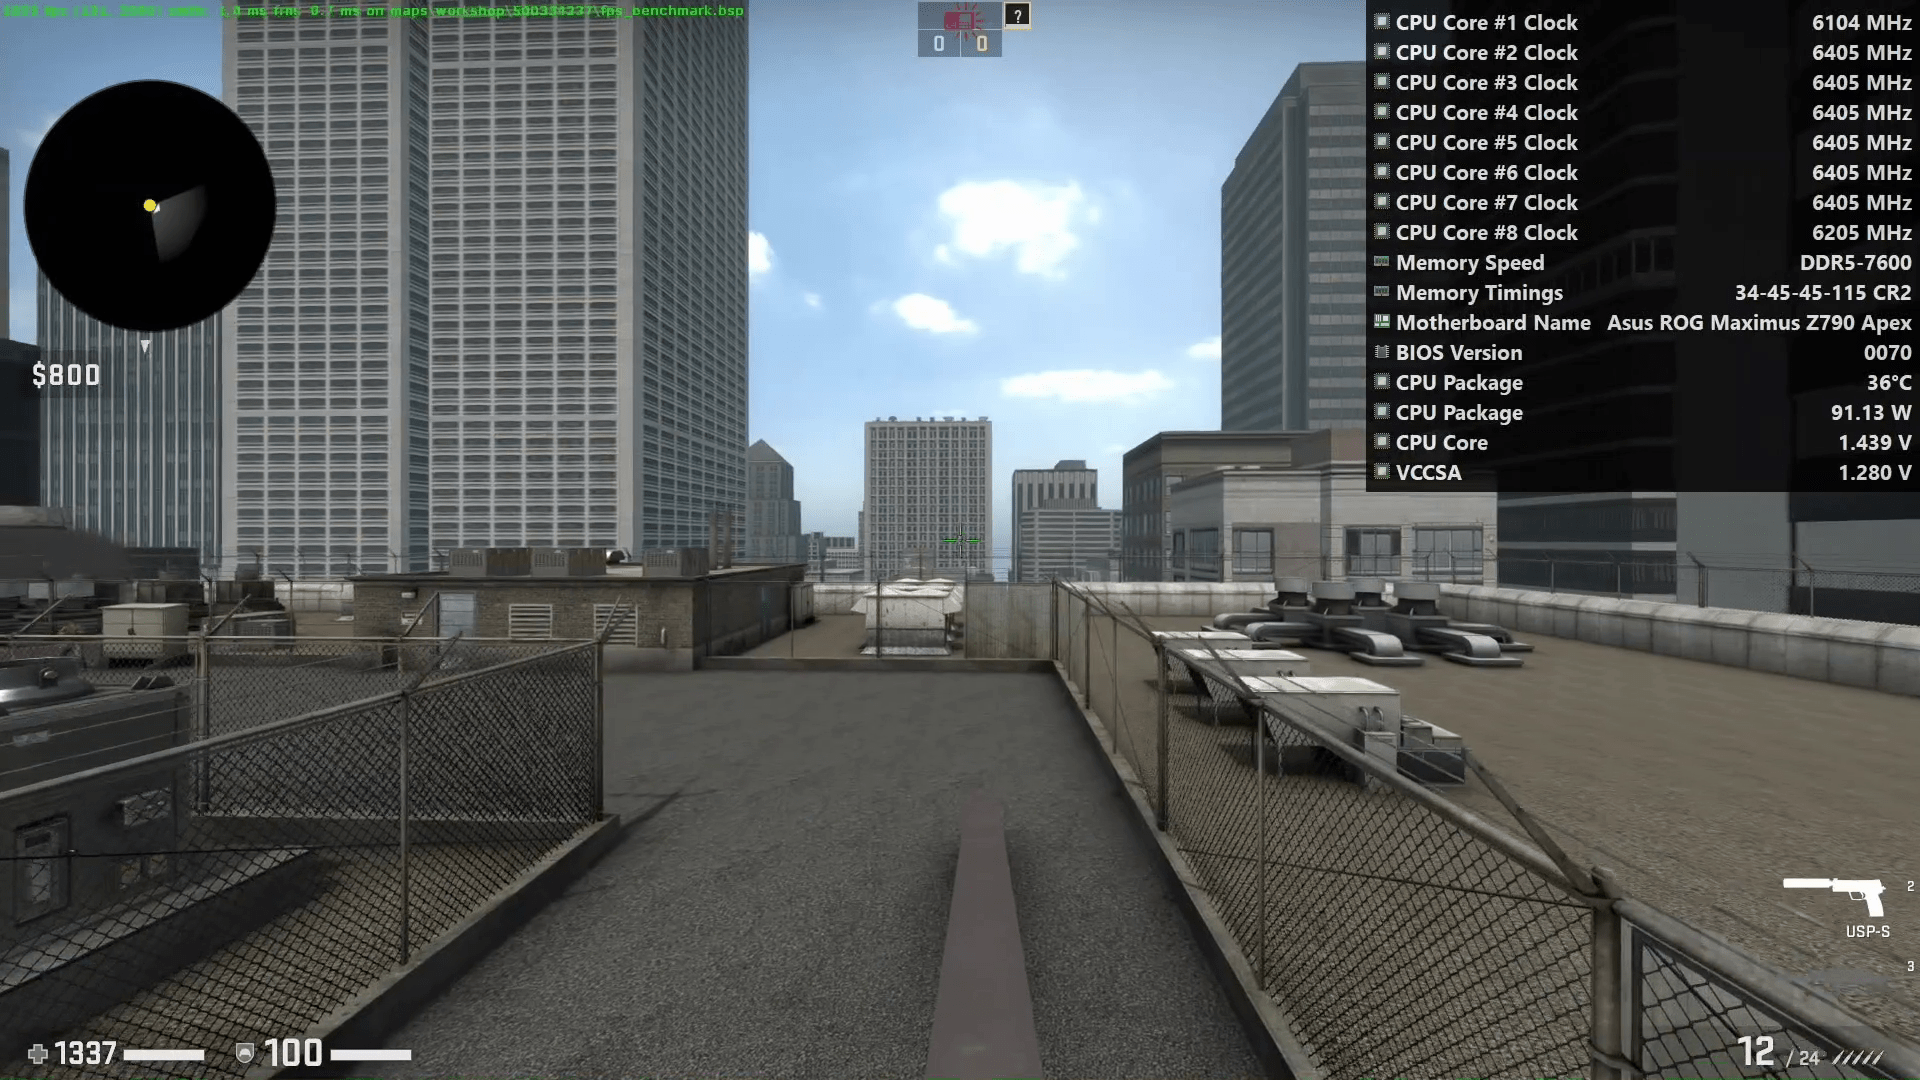
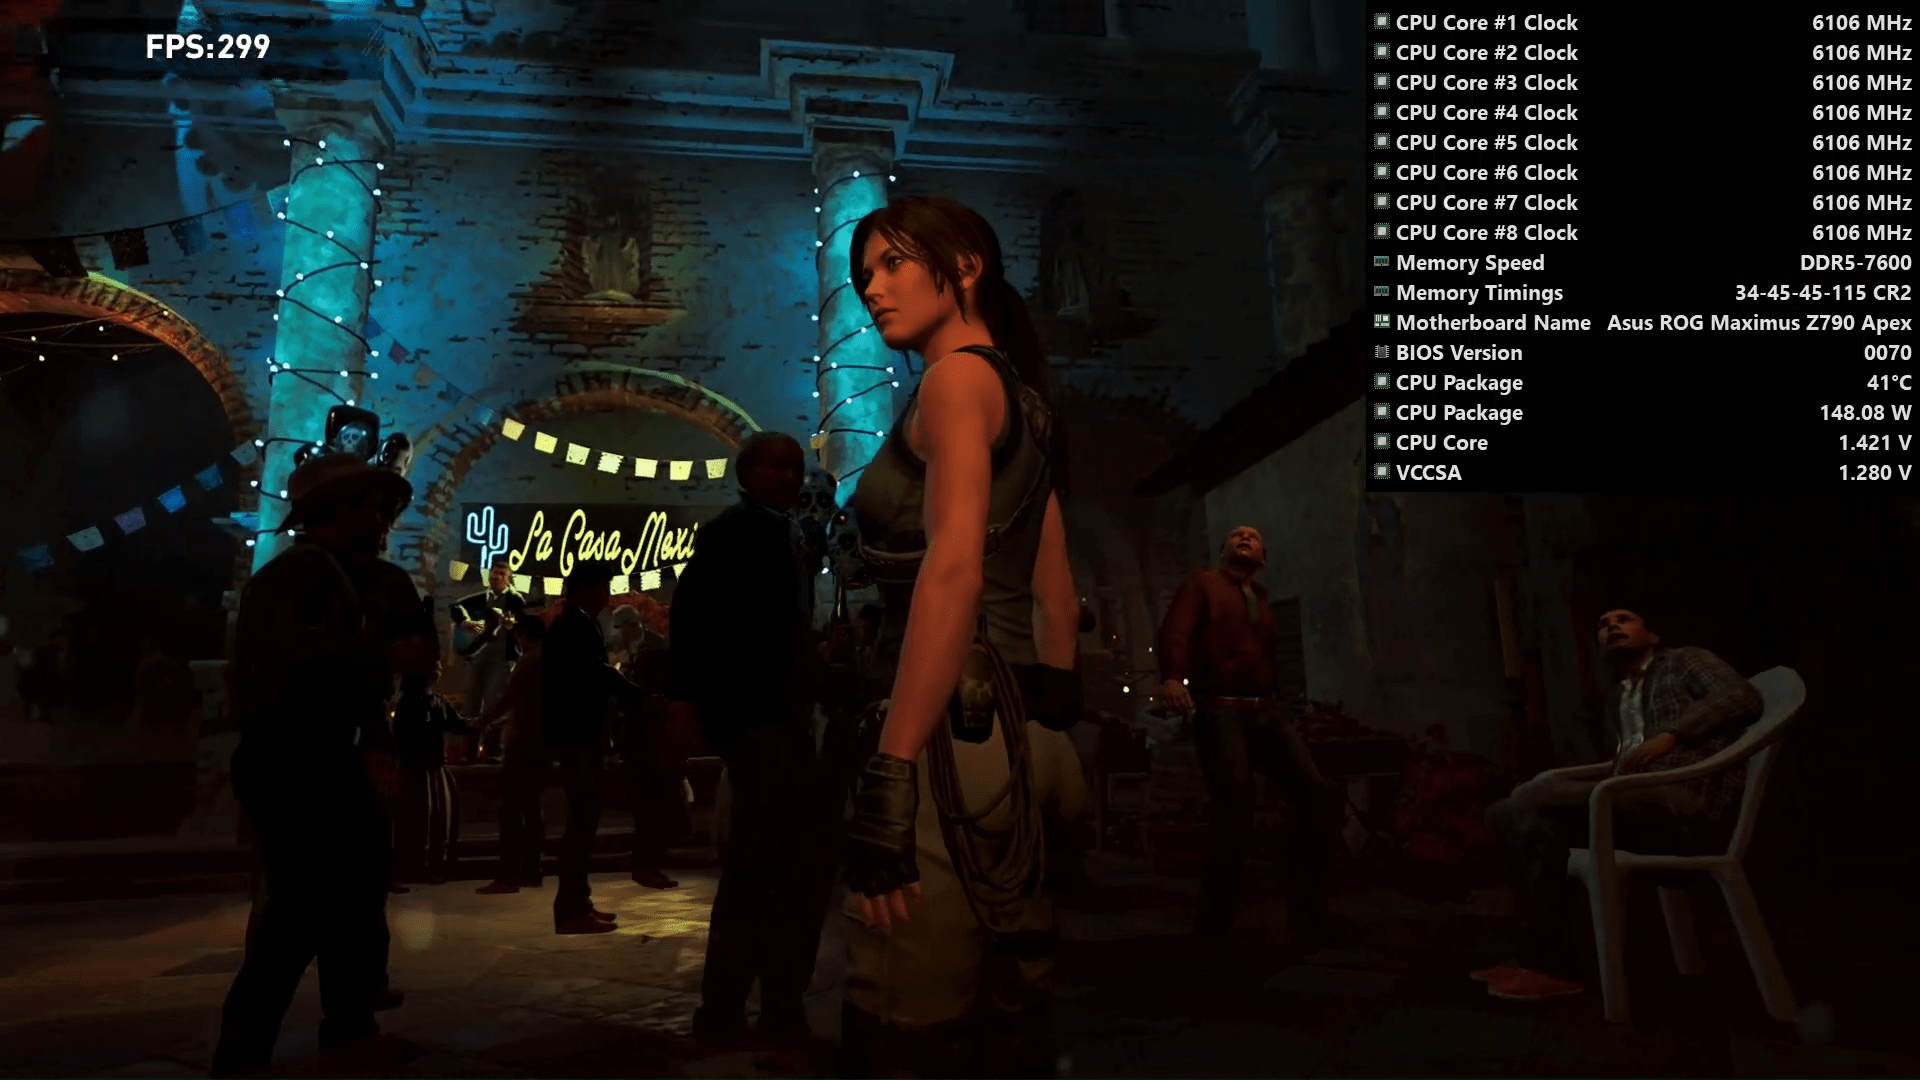
CS:GO & Tomb Raider
The last two benchmarks are actual games: CS:GO and Tomb Raider. Again I just wanted to show the dynamic CPU frequency behavior in these two games. In CS:GO, the CPU frequency moves between 6.1 GHz and 6.4 GHz, depending on the scene and the operating temperature. In Tomb Raider, the CPU is fixed to a frequency of 6.1 GHz as it’s an all-core workload, but the temperature is below 50 degrees Celsius most of the time.
Conclusion
Alright, let’s wrap this up.
The Core i9-13900KS is Intel’s flagship Raptor Lake processor and comes with a 6 GHz thermal velocity boost frequency out of the box. These chips are expected to be the crème de la crème when it comes to Raptor Lake.
From my limited experience testing a couple of KS processors, I feel they’re, on average, one step above the 13900K. My best 13900K could probably match the frequency of this 13900KS. Seeing a 6.7 GHz Core i9-13900KS idle and well above 6 GHz in gaming workloads is pretty spectacular and made me smile throughout the session.
I look forward to seeing what other enthusiasts can squeeze out of these chips in the following weeks and months.
Anyway, that’s all for today! I want to thank my Patreon supporters for supporting my work. If you have any questions or comments, feel free to drop them in the comment section below.
‘Till the next time!
Jeff
I have a single rad running the 13900ks and my temps sit idle around 25 degrees on a load I get around 40 to 50 degrees overcloced to just 6.2 ghz ram volts were 1.6 volts so what I see is I got lots of head room to increase the ghz.. but thanks to your post gives me some ideas to play with.
13900KS Live Overclocking at Intel Creator Challenge Launch Event - SkatterBencher
[…] SkatterBencher showed the Core i9-13900KS running at 6.7 GHz idle and about 6.1 GHz in all core load. The BIOS configuration was similar to the one shown in “Let’s talk 6.7 GHz Core i9-13900KS Raptor Lake.” […]