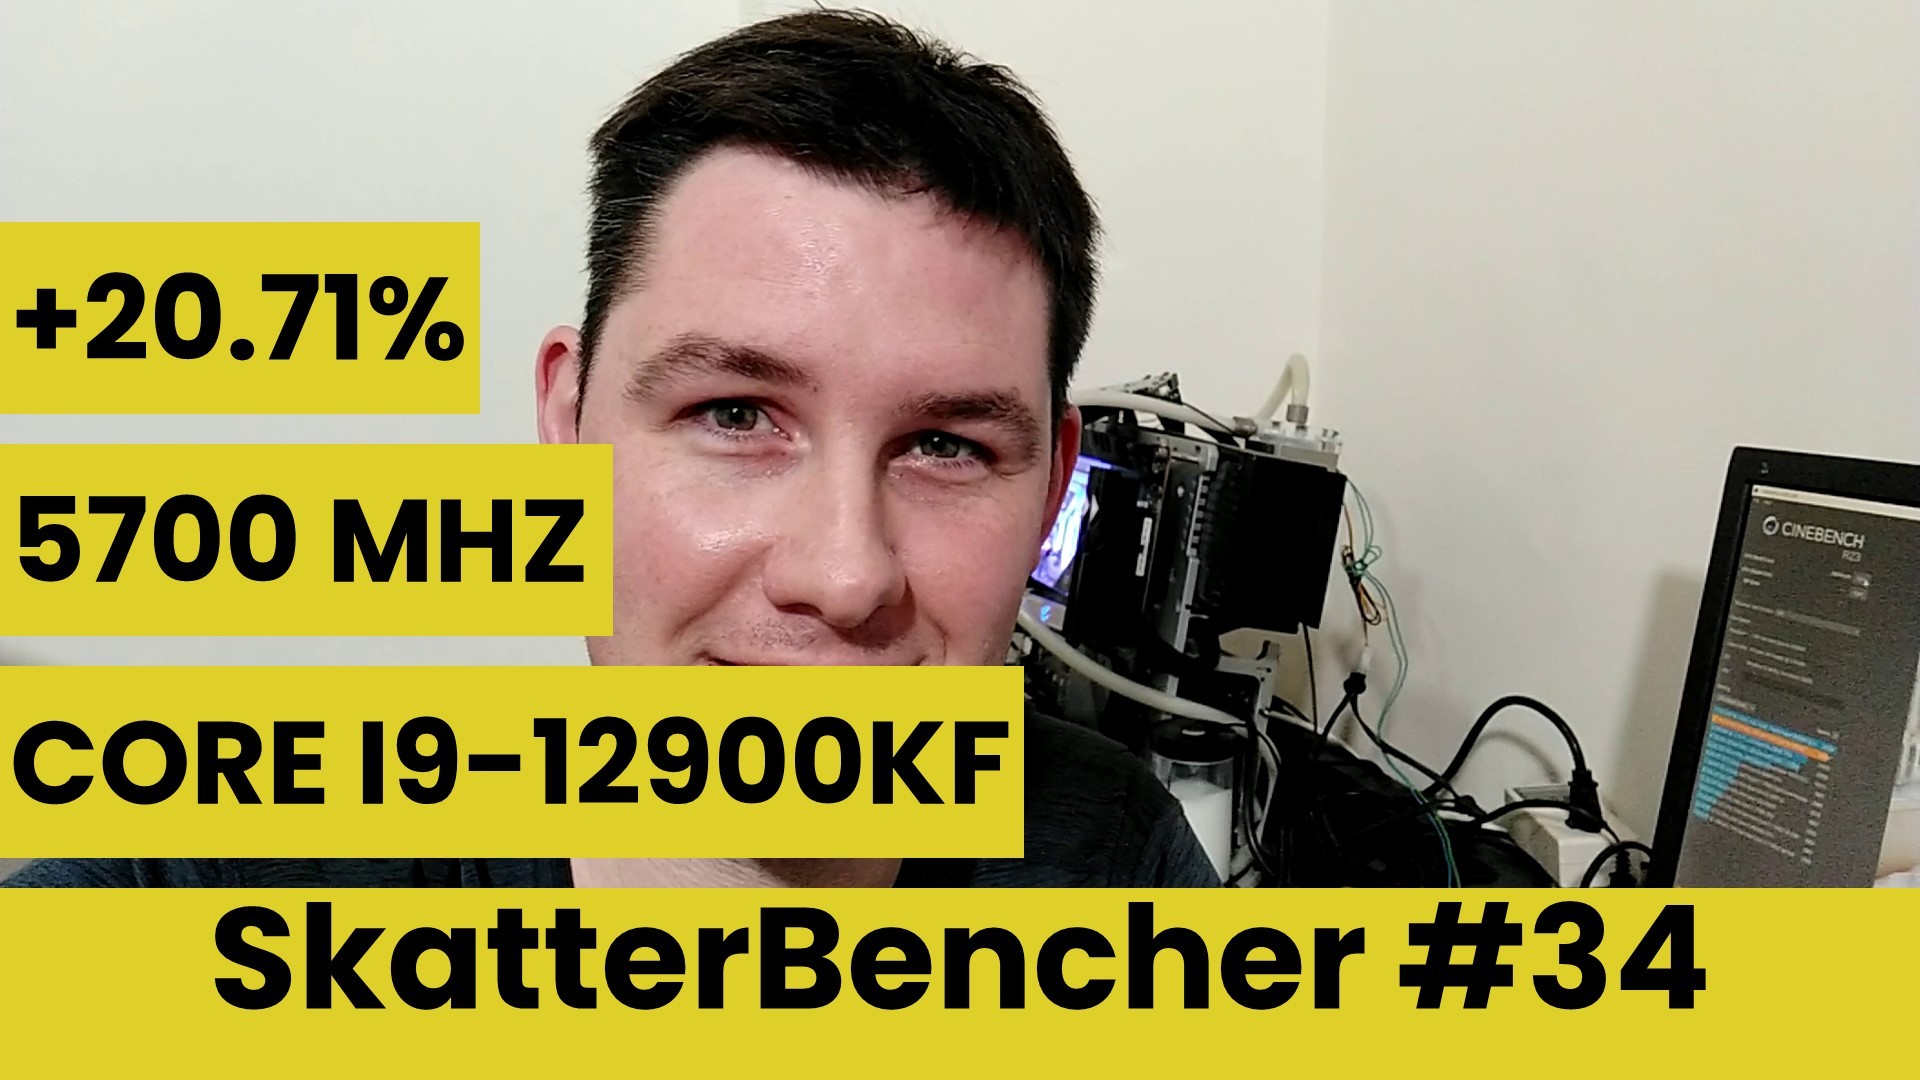
SkatterBencher #34: Intel Core i9-12900KF Overclocked to 5700 MHz
We overclock the Intel Core i9-12900KF processor up to 5700 MHz with the EK-Mana MSI MAG Z690 Torpedo EK X motherboard and EK custom loop water cooling.
The Core i9-12900KF is the graphics-less counterpart of the Core i9-12900K we overclocked on this blog already. Apart from the lack of integrated graphics, the specification of the KF is identical to the K CPU.
The US$369 Z690 Torpedo EK X is the 5th motherboard in the MSIxEK collaboration product range. Unlike the Carbon EK X family, it does not come with an EK monoblock but with an EK Liteblock.
This was a very fun system to overclock and video to make, so hope you enjoy!
Table of Contents
Intel Core i9-12900KF: Introduction
The Intel Core i9-12900KF is part of the 12th generation Intel Core processor lineup.
Intel Alder Lake has an all-new core design with performance hybrid architecture featuring Performance Cores and Efficient cores. It’s built on the Intel 7 process technology formerly known as 10nm Enhanced SuperFin (ESF). It’s a scalable SoC architecture which means Alder Lake will cover all client segments from 9W for ultra-thin notebooks to 125W for gaming and workstation desktops.
Well … 125W+.
The overclockable K-SKU processors again come in three flavors: Core i9, Core i7, and Core i5. Each of the three flavors has a -K and -KF variant. The only difference between the two variants is that the -KF comes without integrated graphics.
The Core i9-12900KF processor has 8 P-cores and 8 E-cores with a total of 24 threads. The base frequency is 3.2 GHz for the P-cores and 2.4 GHz for the E-cores. The maximum single-core boost frequency is 5.1 GHz for the P-cores and 3.9 GHz for the E-cores. The maximum all-core boost frequency is 4.9 GHz for the P-cores and 3.7 GHz for the E-cores. The favored P-cores can boost 100 MHz higher to 5.2 GHz. The processor base power is 125W and the maximum turbo power is 241W.

A major change from previous architectures is that Alder Lake moves away from the TDP concept and instead has two power-related specifications:
- Processor Base Power, formerly the TDP and PL1
- Maximum Turbo Power, formerly PL2
This is sort of in line with how the processor frequency has a base frequency and a maximum turbo frequency.
Another major difference between Alder Lake and any other Intel Core processor is that, at least for the K-SKU CPUs, PL1 is by default equal to PL2. That effectively means that Intel has enabled near-unlimited peak turbo by default!
In this video we will cover four different overclocking strategies:
- First, we increase the performance headroom by unlocking the Turbo Boost 2.0 limits and enabling XMP 3.0
- Second, we try out the MSI Game Boost automatic overclocking feature
- Third, we use the Turbo Ratio Offset feature to increase the P-core and E-cores
- Lastly, we do a manual overclock to achieve the highest performance

However, before we jump into the overclocking let us quickly go over the hardware and benchmarks we use in this video.
Intel Core i9-12900KF: Platform Overview
Along with the Intel Core i9-12900KF processor and EK-Mana MSI MAG Z690 Torpedo EK X motherboard, in this guide, we will be using a pair of 16GB DDR5-6200 Hynix memory sticks, an RTX 2080TI graphics card, a 512GB M.2 NVMe SSD, a Seasonic Prime 850W Platinum power supply, the ElmorLabs Easy Fan Controller, the ElmorLabs Power Measurement Device, the ElmorLabs EVC2, and EK-Classic water cooling. All this is mounted on top of our favorite Open Benchtable.
The cost of the components should be around $3,765.
- Intel Core i9-12900KF processor: $574
- EK-Classic Kit P360 water cooling kit: $315
- EK-Quantum MSI MAG Torpedo EK X motherboard: $369
- NVIDIA RTX 2080 TI graphics card: $1,500
- AORUS RGB 16GB DDR4-4400 memory: $400
- AORUS RGB 512 GB M.2-2280 NVME: $110
- Seasonic Prime 850W Platinum power supply: $200
- ElmorLabs Easy Fan Controller: $20
- ElmorLabs EVC 2: $32
- ElmorLabs Power Measurement Device: $45
- Open Benchtable: $200
ElmorLabs EFC, EVC2, & PMD
ElmorLabs is a company founded by former ASUS ROG motherboard engineer and extreme overclocker Elmor. He designs and sells electronic tools that help performance enthusiasts in their search of higher frequencies and better performance. For this system, I use three of his tools:
- The ElmorLabs Easy Fan Controller,
- The ElmorLabs EVC2,
- And the ElmorLabs Power Measurement Device.
I covered the ElmorLabs EFC in a separate article on this blog. The EFC allows me to map the radiator fan curve to the water temperature. Without going into too many details, I have attached an external temperature sensor from the water in the loop to the EFC. Then, I use the low/high setting to map the fan curve from 25 to 40 degrees water temperature. This is used for all overclocking strategies.
The ElmorLabs Power Measurement Device is a handy tool to measure the voltage, current and power flowing through your CPU and GPU power inputs. An OLED screen attached to the board will show you the current power consumption or details on each connector. For this system I specifically use the PMD to measure the power of the CPU 8-Pin connectors. This allows me to compare the input power to the CPU VRM with the CPU Package Power as reported by HWiNFO.
The ElmorLabs EVC2 enables digital or analog voltage control using I2C/SMBus/PMBus. The device also has UART and SPI functionality. It can be considered as the foundation for the ElmorLabs ecosystem as you can expand the functionality of some ElmorLabs products by connecting it to an EVC2.

In my case, by connecting the EFC and PMD to the EVC2 device I can monitor the following measurements:
- Ambient temperature (EFC)
- Water temperature (EFC)
- Fan duty cycle (EFC)
- CPU input power (PMD)
I have included the measurements in my Prime95 stability test results.
If you want more information about the ElmorLabs products and how they work, I suggest you check out the Discord channel.
EK-Mana MSI MAG Z690 Torpedo EK X
The Z690 Torpedo EK X is the fifth collaborative motherboard from EK and MSI following the Carbon EK for Z490, Z590, X570, and Z690. It is the first motherboard, however, that introduces the concept of the EK-LiteBlock.

The EK-LiteBlock is something in between a regular CPU water block and a monoblock. It’s not a monoblock because it doesn’t directly cool the VRM of the motherboard and it’s also not quite a CPU block because it still indirectly cools the VRM. So how does it work?

MSI redesigned the Z690 Torpedo VRM heatsink to feature a flat surface on both the West and North side of the heatsink. The EK LiteBlock then extends from the CPU socket over the VRM heatsink flat surface and, with the help of two thermal pads. Makes contact with the VRM heatsink. The result is that even though it’s not a monoblock, the LiteBlock still cools the VRM.

The internal performance test data look pretty impressive.
With plain air cooling, the Torpedo EK X heatsink performance about 5 degrees worse than the regular Torpedo heatsink. However, when connected to the LiteBlock, the VRM temperature drops by 30 degrees Celsius under load.
Compared to the Z690 Carbon EK X, the result is obviously slightly worse as the monoblock solution offers almost 10 degrees better performance. But that’s to be expected of course.

The EK LiteBlock design also offers other benefits.
First, the Liteblock costs much less than a monoblock because it’s a much simpler design. That’s why the price premium for a Torpedo EK X compared to a regular Torpedo is much lower than the Carbon EK X versus a regular Carbon.
Second, there’s more room to optimize the CPU cooling engine because the liquid doesn’t need to be routed to the VRM or M.2. The LiteBlock’s cooling engine is derived from the EK-Quantum Velocity2 water block which is the only water block on the market specifically designed for LGA1700 Alder Lake processors.
Third, there’s more capacity to cool the processor since the CPU is the only component directly cooled by the Liteblock.
Of course, we’ll see how the EK-LiteBlock performs when we throw an overclocked Alder Lake Core i9 CPU at it.
Here are a couple more key features of the Z690 Torpedo EK X that may be of interest:
- It is compatible with the EK-Matrix7 standard which means system builders can easily align the tubes for a nice aesthetic effect
- The board sports a 16-phase power delivery with 70A smart power stages
- The MSRP is 369 US Dollar
If you want to learn more, I suggest you check out the EK product page or MSI product page.
Intel Core i9-12900KF: Benchmark Software
We use Windows 11 and the following benchmark applications to measure performance and ensure system stability.
- SuperPI 4M https://www.techpowerup.com/download/super-pi/
- Geekbench 5 https://www.geekbench.com/
- Cinebench R23 https://www.maxon.net/en/cinebench/
- CPU-Z https://www.cpuid.com/softwares/cpu-z.html
- V-Ray 5 https://www.chaosgroup.com/vray/benchmark
- AI-Benchmark https://ai-benchmark.com/
- 3DMark CPU Profile https://www.3dmark.com/
- 3DMark Night Raid https://www.3dmark.com/
- CS:GO FPS Bench https://steamcommunity.com/sharedfiles/filedetails/?id=500334237
- Final Fantasy XV http://benchmark.finalfantasyxv.com/na/
- Prime 95 https://www.mersenne.org/download/

Intel Core i9-12900KF: Stock Performance
The first thing we must do before we start any overclocking is check the system performance at default settings.
Please note that out of the box, the EK-Mana MSI MAG Z690 Torpedo EK X fully unleashes the Turbo Boost 2.0 power limits. So, to check the performance at default settings you must
- In Advanced Mode
- Enter the Overclocking settings menu
- Ensure CPU Cooler Tuning is set to Boxed Cooler (PL1: 241W)
Then save and exit the BIOS.
Here is the benchmark performance at stock:
- SuperPI 4M: 34.431 seconds
- Geekbench 5 (single): 1,992 points
- Geekbench 5 (multi): 17,284 points
- Cinebench R23 Single: 2,022 points
- Cinebench R23 Multi: 27,402 points
- CPU-Z V17.01.64 Single: 826.0 points
- CPU-Z V17.01.64 Multi: 11,387.3 points
- V-Ray 5: 17,666 vsamples
- AI Benchmark: 4,269 points
- 3DMark Night Raid: 78,228 points
- CS:GO FPS Bench: 584.90 fps
- Final Fantasy XV: 191.61 fps

Here are the 3DMark CPU Profile scores at stock
- CPU Profile 1 Thread: 1,107
- CPU Profile 2 Threads: 2,148
- CPU Profile 4 Threads: 4,235
- CPU Profile 8 Threads: 7,908
- CPU Profile 16 Threads: 10,426
- CPU Profile Max Threads: 11,893

When running Prime 95 Small FFTs with AVX enabled, the average CPU P-core clock is 4781 MHz and the average CPU E-core clock is 3691 MHz with 1.217 volts. The average CPU temperature is 83 degrees Celsius. The ambient and water temperature is 24.2 and 35.0 degrees Celsius. The average CPU package power is 241 watts.

When running Prime 95 Small FFTs with AVX disabled, the average CPU P-core clock is 4888 MHz and average CPU E-core clock is 3691 MHz with 1.224 volts. The average CPU temperature is 76 degrees Celsius. The ambient and water temperature is 23.5 and 33.7 degrees Celsius. The average CPU package power is 215.7 watts.

Now, let us try our first overclocking strategy.
However, before we get going, make sure to locate the CMOS Clear Jumper.
Shorting the CMOS Clear Jumper will reset all your BIOS settings to default. This is useful in case your system does not boot up after overclocking or if you want to start your BIOS configuration from scratch. However, it does not delete any of the BIOS profiles previously saved. The Clear CMOS Jumper is located in the lower-left corner of your motherboard.

OC Strategy #1: Unleashed Turbo + XMP 3.0
In our first overclocking strategy we simply take advantage of unleashing the Turbo Boost 2.0 power limits and Intel XMP 3.0.
Turbo Boost 2.0
Intel Turbo Boost 2.0 Technology allows the processor cores to run faster than the base operating frequency if the processor is operating below rated power, temperature, and current specification limits. The ultimate advantage is opportunistic performance improvements in both multi-threaded and single-threaded workloads.
The turbo boost algorithm works according a proprietary EWMA formula. This stands for Exponentially Weighted Moving Average. There are 3 parameters to consider: PL1, PL2, and Tau.
- Power Limit 1, or PL1, is the threshold that the average power will not exceed. Historically, this has always been set equal to Intel’s advertised TDP. Very importantly, PL1 should not be set higher than the thermal solution cooling limits.
- Power Limit 2, or PL2, is the maximum power the processor is allowed to use for limited amount of time.
- Tau is a weighing constant used in the algorithm to calculate the moving average power consumption. Tau, in seconds, is the time window for calculating the average power consumption. If the average power consumed is higher than PL1 the CPU will reduce the CPU frequency.

Obviously, Turbo Boost 2.0 technology is available on Alder Lake as it’s the main driver of performance over the base frequency.
A major difference between Alder Lake and really any other Intel Core processor is that, at least for the K-SKU CPUs, PL1 is by default equal to PL2. This is very different from before where PL1 would equal the TDP and PL2 would range from 200 to 250W. This change effectively means that Intel has enabled near-unlimited peak turbo by default!
For the 12900KF the maximum power limit is set at 241W.
The maximum performance is therefore entirely limited by the capabilities of your cooling solution. If your cooling solution is insufficient, then the processor will reduce the operating frequency at the maximum allowed temperature or TjMax. For Alder Lake CPUs that’s at 100 degrees Celsius.
On MSI motherboards there’s an easy CPU Cooler Tuning option that allows you to unleash the Turbo Boost power limits. Simply set the option to Water Cooler and enjoy the maximum performance. On first boot, the BIOS will pop up a menu to select the CPU cooler type. On the Z690 Torpedo EK X, Water Cooler and its associated unlocked Turbo Boost power limits is selected.

Intel Extreme Memory Profile 3.0
Intel Extreme Memory Profile, or XMP, is an Intel technology that lets you automatically overclock the system memory to improve system performance. It is an extension to the standard JEDEC specification that allows a memory vendor to program different settings onto the memory stick.
Intel Extreme Memory Profile 3.0 is the new XMP standard for DDR5 memory. It is largely based on the XMP 2.0 standard for DDR4 but has additional functionality.

The XMP 3.0 standard is designed with six sections. One global section describes the generic data which is used across the profiles. The other five sections are designed for five profiles respectively.
- Profile 1 is meant for the performance profile (this is the standard XMP as we know it)
- Profile 2 is designed for the extreme settings (this could be a higher frequency at higher voltage)
- Profile 3 is designed for the fastest settings (this could be tighter timings at higher voltage)
- Profiles 4 and 5 are rewritable and meant for user custom settings
There’s a lot more to the new XMP 3.0 standard which is outside the scope of this overclocking guide. If you’re interested in more details about XMP 3.0, feel free to check out my Alder Lake launch article.
Upon entering the BIOS
- In Advanced Mode, click XMP Profile 1
- Enter the Overclocking settings menu
- Ensure CPU Cooler Tuning is set to Water Cooler (PL1: 4096W)
Then save and exit the BIOS.
We re-ran the benchmarks and checked the performance increase compared to the default operation.
- SuperPI 4M: +1.52%
- Geekbench 5 (single): +2.91%
- Geekbench 5 (multi): +5.87%
- Cinebench R23 Single: +0.25%
- Cinebench R23 Multi: +0.49%
- CPU-Z V17.01.64 Single: +0.16%
- CPU-Z V17.01.64 Multi: +0.37%
- V-Ray 5: +1.59%
- AI Benchmark: +6.58%
- 3DMark Night Raid: +0.62%
- CS:GO FPS Bench: +1.27%
- Final Fantasy XV: +0.72%

Here are the 3DMark CPU Profile scores at stock
- CPU Profile 1 Thread: +0.09%
- CPU Profile 2 Threads: +0.33%
- CPU Profile 4 Threads: +0.14%
- CPU Profile 8 Threads: +0.14%
- CPU Profile 16 Threads: +0.06%
- CPU Profile Max Threads: +0.45%

As expected , we see the largest performance difference in multi-threaded applications utilizing AVX instructions as these were previously constraint by the maximum power of 241W. We see up to 6.58% performance increase in AI Benchmark.
When running Prime 95 Small FFTs with AVX enabled, the average CPU P-core clock is 4898 MHz and average CPU E-core clock is 3698 MHz with 1.270 volts. The average CPU temperature is 95 degrees Celsius. The ambient and water temperature is 25.0 and 36.0 degrees Celsius. The average CPU package power is 277.1 watts.

When running Prime 95 Small FFTs with AVX disabled, the average CPU P-core clock is 4898 MHz and average CPU E-core clock is 3698 MHz with 1.234 volts. The average CPU temperature is 80 degrees Celsius. The ambient and water temperature is 24.6 and 35.0 degrees Celsius. The average CPU package power is 228.1 watts.

OC Strategy #2: Game Boost + XMP 3.0
In our second overclocking strategy we make use of the one-click overclocking feature called Game Boost. This unique MSI feature has been on motherboards for quite a while and offers an instant overclocking boost.
We talked extensively about the history of MSI’s Game Boost feature in SkatterBencher #31 when we overclocked the Core i7-12700K with the Z690 Carbon EK X. Feel free to check out that video if you’re interested in the background of Game Boost.
Enabling Game Boost on the Z690 Torpedo EK X lifts all Turbo Ratios by +1 for both P-cores and E-cores. In addition, it also sets an AVX Negative Ratio offset of -3. This results in a maximum P-core boost frequency of 5.3 GHz.
Upon entering the BIOS
- Click the Game Boost button
- Click XMP Profile 1
Then save and exit the BIOS.
We re-ran the benchmarks and checked the performance increase compared to the default operation.
- SuperPI 4M: +3.77%
- Geekbench 5 (single): +2.06%
- Geekbench 5 (multi): +7.60%
- Cinebench R23 Single: +2.42%
- Cinebench R23 Multi: +2.30%
- CPU-Z V17.01.64 Single: +2.01%
- CPU-Z V17.01.64 Multi: +2.01%
- V-Ray 5: +2.09%
- AI Benchmark: +12.93%
- 3DMark Night Raid: +1.18%
- CS:GO FPS Bench: +2.20%
- Final Fantasy XV: +0.75%

Here are the 3DMark CPU Profile scores at stock
- CPU Profile 1 Thread: +0.36%
- CPU Profile 2 Threads: +1.21%
- CPU Profile 4 Threads: +0.35%
- CPU Profile 8 Threads: +1.33%
- CPU Profile 16 Threads: +3.01%
- CPU Profile Max Threads: +0.89%

The performance improvement is a bit of a mixed bag. We see modest increases in most benchmarks as the frequency increased by 100MHz across the board. However, in predominantly AVX benchmarks the performance impacted by the AVX Negative Ratio Offset of 3 bins.
When running Prime 95 Small FFTs with AVX enabled, the average CPU P-core clock is 4824 MHz and average CPU E-core clock is 3798 MHz with 1.258 volts. The average CPU temperature is 90 degrees Celsius. The ambient and water temperature is 24.4 and 35.5 degrees Celsius. The average CPU package power is 264.4 watts.

When running Prime 95 Small FFTs with AVX disabled, the average CPU P-core clock is 4998 MHz and average CPU E-core clock is 3798 MHz with 1.284 volts. The average CPU temperature is 86 degrees Celsius. The ambient and water temperature is 24.2 and 35.3 degrees Celsius. The average CPU package power is 254.6 watts.

OC Strategy #3: Turbo Ratio Offset + XMP 3.0
In our third overclocking strategy we will use MSI’s Turbo Ratio Offset feature. The Turbo Ratio Offset is a unique approach to overclocking that simply lifts the default Turbo Ratio configuration by a specific number of bins. This enables you to configure a dynamic overclock while not having to dig too deep through the various BIOS options.
For our configuration, we choose a Turbo Ratio Offset of +2 for the P-cores and +3 for the E-cores. That will push the P-core frequency to up to 5.4 GHz and the E-core frequency to up to 4.2GHz.
In addition to the Turbo Ratio Offset, we will also use Advanced Voltage Offset mode which suits our dynamic overclock.
Turbo Ratio Configuration
Generally speaking, on Intel platforms, there are two ways to manually configure the CPU ratio: sync all cores or using turbo ratio configuration.
Sync All Cores sets 1 ratio that is applied to all cores. This is very much the traditional way of overclocking.
Turbo Ratios allow us to configure the overclock for different scenarios ranging from 1 active core to all active cores. This enables us to run some cores significantly faster than others when the conditions are right. On Alder Lake, we can configure the turbo ratios for P-cores and E-cores separately. So, we can set the maximum ratio for 1-active P-core to 8-active P-cores and 1-active E-core to 8-active E-cores.
As mentioned, MSI uniquely offers the Turbo Ratio Offset function. This function offsets the default Turbo Ratio configuration by a specific number of bins. The default configuration for the Core i9-12900KF is as follows for the P-Cores and E-Cores:
- 1 active P-core: 52X
- 2 active P-cores: 51X
- 3 active P-cores: 50X
- 4 active P-cores: 50X
- 5 active P-cores: 49X
- 6 active P-cores: 49X
- 7 active P-cores: 49X
- 8 active P-cores: 49X
- 1 active E-core: 39X
- 2 active E-core: 39X
- 3 active E-core: 39X
- 4 active E-core: 39X
- 5 active E-core: 37X
- 6 active E-core: 37X
- 7 active E-core: 37X
- 8 active E-core: 37X

Advanced Voltage Offset (V/F Point)
Advanced Voltage Offset was first introduced with the Comet Lake architecture in 2020 and is of course also available on Alder Lake. It is more commonly known as the V/F Points and is an extension of the Adaptive Voltage Mode we’ve discussed in many previous SkatterBencher guides.
Advanced Voltage Offset exposes some of the points on the V/f curve to the end-user and allows for manual adjustment of these points. The amount of V/f points is not architectural and can change between SKUs. In other words, specific SKUs can have more or less pre-defined V/F points.

The only requirement for the V/f curve is monotonicity. Following a monotonic function, as a rule, the voltage for a given CPU ratio must be equal to or higher than the next lower ratio. So, the voltage for 48X must be equal to or higher than 47X.
The main purpose of Advanced Voltage Offset is to provide end-users with the ability to under-volt their CPUs at specific parts of the V/f curve. In addition to undervolting, this feature also allows overvolting. This is particularly useful when manual overclocking and when you are trying to increase the maximum frequency.
The Advanced Voltage Offset function is commonly used in two ways.
- To configure a positive voltage offset for the highest V/f point. This helps achieve a higher single-threaded boost frequency.
- To configure a negative voltage offset for the second-highest V/f point. This helps achieve lower voltage for all-core boost, which results in a lower temperature in all-core boost, and thus potential additional overclocking headroom.
On Alder Lake, this approach is a bit trickier because the implementation of the Advanced Voltage Offset is a bit more complicated than on Rocket Lake.
And, quite frankly, I’ve gotten it wrong in previous videos.
A comment on my SkatterBencher blog made me revisite the documentation I have on this feature and, yea, I definitely got a couple things wrong in previous videos. So, it’s time to set the record straight. Here’s the deal.
For Alder Lake CPUs, there are a total of 11 V/F Points available for the CPU P-cores. Each V/F point is associated with a specific CPU ratio on the voltage frequency curve
- V/F Points 1 to 6 are each unique and associated with a ratio below the maximum default turbo ratio.
- V/F Point 7 is also unique and is associated with the maximum default turbo ratio
- V/F Points 8 to 10 are copies of V/F Point 7 and may be used for future products
- V/F Point 11 is the final unique point and is associated with the OC Ratio

We’ve talked a lot about the OC ratio on this channel when discussing the Adaptive Voltage mode. When we use Adaptive Voltage mode, the voltage configured in the BIOS is mapped against what’s called the “OC ratio”.
When you leave everything at default the OC ratio is the default maximum turbo ratio plus 1. In the case of the 12900K, the default maximum turbo ratio is 52X which is the Turbo Boost Max 3.0 frequency. So, the default OC ratio is 52+1=53X.
When you manually overclock, the OC ratio is the highest ratio configured for the CPU across all settings including by core usage, per core ratio limit, OCTVB, and so on.
Now back to the V/F Points. On the Core i9-12900KF the specific VF Points are configured as follows:
- VF Point 1: 8X
- VF Point 2: 18X
- VF Point 3: 36X
- VF Point 4: 40X
- VF Point 5: 42X
- VF Point 6: 48X
- VF Points 7-10: 53X
- VF Point 11: 53X and up

Now let’s go over some of the intricacies of this feature. We will discuss 4 topics:
- Direct and indirect control of the V/F curve
- Programming issues with VF7-10
- The Core i9 V/F Point 7 Ratio is 53X, not 52X
- On Torpedo EK X, the final VF point in BIOS is VF7

Direct and indirect control of the V/F curve
The Advanced Voltage Offset feature gives you both direct and indirect control over the voltage frequency curve.
You have direct control over the voltage applied to each of the ratios associated with a V/F Point. For the 12900KF that means direct control of the voltage for ratios 8X, 18X, 36X, 40X, 42X, 48X, and 53X. Note that the direct control is still limited as you cannot set a specific voltage but just an offset to the factory-fused voltages for these points.
For the last point, V/F Point 11, you have direct control over both the ratio and voltage, including the ability to set the desired target voltage. You can set the voltage when using the Adaptive Voltage mode in the BIOS.

You have indirect control of the voltage applied to the ratios in between the different V/F Points. That’s because the voltage for ratios in between the V/F points is interpolated between the previous and next V/F Point. To illustrate this behavior, let’s take the following default values for the CPU P-core ratios on my Core i9-12900KF processor.

The voltages you see in the table above are the factory-fused values for this specific CPU sample. Not only will you get different values for different CPUs, every P-core inside your CPU has its own values for these points. We can demonstrate this by having only 1 P-core enabled and the 7 others disabled, then check the voltage for a specific ratio.

Since all P-cores share the same voltage rail, VccIA, which also shared with the E-cores and Ring, the rule for the VccIA voltage is to set the highest of all requested voltages. That’s why we see for 54X, when all cores are active, a voltage of 1.406V as it is the highest of all P-cores.

Now, let’s check the voltage for ratios in between the V/F Points. We will first calculate the expected voltage assuming linear interpolation between the V/F Points, then check the actual voltage. We do this for ratios 27X, 41X, and 45X.

As you can see, our estimated voltage is very close to the actual real-world value.
In order to demonstrate the fact that we have indirect control over the voltage for the ratios in between the V/F Points, we can change the voltage offset of specific V/F Points and see how they impact the voltage for each ratio.
For example, here’s what happens when we add a +0.3V offset to V/F Point 3

We can make a couple of observations
- The voltages for ratios 8X and 18X are unaffected as they have factory-fused values.
- The voltage for 27X is affected as it is interpolated between V/F Point 2 (18X) and V/F Point 3 (36X).
- The voltages for ratios 40X, 41X, 42X, and 45X have increased because the monotonicity rule of the voltage frequency curve. Even though the factory-fused voltage for 42X is 1.018V, the actual voltage is 1.196V because we have manually set 36X to 1.196V via the advanced voltage offset. The voltage for a given ratio cannot be lower than the voltage of a lower ratio, hence the voltage for 42X must be equal to or higher than the voltage for 36X.
- The voltage for 48X and 53X are unaffected because their factory-fused default voltage is equal to or higher than the voltage of 36X
We can try the same for another V/F Point. For example, let’s increase V/F Point 5 for 42X by 300mV.

Again, we see the same behavior.
- The voltage for 41X has increased because it is interpolated between 40X and 42X, and we increased the voltage for 42X.
- The voltage for 42X has increased because we added a voltage offset
- The voltage for 45X and 48X has increased because the monotonicity rule states the voltage must be equal to or higher than the next lower ratio. So, the voltage is set equal to the voltage for 42X.
I hope these examples make it clear that the Advanced Voltage Offset feature is a very powerful tool that gives us direct and indirect control over the CPU voltage-frequency curve.
Programming issues with V/F Points 7 to 10
As mentioned, Alder Lake has more V/F Points than Rocket Lake as the total configurable points increased from 7 to 11. However, the additional V/F Points 8, 9, and 10 don’t have much function on Alder Lake currently as they’re simply copies of V/F Point 7.

Furthermore, the “copy-points” add extra layers of programming complexity. For example, the CPU does not like V/F Point 7 to be programmed to a lower value than V/F Point 8. If you want to undervolt the CPU at V/F Point 7, so use a negative voltage offset, it’s necessary to first program V/F Point 8 with a negative voltage offset. Similarly, if you want to program V/F Point 8 with a positive offset, you must first program V/F Point 7 positive.
More generally, I you want to configure V/F Point 7 with a negative offset, then the best practice is to first program Point 10, then Point 9, then 8, and finally V/F Point 7 to the same negative value. If you want to program a positive value, then you go the other way around.

If this all sounds very complicated, then you’re right. Fortunately, the motherboard engineers can implement programming auto-rules that will do the hard work for you. But keep in mind that Z690 appears to be a challenging platform due to DDR5 so I’m not sure to what extend the engineers have been able to look into setting up the proper auto-rules for a relatively minor feature like Advanced Voltage Offset.
The Core i9 V/F Point 7 Ratio is 53X, not 52X
I’m sure many of you will have noticed that the VF Point 7 on the 12900KF is mapped against 53X. As a reminder, Intel specifies that VF Point 7 is mapped against the default highest ratio and VF Point 11 is used for the OC Ratio. So, for the 12900KF, we’d expect VF Point 7 to map to 52X, which is the Turbo Boost Max 3.0 ratio, and VF Point 11 to start from 53X.
After some research and external inputs, it appears the reason may be that this is a remnant of the original target specification of the Core i9 Alder Lake CPU. In case you don’t remember, early Alder Lake leaks had the 12900K maximum boost frequency match its predecessor, the 11900K, at 5.3 GHz. . It appears that Intel changed the final specification of the Alder Lake CPU very close to launch and this change didn’t make it to the V/F Point feature.
Right before publishing this blog post, a viewer of my YouTube channel sent me a picture of his 12900K system where V/F Point 7 is 52X. That’s actually correct as that’s the default maximum turbo ratio. It seems like Intel has fixed the V/F Point on newer Core i9 Alder Lake CPUs. If it wasn’t already complex enough, this adds another layer to it.

On Torpedo, the final V/F point available in BIOS is V/F Point 7
While most motherboard vendors have integrated the Advanced Voltage Offset feature into the BIOS in some form, the implementation is not always the same. On BIOS version A21, there are a total 7 configurable VF points. The last configurable point is VF Point 7 which is mapped against 53X. When configuring this point, the BIOS programs VF Point 7 to 11 with the same voltage offset.

This has two implications
- It ensures that the complicated programming rules are taken care of. So as a user you don’t have to worry about any of the complicated rules.
- It does not allow the user to program a separate voltage offset for the OC Ratio which can be independently controlled by VF Point 11. Instead, the voltage offset for CPU ratios 53X and above will be the same. Ideally, we’d like to have control over the final V/F point as well as that would enable us to undervolt the curve at 53X for possibly lower all-core voltage and still use overvolting for our high frequency ratios.
Upon entering the BIOS
- In Advanced Mode, click XMP Profile 1
- Enter the Overclocking settings menu
- Set P-Core Ratio Apply Mode to Turbo Ratio Offset
- Set P-Core Turbo Ratio Offset Value to +2
- Set E-Core Ratio Apply Mode to Turbo Ratio Offset
- Set E-Core Turbo Ratio Offset Value to +3
- Enter the Advanced CPU Configuration submenu
- Set TVB Voltage Optimizations to Disabled
- Leave the Advanced CPU Configuration submenu
- Ensure CPU Cooler Tuning is set to Water Cooler (PL1: 4096W)
- Set CPU Core Voltage Mode to Advanced Offset Mode
- Enter the Advanced Offset Mode submenu
- For Voltage Offset When Running CPU Ratio x53,
- Set Voltage Offset Control to +
- Set Voltage Offset Target to 0.025
- For Voltage Offset When Running CPU Ratio x53,
- Leave the Advanced Offset Mode submenu
Then save and exit the BIOS.
We re-ran the benchmarks and checked the performance increase compared to the default operation.
- SuperPI 4M: +6.82%
- Geekbench 5 (single): +6.98%
- Geekbench 5 (multi): +16.14%
- Cinebench R23 Single: +4.75%
- Cinebench R23 Multi: +4.78%
- CPU-Z V17.01.64 Single: +3.96%
- CPU-Z V17.01.64 Multi: +5.47%
- V-Ray 5: +10.55%
- AI Benchmark: +16.87%
- 3DMark Night Raid: +3.24%
- CS:GO FPS Bench: +3.14%
- Final Fantasy XV: +0.87%

Here are the 3DMark CPU Profile scores at stock
- CPU Profile 1 Thread: +4.16%
- CPU Profile 2 Threads: +5.26%
- CPU Profile 4 Threads: +3.64%
- CPU Profile 8 Threads: +4.98%
- CPU Profile 16 Threads: +7.49%
- CPU Profile Max Threads: +5.14%

There’s not much to say about the benchmark results as we see a significant increase across the board. Apparently increasing the frequency in situations where few cores are active and in situations where many or all cores are active, will also increase the benchmark performance. Who knew? We see the highest performance increase of 16.87% in the AI Benchmark.
When running Prime 95 Small FFTs with AVX enabled, the average CPU P-core clock is 4814 MHz and the average CPU E-core clock is 3844 MHz with 1.213 volts. The average CPU temperature is 99 degrees Celsius. The ambient and water temperature is 25.0 and 36.7 degrees Celsius. The average CPU package power is 295.4 watts.

When running Prime 95 Small FFTs with AVX disabled, the average CPU P-core clock is 5020 MHz and the average CPU E-core clock is 3998 MHz with 1.303 volts. The average CPU temperature is 100 degrees Celsius. The ambient and water temperature is 25.0 and 36.9 degrees Celsius. The average CPU package power is 309.8 watts.

OC Strategy #4: Manual + XMP 3.0
In our fourth and final overclocking strategy, we’re going to do some manual overclocking to squeeze a little more performance out of our system. We have a couple of objectives:
- We will manually set our P-core ratios to increase the performance in both single-threaded and multi-threaded workloads.
- We want to reduce the P-core adaptive voltage in multi-threaded workloads to lower the operating temperature, which in turn creates more overclocking headroom.
- We want to experiment with OverClocking Thermal Velocity Boost to see if we can hit even higher P-core frequencies.

I also tried increasing the E-core frequency but turns out that the Turbo Ratio Offset of +3 from our previous strategy was the best we could achieve.
For each of these objectives, I will try to explain how I approached the tuning and BIOS configuration.
CPU Turbo Ratio Configuration
As I explained earlier in the video, we can set the turbo ratio behavior based on the number of active P-cores. MSI offers up to 8 turbo ratio groups. For our manual configuration, we will treat each group as a configuration of 1 to 8 active cores. So, Group 1 is 1 active P-core, Group 2 is 2 active P-cores, and so on. This will be important later on when configuring the OCTVB.
For each of the groups I start with the configuration from OC Strategy #3, which was as follows:
- 1 active P-core: 54X
- 2 active P-cores: 53X
- 3 or 4 active P-cores: 52X
- 5, 6, 7, or 8 active P-cores: 51X
From the initial configuration, we can go through the regular overclocking process of increasing the P-core target ratio and checking the system stability with our benchmark applications. If it’s unstable, you can increase the voltage. If it’s stable, you can increase the ratio. Rinse and repeat until you can’t improve anymore.
After bumping the voltage offset to 35mV, my CPU was able to do the following ratios:
- 1 or 2 active P-cores: 55X
- 3 or 4 active P-cores: 54X
- 5 or 6 active P-cores: 53X
- 7 or 8 active P-cores: 52X

This is our baseline manual overclock. Next up is the voltage tuning.
All-P-Core Voltage Tuning
For the all-P-core voltage tuning, we have an important data point from our previous overclocking strategy: the Prime95 stability test result.
If we look at the Prime95 result, we see that in the non-AVX workload our average frequency is 5020 MHz even though our configured CPU ratio for 8 active P-cores is 51X. That is of course because the CPU package temperature during the stability test exceeds the TjMax, or maximum allowed temperature, of 100 degrees Celsius. When the temperature is higher than TjMax, the CPU will reduce its ratio to stay within the warranted operating specification. Based on our observation of the 5020 MHz average frequency, we can infer that the ratio drops often to 50X instead of sticking to 51X.

Given a certain workload, the main driver of the operating temperature is the operating voltage. That’s because, broadly speaking, the CPU temperature scales linearly with CPU power usage, and power scales exponentially with voltage.
So, our objective is simple. If we can reduce the operating voltage, we can reduce the operating temperature. If we can reduce the operating temperature, the CPU will stay below TjMax more often. If we stay below the TjMax threshold more often, our CPU ratio will be reduced less often. So, on average we will have a higher frequency and thus higher performance.

The voltage for 51X and 52X in the Prime95 non-AVX all-core workload before tuning is 1.34V and 1.41V respectively. That is of course way too much!
To understand how we can control the CPU voltage under load, let’s revisit how Adaptive Voltage mode works on Intel systems.
Generally speaking, there are three steps to how your system sets the CPU voltage in Adaptive Mode.
- First, the motherboard’s BIOS tells the processor the current loadline characteristics via AC DC loadline values.
- Then, the CPU will request a voltage from the voltage controller based on its programmed V/f curve as well as the motherboard loadline characteristics.
- Finally, the voltage that reaches the CPU is the requested voltage minus any undershoot or overshoot from the VRM loadline.

The AC DC loadline characteristics are a way for the motherboard to inform the CPU about the VRM design. Based on the specific design, the CPU will factor in a certain voltage droop when requesting a VID. Voltage droop is the decrease of voltage when a core goes from idle to full load.
The VRM loadline setting determines how much the output voltage increases or decreases when the CPU goes from a low load to a high load or vice versa. Simply put, a big undershoot or big overshoot can result in an unstable system. The VRM loadline helps to mitigate this problem.

So, now you can see we have 3 tactical options to reduce the all-P-Core operating voltage:
- Use V/F Point offset to change voltage requested by the CPU to the voltage controller
- Tune the ACDC loadline parameters to change how much the CPU adjusts its requested voltage to account for the motherboard design
- Tune the VRM loadline calibration to control how much the voltage drops under a heavy workload

Now I will cover each of these tactics in a little more detail.
V/F Point Offset
We already discussed the Advanced Voltage Offset, or V/F Point Offset, earlier in this video. So I will keep it short: traditionally we would undervolt some of the V/F Points on the voltage frequency curve to control the voltage of a specific ratio.

In this case, since we’re trying to reduce the voltage at 52X we can use either V/F Point 6 which is mapped against the 48X ratio, or V/F Point 7 which is mapped against the 53X ratio. Unfortunately, due to the specific implementation of the V/F Point function on this BIOS version, we must use V/F Point 7 to control the voltage for our highest voltage frequency point. As said, we use an offset of 35mV to achieve 5.5GHz for up to 2 active P-Cores.
V/F Point 6 is still an option, but as the voltage for 52X is interpolated between the voltages for 48X and 53X, it’s unlikely even a large undervolt of V/F Point 6 will be very helpful. Also, keep in mind that undervolting at a certain point also affects the voltages at other ratios.
So, long story short, tuning the V/F Points won’t be of much help for this specific situation.
ACDC Loadline Tuning
In SkatterBencher #31 we had a very close look at the CPU voltage-frequency curve and found that the AC DC loadline parameters can have a big impact on the effective CPU voltage.
In the MSI BIOS, you can adjust the ACDC loadline parameters using the option called CPU Lite Load control. The motherboard BIOS will have specific auto-rules to configure the ACDC Loadline parameters when overclocking. However, we can use preconfigured Modes to adjust the parameters or even set the values ourselves.

Using the configuration from OC Strategy #3 as a baseline, we find the motherboard auto-rule sets the CPU Lite Load to Mode 9. Reducing the Mode will lower the operating voltage. So, we gradually decrease the Mode and check the stability.
Before you start decreasing the Mode, however, make sure to first manually configure the VRM Loadline Calibration setting.
VRM LoadLine Calibration
The VRM loadline setting will determine to what extend the voltage will drop under load. Since we don’t want the motherboard auto-rules to change the setting during our testing, it’s a good idea to pick a loadline setting and then further tune from there.
In my case, I picked the CPU Loadline Calibration Control of Mode 3. With this setting locked in, I then gradually reduced the CPU Lite Load mode to as low as possible while checking the stability in Prime95. When the system started becoming unstable due to too low voltage, I tried adjusting the VRM LoadLine and CPU Lite Load settings to find a combination that would give the lowest voltage for a stable system.
In the end, I managed to reduce the CPU Lite Load to Mode 3 when using a CPU Loadline Calibration Control of Mode 3.
This helped us reduce the voltage for 51X and 52X in the Prime95 non-AVX all-core workload from 1.34V and 1.41V to 1.25V and 1.31V respectively. This 100mV reduction in voltage under load meant that my Prime95 frequency increased from 5020 MHz to 5131 MHz!

One last note to highlight the importance of having a fixed VRM LoadLine Calibration setting when tuning the AC DC loadline parameters. If I leave the VRM loadline calibration to Auto, with a CPU Lite Load set to Mode 3, the voltage for 51X drops to 1.17V. That’s too low and the system crashes.
OverClocking Thermal Velocity Boost
The last part of the manual tuning is probably my favorite. OverClocking Thermal Velocity Boost, or OCTVB, allows us to leverage superior cooling to achieve higher frequencies when the CPU temperature is low enough.
I covered the OCTVB for Comet Lake and Rocket Lake platforms at length in previous blog posts. The implementation of OCTVB on Alder Lake is very similar to Rocket Lake. The function configures the ratio offsets on a by-core usage basis. That means the CPU ratio reduction is based on not just the CPU package temperature but also how many cores are active.
Do note that OCTVB on Alder Lake is available only for the P-cores and not for the E-cores.
I won’t dive too deep into the OCTVB configuration in this video as I’m saving that for when Intel releases the Cryo Cooling software for the Alder Lake platform. Instead, I will focus on a pure use-case for OCTVB which is to increase the CPU ratio when the temperature is sufficiently low.
As I mentioned already, the CPU P-core ratio configuration for the final strategy sets 55X when up to 2 P-cores are active and I’ve set a 35mV voltage offset using the Advanced Voltage Offset function.

The underlying assumption is that up to 2 active P-cores will run at 5.5GHz up to the TjMax of 100 degrees Celsius. However, we should have plenty of thermal headroom due to the custom loop water cooling and low ambient temperature.
In idle I find my CPU temperature to hover on average around 30 degrees Celsius. When I load a single-threaded workload like Cinebench R23, the CPU temperature hovers around 48 degrees Celsius with a peak of 59 degrees Celsius. 40 degrees Celsius is a lot of thermal headroom that we can exploit to bump the frequency.
The OCTVB configuration allows us to configure 2 points for each quantity of active P-cores. Each point is defined by a specific temperature and number of ratio down bins. When the CPU exceeds the temperature threshold, it will reduce the CPU ratio by our specified amount of down bins.
In my configuration, I try to achieve 5.6 GHz for light single-threaded workloads and 5.7 GHz when idle.
First, you have to configure the active P-core settings. Instead of setting the maximum ratio for 1 or 2 active P-cores to 55X, we set it to 57X.
Then, we have to configure our down bins. In my case, for 1-active P-core, I set the first temperature threshold to 35 degrees Celsius and the second temperature threshold to 60 degrees Celsius. Then I set a down bin of 1 ratio for each of these temperature thresholds.

The CPU will then behave as follows:
- In idle, when the temperature is below 35 degrees Celsius, the frequency will be 5.7 GHz
- In a light single-threaded workload, when the temperature is below 60 degrees Celsius, the frequency will be 5.6 GHz
- In heavier single-threaded workloads, when the temperature exceeds 60 degrees Celsius, the frequency will be 5.5 GHz

I also configure the OCTVB for the 2-active P-Core scenario. That’s primarily to avoid a reduction of CPU frequency triggered by a background task that runs on a second P-core.
There is more to configuring OCTVB on Alder Lake than what I described so far, but I’m saving that for a future video with Cryo Cooling.
Upon entering the BIOS
- In Advanced Mode, click XMP Profile 1
- Enter the Overclocking settings menu
- Set P-Core Ratio Apply Mode to Turbo Ratio
- Set Number of P-Core of Group 1 to 1
- Set Target P-Core Turbo Ratio Group 1 to 57
- Set Number of P-Core of Group 2 to 2
- Set Target P-Core Turbo Ratio Group 2 to 57
- Set Number of P-Core of Group 3 to 3
- Set Target P-Core Turbo Ratio Group 3 to 54
- Set Number of P-Core of Group 4 to 4
- Set Target P-Core Turbo Ratio Group 4 to 54
- Set Number of P-Core of Group 5 to 5
- Set Target P-Core Turbo Ratio Group 5 to 53
- Set Number of P-Core of Group 6 to 6
- Set Target P-Core Turbo Ratio Group 6 to 53
- Set Number of P-Core of Group 7 to 7
- Set Target P-Core Turbo Ratio Group 7 to 52
- Set Number of P-Core of Group 8 to 8
- Set Target P-Core Turbo Ratio Group 8 to 52
- Set E-Core Ratio Apply Mode to Turbo Ratio Offset
- Set E-Core Turbo Ratio Offset Value to +3
- Enter the Advanced CPU Configuration submenu
- Set CPU Lite Load to Mode 3
- Set TVB Voltage Optimizations to Disabled
- Enter the TVB Points Configuration submenu
- For the first group,
- Set TVB Points #1 Temp. (C) to 35
- TVB Points #1 Ratio Offset to -1
- TVB Points #2 Temp. (C) to 60
- TVB Points #2 Ratio Offset to -1
- For the second group,
- TVB Points #1 Temp. (C) to 35
- TVB Points #1 Ratio Offset to -1
- TVB Points #2 Temp. (C) to 58
- TVB Points #2 Ratio Offset to -1
- For the first group,
- Leave the TVB Points Configuration submenu
- Leave the Advanced CPU Configuration submenu
- Ensure CPU Cooler Tuning is set to Water Cooler (PL1: 4096W)
- Enter the DigitALL Power submenu
- Set CPU Loadline Calibration Control to Mode 3
- Leave the DigitALL power submenu
- Set CPU Core Voltage Mode to Advanced Offset Mode
- Enter the Advanced Offset Mode submenu
- For Voltage Offset When Running CPU Ratio x53,
- Set Voltage Offset Control to +
- Set Voltage Offset Target to 0.035
- For Voltage Offset When Running CPU Ratio x53,
- Leave the Advanced Offset Mode submenu
Then save and exit the BIOS.
We re-ran the benchmarks and checked the performance increase compared to the default operation.
- SuperPI 4M: +10.13%
- Geekbench 5 (single): +9.89%
- Geekbench 5 (multi): +17.73%
- Cinebench R23 Single: +7.17%
- Cinebench R23 Multi: +6.67%
- CPU-Z V17.01.64 Single: +9.58%
- CPU-Z V17.01.64 Multi: +7.06%
- V-Ray 5: +12.70%
- AI Benchmark: +20.71%
- 3DMark Night Raid: +4.49%
- CS:GO FPS Bench: +3.83%
- Final Fantasy XV: +1.11%

Here are the 3DMark CPU Profile scores at stock
- CPU Profile 1 Thread: +8.67%
- CPU Profile 2 Threads: +9.64%
- CPU Profile 4 Threads: +7.82%
- CPU Profile 8 Threads: +7.23%
- CPU Profile 16 Threads: +8.44%
- CPU Profile Max Threads: +6.38%

Unsurprisingly, we achieve the best performance across the board in all our benchmarks. We see a maximum performance increase of almost 21% in AI Benchmark and almost 10% in most single-threaded workloads.
When running Prime 95 Small FFTs with AVX enabled, the average CPU P-core clock is 4918 MHz and the average CPU E-core clock is 3990 MHz with 1.208 volts. The average CPU temperature is 99 degrees Celsius. The ambient and water temperature is 25.0 and 36.7 degrees Celsius. The average CPU package power is 307.1 watts.

When running Prime 95 Small FFTs with AVX disabled, the average CPU P-core clock is 5131 MHz and the average CPU E-core clock is 3998 MHz with 1.297 volts. The average CPU temperature is 100 degrees Celsius. The ambient and water temperature is 25.0 and 36.9 degrees Celsius. The average CPU package power is 319.6 watts.

Intel Core i9-12900KF: Conclusion
Alright, let us wrap this up.
The main reason I put together this system was to see whether EK’s Liteblock concept works. In addition, I was also interested to try out my first 12900KF processor and comparing it to the two Alder Lake Core i9 processors I had tested previously. During my testing, I also ended having a closer look at the V/F Points and OCTVB.
The EK Liteblock is an interesting concept where instead of developing a monoblock solution, MSI and EK worked together to create an alternative way to cool the CPU and VRM. The value of the solution lies in the consensus of the VRM heatsink flat surface height and the CPU water block extension. The result is a solution that is not only much easier to install than a monoblock but also costs significantly less.
In terms of performance, I was quite astonished to see the VRM temperature under load. With a maximum temperature lower than 50 degrees Celsius, the Liteblock’s simple design does work quite well.
This Core i9-12900KF certainly is a great chip and matches what I had achieved with my first Core i9-12900K on launch day: 5.7GHz in Windows, 5.5 to 5.6Ghz for single-threaded workloads, and about 5.2GHz for an all-core workload. The voltages are similar too as I need about 1.45V for the highest frequencies.
The implementation of the V/F Points and OCTVB for Alder Lake is quite interesting. It looks like every motherboard vendor has its own approach to these niche options and it’s always fun to try and figure out how to make it work properly. I had to approach overclocking this lower-priced MSI motherboard differently than I approach overclocking using high-end motherboards or motherboards from other vendors. But in the end, I got exactly where I wanted to be and that’s what’s important.
Anyway, that’s all for today!
I’m starting to run out of subjects for the Alder Lake platform, so unless the Cryo Cooling pops up anytime soon I might take a little break. However, it looks like we’ll be getting a lot of interesting hardware releases in 2022, so stay tuned for more overclocking guides.
As per usual if you have any questions or comments, feel free to drop them in the comment section below.
See you next time!

SkatterBencher #54: AMD Ryzen 9 7900 Overclocked to 5616 MHz - SkatterBencher
[…] explained how I use ElmorLabs products in SkatterBencher #34. By connecting the EFC to the EVC2 device, I monitor the ambient temperature (EFC), water […]
SkatterBencher #49: Intel Core i9-13900K Overclocked to 6100MHz - SkatterBencher
[…] explained how I use ElmorLabs products in SkatterBencher #34. By connecting the EFC to the EVC2 device, I monitor the ambient temperature (EFC), water […]
5 Minute Overclock: Intel Core i9-12900KF to 5700 MHz - 5 Minute Overclock
[…] Please note that this is for entertainment purposes only and most certainly not the whole picture. Please don’t outright copy these settings and apply them to your system. If you want to learn how to overclock this system, please check out the longer SkatterBencher blog post. […]
SkatterBencher #52: Intel Core i9-13900K P-core Overclocked to 6500MHz - SkatterBencher
[…] explained how I use ElmorLabs products in SkatterBencher #34. By connecting the EFC to the EVC2 device, I monitor the ambient temperature (EFC), water […]
SkatterBencher #51: Intel Core i5-13600K Overclocked to 6200MHz - SkatterBencher
[…] explained how I use ElmorLabs products in SkatterBencher #34. By connecting the EFC to the EVC2 device, I monitor the ambient temperature (EFC), water […]
SkatterBencher #50: Intel Core i7-13700K Overclocked to 6000MHz - SkatterBencher
[…] explained how I use ElmorLabs products in SkatterBencher #34. By connecting the EFC to the EVC2 device, I monitor the ambient temperature (EFC), water […]
SkatterBencher #48: AMD Ryzen 5 7600X Overclocked to 5544 MHz - SkatterBencher
[…] explained how I use ElmorLabs products in SkatterBencher #34. By connecting the EFC and PMD to the EVC2 device, I monitor the ambient temperature (EFC), water […]
SkatterBencher #45: AMD Ryzen 9 7950X Overclocked to 5950 MHz - SkatterBencher
[…] explained how I use ElmorLabs products in SkatterBencher #34. By connecting the EFC and PMD to the EVC2 device, I monitor the ambient temperature (EFC), water […]
SkatterBencher #47: AMD Ryzen 7 7700X Overclocked to 5750 MHz - SkatterBencher
[…] explained how I use ElmorLabs products in SkatterBencher #34. By connecting the EFC and PMD to the EVC2 device, I monitor the ambient temperature (EFC), water […]
SkatterBencher #39: AMD Ryzen 7 5800X3D Overclocked to 4741 MHz - SkatterBencher
[…] explained how I use ElmorLabs products in SkatterBencher #34. By connecting the EFC and PMD to the EVC2 device, I monitor the ambient temperature (EFC), water […]
SkatterBencher #37: Intel Core i5-12400 Overclocked to 5300 MHz - SkatterBencher
[…] explained how I use ElmorLabs products in SkatterBencher #34. By connecting the EFC and PMD to the EVC2 device, I monitor the ambient temperature (EFC), water […]
SkatterBencher #36: AMD Ryzen Threadripper 3990X Overclocked to 4500 MHz - SkatterBencher
[…] explained how I use ElmorLabs products in SkatterBencher #34. By connecting the EFC and PMD to the EVC2 device I monitor the ambient temperature (EFC), water […]
SkatterBencher #35: AMD Ryzen 3 5300GE Overclocked to 4628 MHz - SkatterBencher
[…] explained how I use ElmorLabs products in SkatterBencher #34. By connecting the EFC and PMD to the EVC2 device I monitor the ambient temperature (EFC), water […]