SkatterBencher #29: AMD Ryzen 9 5900 B2 Overclocked to 5152 MHz
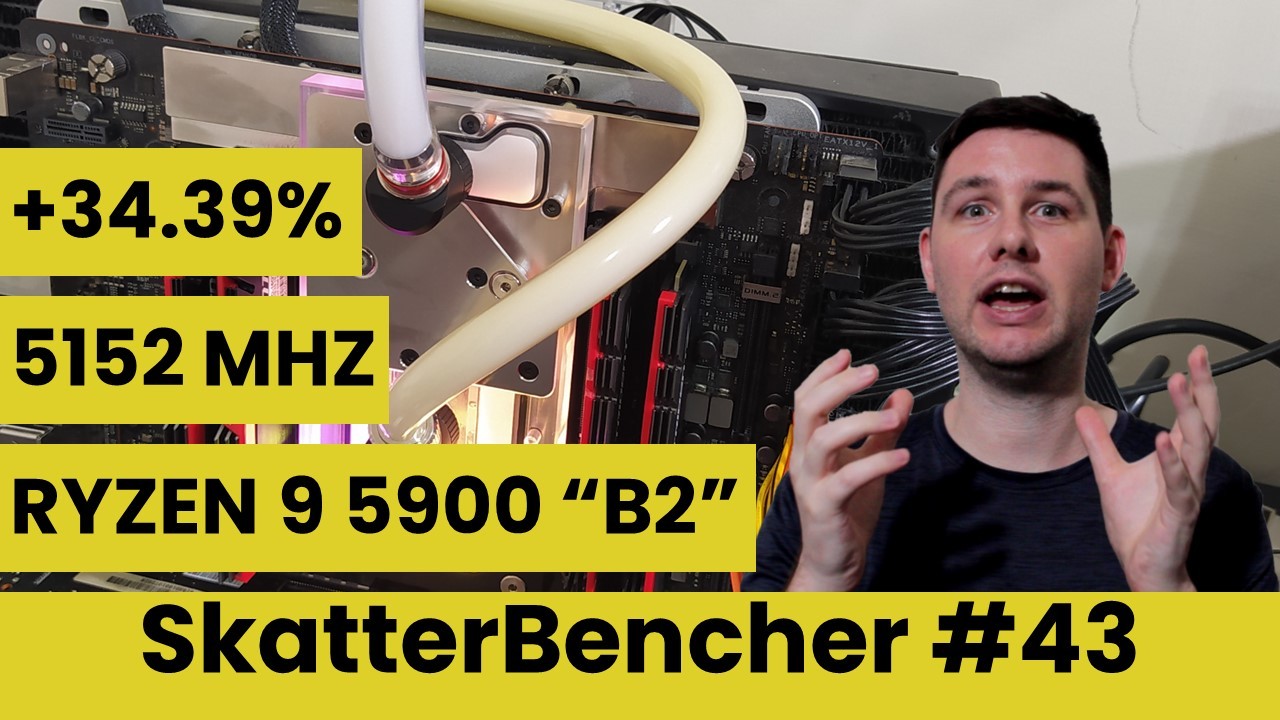
We overclock the AMD Ryzen 9 5900 B2 Stepping processor up to 5152 MHz with the ASUS ROG Crosshair VIII Extreme motherboard and a Shaminocharged PBO.
In today’s article we have a look at overclocking the AMD Ryzen 9 5900 B2 stepping up to 5152 MHz with a Shaminocharged Precision Boost Overdrive.
This is not only our first look at overclocking an OEM exclusive Ryzen 9 non-X processor, but also our first look at a Stepping 2 Vermeer CPU. We Shaminocharge PBO by making use of a new feature on the ROG Crosshair VIII Extreme motherboard called Voltage Suspension.
Alright, there is lots to go through so let’s get started.
Table of Contents
AMD Ryzen 9 5900 B2: Introduction
The AMD Ryzen 9 5900 is part of the Ryzen 5000 series desktop processor lineup. While the four X variants launched together on November 5, 2020, the 2 non-X variants launched 2 months later on January 12, 2021.
Another major difference between the X and non-X variants is the performance. While the 5800X and 5900X are both rated at 105W TDP, the 5800 and 5900 are rated at only 65W. As the CPU dies are identical, the lower power budget translates directly into lower base and boost frequencies.
Our Ryzen 9 5900 has 12 cores with 24 threads, a base frequency of 3 GHz, and a maximum listed boost frequency of 4.7GHz. In comparison, the Ryzen 9 5900X also has 12 cores with 24 threads, but has a base frequency of 3.7 GHz and a maximum boost frequency of 4.8 GHz.

Another novelty of the CPU we’re testing today is that this is a new Stepping 2 Ryzen 5000 processor. All the CPUs we tested in previous SkatterBencher videos are Stepping 0.
A stepping is essentially an architectural iteration or revision of the processor. As AMD manufactures more Ryzen processors, it will discover ways to improve the manufacturing process. When improvements make it into production, they will be identified as a different stepping.
A new stepping can have a wide variety of improvements. These could be simple manufacturing tweaks which optimize for lower power or higher frequency. Or improvements to the manufacturing yield. Steppings could fix actual bugs or defects, or could even be to enable minor features.
Generally, the revision is indicated by a letter and a number. For example, the Ryzen 5000 CPUs in the market almost all have the B0 revision. Increasing the letter would indicate a major change and changing the number would indicate a minor change.
A great example of this would be the Intel Core 2 Q6600 processor – Intel’s very first mainstream quad-core CPU. The processor originally launched with B3 revision and was superceeded by a G0 stepping which offered significantly lower power consumption.
I’ve only come across few examples of the Ryzen 9 5900 B2 processor in the Geekbench 5 database: One Alienware system and one random ASUS system. It also seems that many of the ThreadRipper 5000 leaks mark the CPU as Stepping 2.


So, what does Stepping 2 mean for Ryzen 5000? Frankly – I don’t know. Spoiler alert: I didn’t see any major differences in performance or overclocking capability compared to the Ryzen 5000 CPUs I tested before. So, I presume the difference between Stepping 0 and Stepping 2 are more subtle: improvements in yield, fixing bugs or defects, or feature expansion.
Anyway, what we’re interested in at SkatterBencher is how the Ryzen 9 5900 B2 overclocks. In this video we will cover five different overclocking strategies:
- First, we increase the performance headroom by enabling Precision Boost Overdrive and DOCP
- Second, we tune Precision Boost Overdrive using all the available tools including Curve Optimizer
- Third, we combine our tuned PBO with a manual overclock using ASUS’ Dynamic OC Switcher
- Fourth, we supercharge PBO by increasing the reference clock and voltage offset
- Lastly, we Shaminocharge PBO by making use of the exclusive Voltage Suspension feature of the Crosshair VIII Extreme motherboard

However, before we jump into the overclocking let us quickly go over the hardware and benchmarks we use in this video.
AMD Ryzen 9 5900 B2: Platform Overview
Along with the AMD Ryzen 9 5900 B2 processor and ASUS ROG Crosshair VIII Extreme motherboard, in this guide, we will be using a pair of G.SKILL Trident Z DDR4-4266 memory sticks, an ASUS ROG STRIX RTX 2080TI graphics card, an 512GB M.2 NVMe SSD, a Seasonic Prime 850W Platinum power supply, the ElmorLabs Easy Fan Controller, the EK-Quantum Magnitude water block and EK-Quantum water cooling. All this is mounted on top of our favorite Open Benchtable.


The cost of the components should be around $4,290.
- AMD Ryzen 9 5900 B2 processor: $500
- EK-Quantum Magnitude: $270
- EK-Quantum P360 water cooling kit: $550
- ASUS ROG Crosshair VIII Extreme motherboard: $800
- ASUS ROG Strix RTX 2080 TI graphics card: $1,500
- G.SKILL Trident Z DDR4-4266 memory: $140
- AORUS RGB 512 GB M.2-2280 NVME: $110
- Seasonic Prime 850W Platinum power supply: $200
- ElmorLabs Easy Fan Controller: $20
- Open Benchtable: $200

I covered the ElmorLabs EFC in a separate article on this blog.
Without going into too many details, I have attached an external temperature sensor from the water in the loop to the EFC. Then, I use the low/high setting to map the fan curve from 25 to 40 degrees water temperature. This is used for all overclocking strategies.
ASUS ROG Crosshair VIII Extreme Overview
The ASUS ROG Crosshair VIII Extreme is ASUS’ new top of the line X570 motherboard for AM4. It sits on top of the Dark Hero motherboard we used a couple of times before on this channel. It’s the spiritual successor of the Crosshair VI Extreme motherboard for the X370 chipset.
Major selling points are the fanless PCH cooler and the widest range of product features imaginable. Of course, we also know the Crosshair Extreme motherboards as ROG’s main avenue for overclocking features.


The Crosshair VIII Extreme certainly fulfills this promise with plenty of buttons, jumpers, switches, measuring points, fan and temperature headers, and LED displays. We don’t have the time to cover all the different features, but I do want to highlight the 3 most interesting ones.
- Dynamic OC Switcher
- VLatch
- Voltage Suspension

ASUS Dynamic OC Switcher allows dynamic switching between AMD Precision Boost Overdrive and OC mode on AMD Ryzen processors. It launched exclusively on ASUS ROG Crosshair VIII Dark Hero motherboard last year. The main benefit of Dynamic OC Switcher is that you can benefit from both the high single thread frequencies offered by tuning Precision Boost Overdrive and the high all-core frequency you achieve by manually overclocking.
I used the Dynamic OC Switcher in a couple of SkatterBenchers before and also have a dedicated article, so feel free to check out those for more information.
ASUS VLatch allows enthusiasts to detect the true Vmin and Vmax of the CPU core voltage without having to purchase an expensive oscilloscope. Explaining the VLatch function and purpose gets complicated and thus lengthy very quickly. In short: VLatch uses a separate circuit on the motherboard which keeps track of the peak voltage undershoot and peak voltage overshoot.
I explained VLatch in my Rocket Lake launch article as well as have a dedicated article available on this blog, so feel free to check out those for more information.
ASUS Voltage Suspension is a brand-new feature exclusively available on the Crosshair VIII Extreme motherboard. The term suspension is akin the suspension of a car, though I prefer the more technical term V-Clamp. The purpose of V-Clamp is to force the Core Voltage to stay within a specific range even when using a dynamic voltage like with Precision Boost Overdrive.
We’ll explore the Voltage Suspension in our final overclocking strategy when we Shaminocharge Precision Boost Overdrive, so I won’t cover the details of this feature right now.
So, let’s move forward and have a look at the benchmarks and hardware we’ll be using in this guide.
AMD Ryzen 9 5900 B2: Benchmark Software
We use the following benchmark applications to measure performance and ensure system stability.
- SuperPI 4M https://www.techpowerup.com/download/super-pi/
- Geekbench 5 https://www.geekbench.com/
- HWBOT X265 https://hwbot.org/benchmark/hwbot_x265_benchmark_-_4k/
- Cinebench R23 https://www.maxon.net/en/cinebench/
- V-Ray 5 https://www.chaosgroup.com/vray/benchmark
- 3DMark CPU Profile https://www.3dmark.com/
- 3DMark Night Raid https://www.3dmark.com/
- CS:GO FPS Bench https://steamcommunity.com/sharedfiles/filedetails/?id=500334237
- Final Fantasy XV http://benchmark.finalfantasyxv.com/na/
- Prime 95 https://www.mersenne.org/download/

AMD Ryzen 9 5900 B2: Stock Performance
The first thing we must do before we start any overclocking is check the system performance at default settings.
Please note that out of the box, the Crosshair VIII Extreme enables Precision Boost Overdrive. So, to check the performance at default settings you must
- Go to the Extreme Tweaker menu
- Enter the Precision Boost Overdrive submenu
- Set Precision Boost Overdrive to Disabled
Then save and exit the BIOS.
Here is the benchmark performance at stock:
- SuperPI 4M: 36.389 seconds
- Geekbench 5 (single): 1,604 points
- Geekbench 5 (multi): 11,339 points
- HWBOT X265 4K: 21.915 fps
- Cinebench R23 Single: 1,476 points
- Cinebench R23 Multi: 18,847 points
- V-Ray 5: 14,242 vsamples
- 3DMark Night Raid: 57,414 points
- CS:GO FPS Bench: 603.63 fps
- Final Fantasy XV: 170.96 fps

Here are the 3DMark CPU Profile scores at stock
- CPU Profile 1 Thread: 939
- CPU Profile 2 Threads: 1,858
- CPU Profile 4 Threads: 3,505
- CPU Profile 8 Threads: 6,009
- CPU Profile 16 Threads: 7,746
- CPU Profile Max Threads: 8,434

The peak effective clock is 4741 MHz which is slightly higher than the advertised boost clock of 4700 MHz.

When running Prime 95 Small FFTs with AVX enabled, the average effective CPU clock is 3199 MHz with 0.865 volts. The average CPU temperature is 48 degrees Celsius and the average VRM temperature is 42 degrees Celsius. The average CPU package power is 74 watts.

When running Prime 95 Small FFTs with AVX disabled, the average effective CPU clock is 3489 MHz with 0.924 volts. The average CPU temperature is 48 degrees Celsius and the average VRM temperature is 42 degrees Celsius. The average CPU package power is 76 watts.

Now, let us try our first overclocking strategy.
However, before we get going, make sure to locate any of the following three buttons: Safe Boot button, ReTry button, and CMOS Clear button.
The Safe Boot button temporarily applies safe settings to the BIOS while retaining the overclocked settings, allowing you to modify the settings causing a boot failure.
The ReTry button forces the system to reboot in case it locks up during the boot process where the Reset button is rendered useless. It will not change anything to your BIOS settings.
Both Safe Boot and ReTry buttons sit right next to each other at the bottom of your motherboard.
Pressing the Clear CMOS button will reset all your BIOS settings to default. This is useful in case you want to start your BIOS configuration from scratch. However, it does not delete any of the BIOS profiles previously saved. The Clear CMOS button is located on the rear I/O panel.


OC Strategy #1: PBO + DOCP
In our first overclocking strategy we simply take advantage of AMD’s Precision Boost Overdrive and ASUS DOCP.
PBO stands for Precision Boost Overdrive and is an extension of the Precision Boost technology integrated in all AMD Ryzen CPUs. Precision Boost uses a proprietary algorithm with inputs from a plethora of sensors inside the CPU to determine the optimal frequency and voltage at any given time. Precision Boost allows the CPU to opportunistically increase its clock frequency over base frequency based on the available power and thermal headroom.

Precision Boost Overdrive is the overclocker’s extension of Precision Boost as it provides us with tools to tweak the Precision Boost algorithm and achieve higher frequencies. It is important to mention that using Precision Boost Overdrive is a form of overclocking and is therefore not covered by warranty.

DOCP is ASUS’ term for their implementation of XMP on AMD platforms. XMP is a technology that lets you automatically overclock the system memory to improve system performance. XMP is an extension to the standard JEDEC specification that allows a memory vendor to program different settings onto the memory stick. The settings include the memory frequency, the memory timings as well as the memory voltage.
Upon entering the BIOS
- Go to the Extreme Tweaker menu
- Set Ai Overclock Tuner to D.O.C.P. Standard
- Enter the Precision Boost Overdrive submenu
- Set Precision Boost Overdrive to Enabled
Then save and exit the BIOS.
We re-ran the benchmarks and checked the performance increase compared to the default operation.
- SuperPI 4M: +1.53%
- Geekbench 5 (single): +4.18%
- Geekbench 5 (multi): +17.28%
- HWBOT X265 4K: +21.37%
- Cinebench R23 Single: +6.37%
- Cinebench R23 Multi: +18.70%
- V-Ray 5: +17.93%
- 3DMark Night Raid: +15.50%
- CS:GO FPS Bench: +1.99%
- Final Fantasy XV: +5.08%

We also check the 3DMark CPU profile improvement:
- CPU Profile 1 Thread: +0.75%
- CPU Profile 2 Threads: +1.24%
- CPU Profile 4 Threads: +2.25%
- CPU Profile 8 Threads: +11.55%
- CPU Profile 16 Threads: +21.15%
- CPU Profile Max Threads: +27.69%

Enabling Precision Boost Overdrive allows the CPU to run at higher power consumption. So, we expect to see the largest performance gains in multithreaded applications. And that is in fact what we see with up to +21.37% benchmark performance increase and up to +27.69% increase in 3DMark CPU Profile.
The peak effective clock is 4748 MHz which is slightly higher than the advertised boost clock of 4700 MHz and almost matches the maximum firmware programmed boost clock of 4750 MHz.

When running Prime 95 Small FFTs with AVX enabled, the average effective CPU clock is 4263 MHz with 1.186 volts. The average CPU temperature is 86 degrees Celsius and the average VRM temperature is 51 degrees Celsius. The average CPU package power is 191 watts.

When running Prime 95 Small FFTs with AVX disabled, the average effective CPU clock is 4331 MHz with 1.221 volts. The average CPU temperature is 80 degrees Celsius and the average VRM temperature is 50 degrees Celsius. The average CPU package power is 177 watts.

OC Strategy #2: PBO Tuned
In our second overclocking strategy we use the aforementioned Precision Boost Overdrive tools to tune our CPU.
We follow the PBO tuning process as outlined in SkatterBencher #24 with the Ryzen 7 5700G. As we have covered Precision Boost Overdrive 2 in detail in another video, I won’t put you through the same theory again.
Practically, we follow the same process. That means we manually increase the PBO power and current limits, increase the maximum CPU Boost Clock Override by 200 MHz, and use Curve Optimizer to finetune the voltage frequency curve of each CPU core individually. Though, note that with this CPU we could set all cores to a maximum of negative 30 steps.

The result is that the PBO algorithm much more aggressively pursues higher voltages, which in turn provides us with higher overclocking frequencies.
Upon entering the BIOS
- Go to the Extreme Tweaker menu
- Set Ai Overclock Tuner to D.O.C.P. Standard
- Enter the Precision Boost Overdrive submenu
- Set Precision Boost Overdrive to Manual
- Set PPT Limit to 250
- Set TDC Limit to 200
- Set EDC Limit to 200
- Set Precision Boost Overdrive Scalar to Manual
- Enter the Curve Optimizer menu
- Set Curve Optimizer to All Cores
- Set All Core Curve Optimizer Sign to Negative
- Set All Core Curve Optimizer Magnitude to 30
- Leave the Curve Optimizer menu
- Set Customized Precision Boost Overdrive Scalar to 10X
- Set Max CPU Boost Clock Override to 200
Then save and exit the BIOS.
We re-ran the benchmarks and checked the performance increase compared to the default operation.
- SuperPI 4M: +6.89%
- Geekbench 5 (single): +6.67%
- Geekbench 5 (multi): +17.72%
- HWBOT X265 4K: +21.95%
- Cinebench R23 Single: +8.40%
- Cinebench R23 Multi: +19.09%
- V-Ray 5: +17.96%
- 3DMark Night Raid: +15.31%
- CS:GO FPS Bench: +2.08%
- Final Fantasy XV: +4.36%

We also check the 3DMark CPU profile improvement:
- CPU Profile 1 Thread: +1.92%
- CPU Profile 2 Threads: +1.67%
- CPU Profile 4 Threads: +2.48%
- CPU Profile 8 Threads: +11.92%
- CPU Profile 16 Threads: +21.31%
- CPU Profile Max Threads: +28.20%

Finetuning Precision Boost Overdrive enables higher frequency headroom for both single threaded and multi-threaded workloads. We see an increase of almost 7% in single threaded benchmarks and up to +22% in multi-threaded workloads. In 3DMark CPU Profile we see an improvement of up to +28%
The peak effective clock is 4854 MHz which is much higher than the advertised boost clock of 4700 MHz but lower than the extended firmware limit of 4950 MHz.

When running Prime 95 Small FFTs with AVX enabled, the average effective CPU clock is 4234 MHz with 1.187 volts. The average CPU temperature is 86 degrees Celsius and the average VRM temperature is 51 degrees Celsius. The average CPU package power is 192 watts.

When running Prime 95 Small FFTs with AVX disabled, the average effective CPU clock is 4312 MHz with 1.215 volts. The average CPU temperature is 79 degrees Celsius and the average VRM temperature is 50 degrees Celsius. The average CPU package power is 180 watts.

OC Strategy #3: Dynamic OC Switcher
Dynamic OC Switcher is ASUS’ very clever way of solving one of AMD’s biggest problems when overclocking: while Precision Boost Overdrive provides the best benchmark performance in single and low-threaded benchmark applications, the best multi-threaded performance is achieved by manually overclocking. So, you have to compromise: best single threaded performance or best multi-threaded performance.
Dynamic OC Switcher gives us the best of both worlds as it allows the system to actively switch between Precision Boost Overdrive and manual OC mode. As I have demonstrated in previous SkatterBencher videos, DOS requires little additional configuration work.
Think about DOS as follows: it is exactly like Precision Boost Overdrive, but the lowest frequency is manually set by us. So, we need to know two things:
- What is the lowest frequency we will allow
- At which point do we want DOS to switch between PBO and OC Mode
Sadly, we cannot simply configure a minimum frequency and have the system switch based on that. Instead, we need to use a proxy metric: a certain current threshold or a certain temperature threshold. There is not one specific method of determining the right threshold, so I’ll show you one example using Cinebench R23.

For our minimum frequency, we choose our maximum stable manual overclock. I verified the maximum stable manual overclock of this CPU using Prime 95 Small FFTs with AVX disabled and ended up with a ratio of 46.25 for CCD0 and 45.50 for CCD1 with a core voltage of 1.345V.
So, our minimum frequency will be the average of 4625 and 4550 MHz, so 4587 MHz.
In the Operating System, we first open HWiNFO. We make sure we can monitor both the Effective Clock Frequency and the CPU Core Current.
Then we start the Cinebench R23 multi-threaded benchmark workload and change the affinity to 1 core in task manager. Now monitor the effective clock frequency. It will be higher than our target of 4587 MHz. Now you can gradually increase the Cinebench R23 thread count. When you reach 4587 MHz or below, check the CPU Core Current reading. This value will be our input for the DOS Current Threshold.
As you can see, I’m not enabling threads sequentially. That’s because as some cores are better than others, they will boost to higher frequencies. So, I want to make sure I am not too conservative when picking the switching point.
I checked which cores are the best by running the CoreCycler application and checking the peak effective clock using HWiNFO.
In our case, we reach the frequency of 4587 MHz at 7 active threads. The current varies between 43.7 and 51.5 amps. To be on the safe side we pick 47A as the Current Threshold.
So, to reiterate what’s happening: Dynamic OC Switcher will switch between OC mode and Precision Boost Overdrive when the CPU current hits 47A. Anything above 47A will engage manual OC mode; anything below 47A will engage Precision Boost Overdrive.

As for the Precision Boost Overdrive settings, we just copy the configuration from our previous OC Strategy.
Upon entering the BIOS
- Go to the Extreme Tweaker menu
- Set Ai Overclock Tuner to D.O.C.P. Standard
- Enter the CPU Core Ratio (Per CCX) submenu
- Set Core VID to 1.345
- Set CCD0 CCX0 Ratio to 46.25
- Set CCD1 CCX0 Ratio to 45.50
- Set Dynamic OC Switcher to Enabled
- Set Current Threshold to Switch to OC Mode to 47
- Set Calibrated Temperature Threshold to switch back to 90
- Leave the CPU Core Ratio (Per CCX) submenu
- Enter the Precision Boost Overdrive submenu
- Set Precision Boost Overdrive to Manual
- Set PPT Limit to 250
- Set TDC Limit to 200
- Set EDC Limit to 200
- Set Precision Boost Overdrive Scalar to Manual
- Enter the Curve Optimizer menu
- Set Curve Optimizer to All Cores
- Set All Core Curve Optimizer Sign to Negative
- Set All Core Curve Optimizer Magnitude to 30
- Leave the Curve Optimizer menu
- Set Customized Precision Boost Overdrive Scalar to 10X
- Set Max CPU Boost Clock Override to 200
Then save and exit the BIOS.
We re-ran the benchmarks and checked the performance increase compared to the default operation.
- SuperPI 4M: +6.01%
- Geekbench 5 (single): +5.61%
- Geekbench 5 (multi): +17.98%
- HWBOT X265 4K: +25.82%
- Cinebench R23 Single: +8.47%
- Cinebench R23 Multi: +34.39%
- V-Ray 5: +22.72%
- 3DMark Night Raid: +15.83%
- CS:GO FPS Bench: +2.21%
- Final Fantasy XV: +3.84%

We also check the 3DMark CPU profile improvement:
- CPU Profile 1 Thread: +1.81%
- CPU Profile 2 Threads: +1.72%
- CPU Profile 4 Threads: +3.48%
- CPU Profile 8 Threads: +12.22%
- CPU Profile 16 Threads: +23.02%
- CPU Profile Max Threads: +32.91%

Dynamic OC Switcher combines our PBO tuned configuration for single threaded peak frequency and our superior all-core manual overclock. The expectation is that we see good performance increase in all types of workloads.
And that’s what we also see when checking the benchmark performance. Our benchmark performance gains over stock settings range from +2.21% in CS:GO to +34.39% in Cinebench R23 Multi.
The peak effective clock is 4860 MHz which is much higher than the advertised boost clock of 4700 MHz but lower than the extended firmware limit of 4950 MHz.

When running Prime 95 Small FFTs with AVX enabled, the system does not pass the stability test even though it could run all our other benchmarks.
When running Prime 95 Small FFTs with AVX disabled, the average effective CPU clock is 4588 MHz with 1.296 volts. The average CPU temperature is 94 degrees Celsius and the average VRM temperature is 53 degrees Celsius. The average CPU package power is 221 watts.

OC Strategy #4: PBO Supercharged
In our fourth overclocking strategy we are looking to supercharge the Precision Boost Overdrive algorithm to get even more performance.
I went through the process of explaining what I mean by supercharging PBO in two previous articles: SkatterBencher #26 with the Ryzen 9 5900X and SkatterBencher #27 with the Ryzen 9 5950X. It’s quite a lengthy and detailed overview so I would suggest you check out those videos to learn more.
The long story short is that we’re increasing the base clock frequency and use voltage offsets to manually change the CPU voltage frequency curve
The voltage frequency curve, or V/f curve, is a line that describes the relationship between the operating frequency and the voltage required to run stably at that frequency. Each individual core in your AMD Ryzen CPU has a V/f curve. Better cores which require less voltage for a given frequency will be able to boost to higher frequencies given a certain voltage.

Precision Boost technology uses this V/f curve information to dynamically increase the CPU operating frequency. The boost algorithm determines the maximum allowed voltage for a given set of input parameters. The inputs include not just power, current, and temperature, but also quantity of active cores, the core quality, and so on. Once the algorithm has determined the maximum allowed voltage, it applies the according frequency based on the V/f curve.
The base clock frequency is the reference clock frequency for many parts in your system, including the CPU cores but also the system memory, PCIe, and SATA. When increasing the base clock frequency you change all the frequencies that use the BCLK as reference clock. While this can result in additional performance, it can also cause instability so be careful.
For example, on this platform, I must use an M.2 drive connected to the CPU PCIe lanes to use over 101 MHz base clock frequency as my SATA drives are no longer showing up.

As the Precision Boost algorithm is BCLK-unaware, we can use this reference frequency to push the core frequency higher than what the algorithm wants to set it at. For example, if the algorithm pushes the frequency to 5000 MHz and we use a base clock frequency of 101 MHz instead of the default 100 MHz, then the actual frequency will be 5000 x 1.01 = 5050 MHz.
This is of course a nice frequency bump but without additional voltage this won’t be stable
By adding an additional voltage offset we can look for stability at the highest frequency range. But, also keep in mind that adding an offset to the entire V/f curve means that you’ll also get higher voltage at lower frequencies. In heavy multi-threaded workloads that means you’ll run out of thermal headroom faster than without the voltage offset.
One last note on using voltage offsets: setting a certain offset will not result in the actual voltage increasing by that exact amount. Here’s why:
When the Precision Boost algorithm determines the optimal voltage for a given situation, it will request the voltage controller on the motherboard to provide that voltage. It does this with a VID request. The voltage controller takes that VID request, adds our manual voltage offset, then outputs this voltage to the CPU.
The CPU has many sensors on board to monitor its health and stability. When it senses that the actual voltage is higher than expected (because we added a voltage offset), it will reduce its requested VID to compensate. While this kind of monitoring and behavior is very useful to ensure continued stability when there is a significant voltage droop due to changes in workload, it is a bit annoying when trying to push the voltage up.

With our CPU, we can see that the maximum voltage in a Geekbench5 run increases slower than our voltage offset. Adding a +50mV offset results in a 48mV increase in Vcore, but adding a +200mV offset results in only a 168mV increase.
In a heavy workload like Prime95 Small FFTs with AVX disabled, this effect is even more pronounced. Adding a +50mV offset results in only a 25mV increase in Vcore, and adding anything more than +100mV offset results in only 80mV to 85mV extra Vcore.

Do note that this applies only to the situation where you’re overclocking via Precision Boost Overdrive. When you do manual overclocking, the Ryzen CPU switches to “OC Mode” and some functions inside the SMU will be disabled – including features that monitor power, voltage, and current limits. Hence why the extreme overclockers can use such high voltages even in multi-threaded benchmarks like Cinebench.
Now that we have all the information how to supercharge PBO, let’s get into the BIOS and configure our overclock.
There are a couple of settings that you definitely need to know when using BCLK overclocking with the Crosshair VIII Extreme. The motherboard is tuned for both ambient and extreme overclocking and thus has a lot of auto-rules implemented to help with easy overclocking.
However, the same auto-rules that help make manual overclocking very easy can sometimes make overclocking with Precision Boost Overdrive more tricky.
When changing to BCLK overclocking, the auto-rules of the BIOS force the CPU into OC mode and thus has all Precision Boost function disabled. So, you’ll end up with a fixed ratio in the Operating System. To avoid this make sure to enable both Core Performance Boost and Force OC Mode disabled. Yes, that’s enable the disable setting.
Also, make sure to enable Global C-State Control. Without it, the effective clock frequency will increase up to 101MHZ BCLK but then sharply drop by about 100 MHz. By enabling this setting you ensure that the PBO frequency keeps scaling with the reference clock.


Upon entering the BIOS
- Go to the Extreme Tweaker menu
- Set Ai Overclock Tuner to D.O.C.P. Standard
- Set BCLK Frequency to 104.00
- Set Memory Frequency to DDR-4229MHz
- Set Core Performance Boost to Enabled
- Enter the Precision Boost Overdrive submenu
- Set Precision Boost Overdrive to Manual
- Set PPT Limit to 250
- Set TDC Limit to 200
- Set EDC Limit to 200
- Set Precision Boost Overdrive Scalar to Manual
- Enter the Curve Optimizer menu
- Set Curve Optimizer to Per Core
- Set Core 0 to Core 11 Curve Optimizer Sign to Negative
- Set Core 0 to Core 11, except Core 2, Curve Optimizer Magnitude to 30
- Set Core 2 Curve Optimizer Magnitude to 25
- Leave the Curve Optimizer menu
- Set Customized Precision Boost Overdrive Scalar to 10X
- Set Max CPU Boost Clock Override to 200
- Leave the Precision Boost Overdrive submenu
- Enter the Tweaker’s Paradise submenu
- Set Force OC Mode Disable to Enabled
- Leave the Tweaker’s Paradise submenu
- Set CPU Core Voltage to Offset mode
- Set offset Mode sign to +
- Set CPU Core Voltage Offset to 0.075
- Go to the Advanced menu
- Enter the AMD CBS submenu
- Enter the CPU Common Options submenu
- Set Global C-State Control to Enabled
- Enter the CPU Common Options submenu
- Enter the AMD CBS submenu
Then save and exit the BIOS.
We re-ran the benchmarks and checked the performance increase compared to the default operation.
- SuperPI 4M: +10.61%
- Geekbench 5 (single): +8.67%
- Geekbench 5 (multi): +19.11%
- HWBOT X265 4K: +23.17%
- Cinebench R23 Single: +11.38%
- Cinebench R23 Multi: +20.27%
- V-Ray 5: +19.28%
- 3DMark Night Raid: +19.12%
- CS:GO FPS Bench: +2.17%
- Final Fantasy XV: +5.66%

We also check the 3DMark CPU profile improvement:
- CPU Profile 1 Thread: +5.01%
- CPU Profile 2 Threads: +4.52%
- CPU Profile 4 Threads: +4.85%
- CPU Profile 8 Threads: +14.21%
- CPU Profile 16 Threads: +22.81%
- CPU Profile Max Threads: +29.04%

Our expectation going in would be to see an approximate 4% improvement over the PBO Tuned from OC Strategy #2. We see the highest performance results in all benchmarks and an improvement over our stock system ranging from +2.17% in CS:GO to +29.04% in CPU Profile Max Threads.
The peak effective clock is 5031 MHz which is much higher than the advertised boost clock of 4700 MHz and exceeds the extended firmware limit of 4950 MHz. This is of course because we increased the reference clock frequency from 100 MHz to 104 MHz.

When running Prime 95 Small FFTs with AVX enabled, the system does not pass the stability test even though it could run all our other benchmarks.
When running Prime 95 Small FFTs with AVX disabled, the average effective CPU clock is 4385 MHz with 1.307 volts. The average CPU temperature is 93 degrees Celsius and the average VRM temperature is 51 degrees Celsius. The average CPU package power is 225 watts.

OC Strategy #5: PBO Shaminocharged
In our final overclocking strategy we are Shaminocharging Precision Boost Overdrive.
Many young viewers probably know Shamino as a highly experienced engineer and overclocker working at ASUS ROG and responsible for making possible many of the Liquid Helium overclocking events that led to CPU Frequency world records. In recent history, that includes the 7.3 GHz 11900K, 7.7 GHz 10900K, and 7.6 GHz 9900K. He is in part responsible for many of the overclocking features that come to ASUS ROG motherboards like the Dynamic OC Switcher and VLatch.

Older viewers will know that Shamino has been in the industry for much longer than his current stint at ASUS ROG. Prior to ASUS, Shamino worked at EVGA where he helped develop the X58 Classified and the Classified SR-2.
Before his short stint at EVGA, Shamino also worked at Foxconn where he helped set up the Quantum Force project. This project was targeted at developing high-end motherboards for the enthusiast market and resulted most famously in the X48 BlackOps motherboard.
Generally speaking, wherever Shamino goes, also a lot of competitive overclockers go. As HWBOT put forward in 2013: there is a certain Shamino effect which seems to indicate that at least the HWBOT competitive overclocking scene is drawn to products that have a Shamino touch to it.
Even older viewers will undoubtedly remind me that prior to his life developing products, Shamino was active at VR-Zone. In the early 2000s VR-Zone was one of the main websites for overclockers as it featured not only an early overclocking database but also plenty of overclocking guides. Shamino spearheaded the local overclocking team and was highly competitive on the 3DMark leaderboards. In fact, he would go on to break many 3DMark world records and compete with the very best extreme overclockers of that time.

But perhaps it was written in the stars that Shamino would end up at the ASUS Republic of Gamers team as he featured in a very early ROG overclocking advertisement showing off a 3DMark06 world record using the ROG Striker Extreme from 2007.
Anyway, the point I’m trying to make is that by Shaminocharging I mean that we’re going to do something beyond our traditional scope to get a better overclocking result.
Specifically, today we’re using the Voltage Suspension feature of the Crosshair VIII Extreme.
Voltage Suspension: Theory
Voltage Suspension is a feature included in the External Digi+ Power Control menu of the BIOS. At the moment of recording, I believe it’s only available in beta BIOSes like the 0055 I’m using for this guide. However, the feature should also make it to public BIOSes and pop up when using Vermeer CPUs.
The term suspension is akin the suspension of a car, though I prefer the more technical term V-Clamp. The purpose of V-Clamp is to force the Core Voltage to stay within a specific range even when using a dynamic voltage like with Precision Boost Overdrive.
To achieve this, there’s a special hardware circuitry on the motherboard PCB. Essentially the circuitry has two main functions: one function to monitor what the CPU requests as VID (so voltage), another function to correct this request and adjust it according to our custom suspension rules.

We can configure the Voltage Suspension by setting the voltage ceiling and voltage floor. Obviously, the ceiling is our maximum voltage and the floor is our minimum voltage. We can configure the ceiling and floor in static mode or dynamic mode.
In Static mode we set a maximum and minimum voltage and the Voltage Suspension function will try to keep the voltage between these two levels.
In Dynamic mode we kind of make our own voltage frequency curve, though we don’t use frequency as a parameter directly. Instead, we configure the ceiling and floor voltage as the function of four points defined by a voltage and temperature. So, I guess it’s more like a voltage temperature curve.

It gets a little complicated in the BIOS, but here’s what it boils down to:
- Ceiling values determine the maximum upper limit of the allowed voltage
- Floor values determine the minimum lower limit of the allowed voltage
- Cold Temp sets the lower temperature target; lower typically means light workloads with few cores active
- Hot Temp sets the upper temperature target; higher typically means heavy multi-threaded workloads with all cores active
- VMin voltages are mapped against Hot Temp targets
- VMax voltages are mapped against Cold Temp targets

Maybe the best way to comprehend the feature is with an example. Let’s take the following parameters:
- Floor Low Vmin: 1.05
- Floor Hot Temp: 95
- Floor High Vmin: 1.30
- Floor Cold Temp: 50
- Ceiling Low Vmax: 1.20
- Ceiling Hot Temp: 88
- Ceiling High Vmax: 1.45
- Ceiling Cold Temp: 65
Now let’s put these parameters our voltage temperature curve with temperature on the x-axis and voltage on the y-axis. We mark our four points on the graph, then connect the two ceiling points and the two floor points. Now we have a linearly scaling curve for our voltage as function of the temperature.

Linear scaling means that the voltage suspension limits slide up and down the temperature scale. For example, if the temperature is 75 degrees Celsius, the voltage ceiling voltage will be about 1.35V and the voltage floor will be 1.15V.

Note that the scaling does not continue linearly but the ceiling and floor are the upper and lower limit of the voltage target. So, 1.45V is the voltage ceiling at 65 degrees Celsius and below. And 1.20V is the voltage ceiling at 88 degrees Celsius and above. The same applies to the floor voltages.

Moving these four configurable points will alter the voltage temperature scaling according to your needs.
The V-Clamp is effective up to 0.3V difference between the requested voltage by the CPU and our configured voltage target. Returning to our example:
At a temperature of 65 degrees Celsius the voltage ceiling is 1.45V. If the CPU requests 1.55V, then the voltage will be 1.45V as the difference between both values is less than 0.3V and our ceiling is 1.45V.
At a temperature of 50 degrees Celsius the voltage floor is 1.3V. If the CPU requests 0.95V, then the voltage will be 1.25V as difference between floor voltage and requested CPU voltage is more than 0.3V. And, V-Clamp does not exceed 0.3V.

In addition to the ability to V-Clamp the Core Voltage, the Voltage Suspension also has a CO Mitigator feature.
CO mitigator aims to improve the Curve Optimization undervolting margins by boosting the voltage ever so slightly under very light loads. It does this by monitoring the current draw. When the current drops below a certain point, the voltage is boosted by 0.3V (yes, the maximum V-clamp). You can manually configure this point in the BIOS, though it is recommended to stick with the default of 0.3. This value isn’t voltage or amps, it’s just a unit to configure the co mitigator. Setting a higher value may cause the additional voltage to also be applied when there’s an actual light load and thus negatively impact your overclock.
Note that Voltage Suspension is still affected by the CPU VCore load-line and doesn’t affect any undershoot or overshoot. As a reminder: voltage suspension aims to adjust the request voltage by the CPU to stay within a pre-defined upper and lower limit. Any effect of the load-line occurs after this re-adjustment.

Voltage Suspension: Benefits & Applicability
I found five situations where Voltage Suspension can be effective in helping you achieve higher performance when overclocking.
- Increase maximum overclocking frequency
- Increase peak effective clock
- Mitigate instability caused by aggressive Curve Optimizer settings
- Improve temperature, stability, and frequency for heavy multi-threaded workloads
- Mitigate instability caused by rapid fluctuations from heavy all-core load to idle and back

First, the obvious one: when you increase the PBO frequency using the reference clock, you will need higher voltages to ensure stability. You can use a higher ceiling voltage to have a higher voltage than Precision Boost requests. This may help you stabilize the overclock.

Second, you can achieve slightly higher peak effective clock frequencies for light workloads by trimming the maximum voltage using the voltage ceiling. The starting point would be to check the peak voltage first, then lower it step by step using the dynamic ceiling Vmax. Capping the peak voltage with our manual ceiling may trigger the CPU to sense the voltage for a given frequency is too low and increase the requested VID which in turn could help push the frequency slightly higher. Of course, you must check carefully for clock stretching as trimming the voltage may cause instability. I was able to find scenarios where I could achieve about 20MHz higher peak effective clock in light workloads.

Third, you can use Voltage Suspension to mitigate instability when running aggressive Curve Optimizer settings. As you know, Curve Optimizer allows us to manipulate the voltage frequency curve of each of our CPU cores. By using a negative curve optimizer setting the Precision Boost algorithm will use less voltage for a given frequency. Or, of course, achieve a higher frequency for a given voltage.
However too low voltage will result in instability. There are two ways to mitigate instability due to too low voltage as a result of aggressive use of curve optimizer.
- One, you can use the CO mitigator to boost the voltage ever so slightly under very light loads.
- Two, you can configure the floor Vmax such that at light loads the voltage would not drop below a certain level.

The fourth application of Voltage Suspension is the one I found most useful. Namely mitigating the effects of using a voltage offset on heavy workload stability. As you’ve seen from our PBO Supercharged overclocking strategy, when adding a voltage offset the Prime95 SmallFFTs with AVX enabled workload was no longer stable. But as you’ll see later on, with Voltage Suspension I was not only able to get the system stable but also lower the operating temperatures significantly.

Lastly, you can use Voltage Suspension to mitigate the effects of a transient load. In some situations, you may find that the workload is switching between full load and no load rapidly. The difference in load and the effect it has on the effective voltage could result in an unstable system. By setting an appropriate voltage floor, you can try to mitigate this issue.

Voltage Suspension: Setting Up Your System
Now comes the part where I’d like to provide you with a step-by-step guide on how to set up the Voltage Suspension configuration. However, truth be told … I don’t have a solid procedure yet. So rather than pretending I do, I’ll share my configuration and give you some context how I approached the configuration.
I’m sure that as more experienced enthusiasts and overclockers get their hands on this feature, better approaches will surface. So, I’d love to hear from you how you set up Voltage Suspension on your system.
Here are my Voltage Suspension settings:
- Floor Low Vmin: 1.15
- Floor Hot Temp: 90
- Floor High Vmin: 1.40
- Floor Cold Temp: 60
- Ceiling Low Vmax: 1.20
- Ceiling Hot Temp: 85
- Ceiling High Vmax: 1.53125
- Ceiling Cold Temp: 65
Let’s put them in a chart and label the points A, B, C, and D. With,
- A = ceiling high
- B = floor high
- C = ceiling low
- D = floor low

To set point A, I checked the Vcore and temperature when one core is loaded during CoreCycler. I tried to find the lowest voltage needed to achieve the highest stable peak effective clock frequency for all cores.
To set point B, I tried lowering point A in voltage until I saw clock stretching occur.
To set point C, I relied on the information from OC Strategy #2 where we tuned PBO. When running Prime 95 Small FFTs with AVX enabled, the average effective CPU clock was 4234 MHz with 1.187 volts and the average CPU temperature is 86 degrees Celsius. So my aim was to limit the maximum voltage to 1.2 at a temperature of around 85 degrees Celsius.
To set point D, I … kinda just put it slightly lower than point C.

In terms of additional peak frequency, we didn’t gain much over our PBO Supercharged OC strategy. However, for our all-core workloads the results are much more impressive. Not only did we manage to get a stable system for Prime95 Small FFTs with AVX enabled, we also achieved 60MHz higher frequency at 9 degrees Celsius lower temperature. The average CPU Package Power is almost 30W lower too!
In fact, the temperature improvement was so good that our Prime95 Small FFTs with AVX enabled was not only stable but also hitting too high frequency for 1.2V. To limit the frequency I had to lower the PPT limit to 205 which resulted in a stable frequency.

Now that we understand Voltage Suspension, let’s apply it to our system
Upon entering the BIOS
- Go to the Extreme Tweaker menu
- Set Ai Overclock Tuner to D.O.C.P. Standard
- Set BCLK Frequency to 104.00
- Set Memory Frequency to DDR-4229MHz
- Set Core Performance Boost to Enabled
- Enter the Precision Boost Overdrive submenu
- Set Precision Boost Overdrive to Manual
- Set PPT Limit to 205
- Set TDC Limit to 150
- Set EDC Limit to 195
- Set Precision Boost Overdrive Scalar to Manual
- Enter the Curve Optimizer menu
- Set Curve Optimizer to Per Core
- Set Core 0 to Core 11 Curve Optimizer Sign to Negative
- Set Core 0 to Core 11, except Core 2, Curve Optimizer Magnitude to 30
- Set Core 2 Curve Optimizer Magnitude to 25
- Leave the Curve Optimizer menu
- Set Customized Precision Boost Overdrive Scalar to 10X
- Set Max CPU Boost Clock Override to 200
- Leave the Precision Boost Overdrive submenu
- Enter the External Digi+ Power Control submenu
- Set Core Voltage Suspension to Enabled
- Set Co mitigator to 0.3
- Set Voltage Floor Mode to Dynamic
- Set Floor Low VMin to 1.15
- Set Floor Hot Temp to 90
- Set Floor High VMin to 1.40
- Set Floor Cold Temp to 60
- Set Voltage Ceiling Mode to Dynamic
- Set Ceiling Low VMax to 1.20
- Set Ceiling Hot Temp to 85
- Set Ceiling High VMax to 1.53125
- Set Ceiling Cold Temp to 65
- Set Core Voltage Suspension to Enabled
- Leave the External Digi+ Power Control submenu
- Enter the Tweaker’s Paradise submenu
- Set Force OC Mode Disable to Enabled
- Leave the Tweaker’s Paradise submenu
- Set CPU Core Voltage to Offset mode
- Set offset Mode sign to +
- Set CPU Core Voltage Offset to 0.075
- Go to the Advanced menu
- Enter the AMD CBS submenu
- Enter the CPU Common Options submenu
- Set Global C-State Control to Enabled
- Enter the CPU Common Options submenu
- Enter the AMD CBS submenu
Then save and exit the BIOS.
We re-ran the benchmarks and checked the performance increase compared to the default operation.
- SuperPI 4M: +11.01%
- Geekbench 5 (single): +8.79%
- Geekbench 5 (multi): +19.86%
- HWBOT X265 4K: +23.92%
- Cinebench R23 Single: +12.06%
- Cinebench R23 Multi: +21.65%
- V-Ray 5: +21.53%
- 3DMark Night Raid: +19.60%
- CS:GO FPS Bench: +2.18%
- Final Fantasy XV: +5.71%

We also check the 3DMark CPU profile improvement:
- CPU Profile 1 Thread: +5.01%
- CPU Profile 2 Threads: +4.48%
- CPU Profile 4 Threads: +5.16%
- CPU Profile 8 Threads: +14.36%
- CPU Profile 16 Threads: +23.65%
- CPU Profile Max Threads: +30.55%

After Shaminocharging our Precision Boost Overdrive, we once again improve all our benchmark scores. However, since we didn’t actually increase the frequency, the performance improvement is minimal. The benchmark performance improvement over stock ranges from +2.18% in CS:GO to +30.55% in CPU Profile Max Threads.
The peak effective clock is 5036 MHz which is much higher than the advertised boost clock of 4700 MHz and exceeds the extended firmware limit of 4950 MHz. This is of course because we increased the reference clock frequency from 100 MHz to 104 MHz.

The biggest impact of the Voltage Suspension can be seen in Prime95.
When running Prime 95 Small FFTs with AVX enabled, the average effective CPU clock is 4351 MHz with 1.200 volts. The average CPU temperature is 89 degrees Celsius and the average VRM temperature is 52 degrees Celsius. The average CPU package power is 213 watts.

When running Prime 95 Small FFTs with AVX disabled, the average effective CPU clock is 4455 MHz with 1.23 volts. The average CPU temperature is 84 degrees Celsius and the average VRM temperature is 51 degrees Celsius. The average CPU package power is 197 watts.

AMD Ryzen 9 5900 B2: Conclusion
Alright, let us wrap this up.
When putting together this system, I had three things on my mind. First, I wanted to check the overclocking experience of a non-X Ryzen 5000 CPU. Second, I was curious to find out if the B2 stepping had any performance improvements over the B0 stepping. Third, I definitely wanted to figure out how using the Crosshair VIII Extreme Voltage Suspension feature would impact my overclock.
When it comes to overclocking the Ryzen 9 5900 versus the Ryzen 9 5900X I can say there’s not really any difference. Of course, at stock the 5900 is rather limited in performance due to the lower TDP and the lower frequency range. However, when enabling Precision Boost Overdrive the performance is similar to that of the 5900X even in heavy workloads like Prime95 as the frequency is around 4300 MHz and the power consumption is around 190W.
The B2 stepping is also somewhat of a let-down when it comes to performance improvements. That is to say: I didn’t see any difference either in overclocking capabilities or benchmark performance over the Ryzen 5000 B0 stepping I’ve tested before. As I mentioned earlier, I presume the difference between B0 and B2 are more subtle like improvements in yield, fixing bugs or defects, or feature expansion.
When it comes to Voltage Suspension feature, I’m genuinely surprised about the results. It didn’t do incredibly much for my single threaded frequencies, though any improvements are already quite surprising.
The biggest shock for me was the impact it had in heavy multithreaded workloads. By using Voltage Suspension, in Prime95 Small FFTs with AVX disabled I achieve 60 MHz higher and 9 degrees less and 30W lower power consumption. That’s … WOW!
Voltage Suspension kind of feels like when first trying Dynamic OC Switcher: it takes a while to get your head around how to configure it, but once you get it you can improve your overclock and system performance quite a bit.
Anyway, that’s all for today!
I do have a couple more articles in the planning with both AMD and Intel platforms in the coming months. As per usual if you have any questions or comments, feel free to drop them in the comment section below.
‘Till the next time!

5 Minute Overclock: AMD Ryzen 9 5900 B2 to 5152 MHz - 5 Minute Overclock
[…] I’ll speed run you through the BIOS settings and provide some notes and tips along the way. Please note that this is for entertainment purposes only and most certainly not the whole picture. Please don’t outright copy these settings and apply to your system. If you want to learn how to overclock this system, please check out the longer SkatterBencher article. […]
SkatterBencher #39: AMD Ryzen 7 5800X3D Overclocked to 4741 MHz - SkatterBencher
[…] the 5800X3D is that the latter is the B2 stepping. We already talked about this minor difference in SkatterBencher #29, where we overclocked a Ryzen 9 5900 B2. While there’s been a lot of speculation about the […]
SkatterBencher #35: AMD Ryzen 3 5300GE Overclocked to 4628 MHz - SkatterBencher
[…] SkatterBencher videos: episode #26 with the Ryzen 9 5900X, episode #27 with the Ryzen 9 5950X, and episode #29 with the Ryzen 9 5900 B2. It’s quite a lengthy and detailed overview so I would suggest you check out those videos to […]