SkatterBencher #28: Intel UHD Graphics 750 Overclocked to 1750 MHz
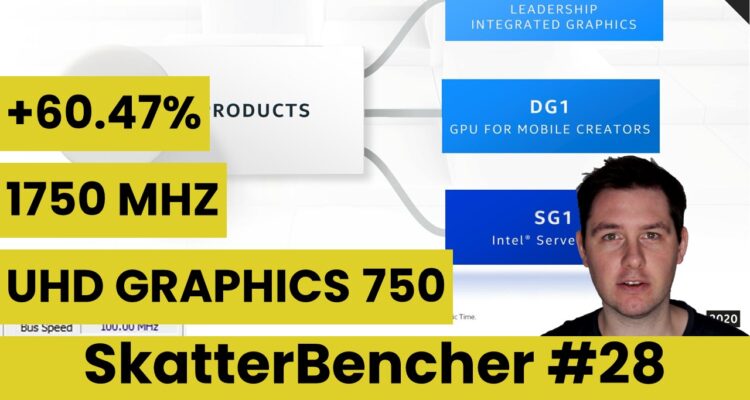
We overclock the Intel UHD Graphics 750 integrated graphics up to 1750 MHz with the EK-QuantumX Delta TEC Evo and ASUS ROG Maximus XIII Hero.
You can overclock the Intel UHD Graphics with Xe architecture to 1.75GHz and get up to 60% higher performance in games. It’s really simple and straightforward.
Also, I just received the 2nd generation of EK’s Delta TEC and it’s quite a lot more powerful. I was even able to push my Core i9-11900K up to 5.9 GHz.
All that and more in this article. Let’s get started
Intel UHD Graphics 750: Introduction
The Intel UHD Graphics 750 is the integrated graphics portion of the Intel Rocket Lake Core i9-11900K and launched back in November. It is part of the Intel Xe GPU architecture which ranges from the low power or Xe-LP to the high performance Xe-HPC. The latter includes the infamous Ponte Vecchio HPC/AI GPU.

Intel announced the Xe-LP products in August 2020 and listed three main avenues for the chip: Tiger Lake mobile graphics, a DG1 discrete card, and SG1 accelerator for data center.

Unfortunately, we neither have the time nor the scope to dig into what makes the Xe-LP different from its bigger brothers and predecessors. What is important to mention is that Rocket Lake is an architecture backported from Tiger Lake and as such also received the Intel Xe graphics treatment.
However, the backport from 10nm to 14nm comes at a performance cost. Whereas the Tiger Lake-U mobile processors feature integrated graphics with up to 96 execution units, the Intel UHD Graphics 750 integrated in the top-of-the-line Rocket Lake Core i9-11900K only features 32 execution units. With that in mind, Intel still suggests a 50% improvement over the Comet Lake integrated graphics.
Either way, the integrated graphics on desktop are one process node behind that of its mobile brethren and have a lot less horsepower. So, the performance is never going to be amazing.
Nevertheless, at SkatterBencher we are always looking to squeeze more performance out of our system and today that entails the IGP. In this video we will cover 3 overclocking strategies.
- First, we enable ASUS Multicore Enhancement, Intel Adaptive Boost Technology, and compare DDR4-3200 to our DDR4-4266 XMP
- Second, we overclock the integrated graphics to a modest 1.5GHz
- Lastly, we push the integrated graphics to 1.75GHz and overclock the 11900K CPU to 5.5GHz.

However, before we jump into the overclocking let us quickly go over the hardware and benchmarks we use in this video. You’ll see there’s quite a couple of new things we’re doing with this system.
Intel UHD Graphics 750: Platform Overview
Along with the Intel Core i9-11900K processor and its Intel UHD Graphics 750 integrated graphics, in this guide, we will be using the ASUS ROG Maximus XIII Hero motherboard, two pair of G.SKILL TridentZ DDR4-4266 8GB memory sticks, a 512GB M.2 NVMe SSD, a Seasonic Prime 850W Platinum power supply, the ElmorLabs Easy Fan Controller, the EK-QuantumX Delta TEC Evo, and EK-Quantum water cooling. All this is mounted on top of our favorite Open Benchtable.


The cost of the components should be around $4,140.
- Intel Core i9-11900K processor: $550
- EK-QuantumX Delta TEC Evo: $390
- EK-Quantum P360 water cooling kit: $550
- ASUS ROG Maximus XIII Hero motherboard: $470
- ASUS ROG Strix RTX 2080 TI graphics card: $1,500
- 2x G.SKILL TridentZ DDR4-4266 memory: $350
- AORUS RGB 512 GB M.2-2280 NVME: $110
- Seasonic Prime 850W Platinum power supply: $200
- ElmorLabs Easy Fan Controller: $20
- Open Benchtable: $200
There are two parts of the hardware I want to talk about a bit more in detail.
ElmorLabs Easy Fan Controller
First, the ElmorLabs Easy Fan Controller. I covered the use case of this fan controller in a separate article on this website, so I won’t bore you with the details. To keep it short and simple:
I attached an external temperature sensor from the water in the loop to the EFC. Then, I use the low/high setting to map the fan curve from 25 to 40 degrees water temperature. This is used for all overclocking strategies.
As I pointed out in my dedicated EFC video, the Delta TEC Evo introduces additional heat in the water loop because of the Peltier element. So, while using the EFC may look like a trivial part of the hardware system, it’s actually very important to ensure optimal operation of the EK-QuantumX Delta TEC Evo.

EK-QuantumX Delta TEC Evo
To regular visitors of this website, the EK-QuantumX Delta TEC is not new. I’ve used the Delta TEC in two previous videos: once to get a Core i9-10900K up to 6 GHz and once to get the Core i9-11900K up to 5.6GHz. That was with the 1st gen Delta TEC.
On August 13, EK released the 2nd generation of the Delta TEC: the appropriately named EK-QuantumX Delta TEC Evo. It promises compatibility with both 10th gen and 11th gen Intel CPUs for socket LGA1200. The new Delta TEC Evo is a, well, evolution on the original design as it incorporates much of the same technology but has a more powerful Peltier element.
The TEC plate is now soldered to the bottom of the water block that goes over the CPU. This improves the contact and transfer of cooling to the block and eventually the CPU. In addition, it also features a more powerful 275W TEC instead of the 200W of the first generation.
The Delta TEC Evo is still exclusively powered by the Intel Cryo Cooling Technology, a unique combination of hardware, software, and firmware designed to help unleash elite performance for gamers and overclockers.
In terms of installation and things to keep in mind, the Delta TEC Evo isn’t different from the Delta TEC. So, if you’re lucky enough the get ahold of one of the very limited units that are available, I suggest you check out the “Using all the overclocking knobs” video series on this channel to get a full picture on how to install and configure the Delta TEC Evo in your system.
To compare the cooling performance of the Delta TEC Evo against the Delta TEC, I picked 2 points of comparison:
- I use the OC Strategy #1 from SkatterBencher #25 to directly compare the Delta TEC with the Delta TEC Evo in Prime95 Small FFTs AVX and non-AVX when ASUS MCE and Intel ABT are enabled, and the package temperature threshold set to 85 degrees Celsius.
- In that same video I also shared a Prime95 Small FFTs non-AVX with just MCE and ABT enabled using the EK-Quantum Magnitude water block.

When comparing the first gen Delta TEC with the second gen Delta TEC, we find that:
- In Prime95 Small FFTs with AVX disabled our all-core frequency improves by almost 150MHz to 4874 MHz from 4736 MHz
- In Prime95 Small FFTs with AVX enabled our all-core frequency improves by almost 150MHz to 4413 MHz from 4262 MHz


Then we compare the 2nd gen Delta TEC to a regular high-performance water block like the EK-Quantum Magnitude in Prime95 Small FFTs with AVX disabled, leaving ABT and MCE enabled, and relying on Intel’s own thermal throttling mechanisms which kick in at 100 degrees Celsius.
We find that the Delta TEC is still trailing by about 200 MHz in average frequency, 4.9G versus 5.1G, as it hits the thermal throttling point of 100C. That said, the TEC handling an average CPU Package Power of 265W is still pretty impressive. The Magnitude holds the 11900K at 5.1 GHz with 285W average package power and 87 degrees Celsius. So, it’s getting pretty close!


One last note on the Delta TEC Evo: when running an all-core heavy multi-threaded workload like Prime95, the average CPU package power is 265W but the power from the wall is … 600W. That may sound really high, but it’s just the nature of Peltier cooling. An efficiency of 50% at such high loads is quite good for a Peltier.

In unregulated mode I also saw some improvement over to the 1st gen Delta TEC we used in SkatterBencher #25 with the 11900K.
When idling in the operating system, with the 1st gen Delta TEC I was not able to see negative temperatures and my maximum frequency was 5.7GHz.
When idling in the operating system, with the 2nd gen Delta TEC Evo I reached subzero temperatures and could further increase the CPU frequency to 5.9 GHz. So, I could probably set up a Rocket Lake system that could boost to 5.7 or 5.8 GHz with the Delta TEC Evo.

So, let’s summarize in bullet points: 1st gen Delta TEC versus 2nd gen Delta TEC Evo
- Maximum CPU package power increased from 200W to 265W
- Roughly 150 MHz frequency improvement in all-core heavy workloads
- Roughly 200 MHz frequency improvement in light workloads
- Peltier efficiency of around or above 50%

Alright, let’s move on to the benchmark software.
Intel UHD Graphics 750: Benchmark Software
We use the following benchmark applications to measure performance and ensure system stability.
- Geekbench 5 (OpenCL, Vulkan) https://www.geekbench.com/
- Furmark https://geeks3d.com/furmark/
- AI-Benchmark https://ai-benchmark.com/
- 3DMark Night Raid https://www.3dmark.com/
- CS:GO FPS Bench https://steamcommunity.com/sharedfiles/filedetails/?id=500334237
- Final Fantasy XV http://benchmark.finalfantasyxv.com/na/
- Handbrake https://handbrake.fr/
- Prime 95 https://www.mersenne.org/download/
There’s lots of new benchmarks in this list which may need some detailing how I set it up
AI Benchmark
Unless you’ve been living under a rock for the past couple of years, AI and deep learning are a pretty big deal these days. So, I wanted to include at least one benchmark test to see if overclocking the IGP could improve deep learning performance.
I came across AI Benchmark: https://pypi.org/project/ai-benchmark/.
AI Benchmark Alpha is an open-source python library for evaluating AI performance of various hardware platforms, including CPUs, GPUs and TPUs. The benchmark is relying on the TensorFlow machine learning library, and is providing a lightweight solution for assessing inference and training speed for key Deep Learning models.
Installing AI Benchmark turned out to be a bit more of a hassle than initially expected. First, it relies on the TensorFlow machine learning library. TensorFlow can be used with AVX-enabled CPUs or CUDA-enabled GPUs, neither of which describes our integrated graphics.
Then I came across TensorFlow-DirectML. TensorFlow-DirectML broadens the reach of TensorFlow beyond its traditional Graphics Processing Unit (GPU) support, by enabling high-performance training and inferencing of machine learning models on any Windows devices with a DirectX 12-capable GPU through DirectML, a hardware accelerated deep learning API on Windows.

While I am pretty software-illiterate, I was able to use the TensorFlow-DirectML package to get the benchmark to run on the integrated graphics. For those who want to also run it, I’ll quickly run you through the process.
- First, install Anaconda
- Then, run the Anaconda Prompt
- Create a new Python environment for the benchmark. Make sure to specify Python version 3.7 as only versions 3.5, 3.6, and 3.7 are supported by tensorflow-directml
- conda create -n aibench python=3.7
- Activate your newly created environment
- conda activate aibench
- Download and install the ai_benchmark package
- pip install ai_benchmark
- Download and install the tensorflow-directml package
- pip install tensorflow-directml
- Start python
- python
- Import the AI Benchmark package
- From ai_benchmark import AIBenchmark
- Specify AI Benchmark to run on the IGP
- Benchmark = AIBenchmark(use_CPU=None, verbose_level=3)
- Use_CPU=None will prevent the benchmark from running on the CPU
- Verbose_level=3 will provide us detailed information during the benchmark
- Benchmark = AIBenchmark(use_CPU=None, verbose_level=3)
- Start the benchmark
- Benchmark.run()
The benchmark itself takes about 20 minutes to run and outputs three scores: inference score, training score, and AI-Score. It’s the latter we use as performance measurement.
Do note that the AI Benchmark requires a substantial amount of memory. The integrated graphics does not have dedicated memory but rather shares the memory with the CPU. As you’ll see later in the video: when using 2 sticks of 8GB we ended up running out of memory and unable to complete the benchmark. So, I recommend a minimum of 32GB of system memory.
Also, you may run into an error called DXGI_ERROR_DEVICE_REMOVED while running the benchmark. This happens when there’s a timeout. Basically, the benchmark figures our integrated graphics gave up and went home. But our IGP didn’t give up … it’s just a bit slow.
To solve the issue, you can increase the timeout with the registry entry “TdrDelay”. This registry entry will extend the time a software application waits for the IGP. I use a value of 20 and this resolved my problem.
KeyPath: HKEY_LOCAL_MACHINE\System\CurrentControlSet\Control\GraphicsDrivers
KeyValue: TdrDelay
ValueType: REG_DWORD
ValueData: Number of seconds to delay. The default value is 2 seconds.
Oh, and did I mention already the IGP is pretty slow?
As you’ll see later on, the IGP gets a score of about 1,000 points at stock. When running the AI Benchmark on our 8 Rocket Lake CPU cores using the regular TensorFlow library, we get a score of about 3,000 points. So 3x higher.
Handbrake
I included Handbrake in the benchmark suite to check if there’s any performance scaling when using Quick Sync. I followed the following guide: https://forum.handbrake.fr/viewtopic.php?f=9&t=40721
I used the Tears of Steel Full Movie 1920 pixels wide source, then check the average frames per seconds during encoding with the H.265 QSV 1080p preset.
Alright, let’s start the overclocking.
Intel UHD Graphics 750: Stock Performance
The first thing we must do before we start overclocking is check the system performance at default settings.
Please note that out of the box, the ASUS ROG Maximus XIII Hero enables ASUS MultiCore Enhancement which unleashes the Intel Turbo Boost 2.0 limits. So, to check the performance at default settings you must
Go to the BIOS, then
- Go to the Extreme Tweaker menu
- Set ASUS MultiCore Enhancement to Disabled – Enforce All limits
Then save and exit the BIOS.
Here is the benchmark performance at stock:
- Geekbench 5 OpenCL: 7,517 points
- Geekbench 5 Vulkan: 7,283 points
- Furmark 1080P: 757 points
- AI-Benchmark: /
- 3DMark Night Raid: 9,740 marks
- CS:GO FPS Bench: 28.51 fps
- Final Fantasy XV: 11.15 fps
- Handbrake: 342.273 fps

There were some mentions that 4dimm performance is much better than 2dimm performance on Rocket Lake, so we tried that as well.
Here is the benchmark performance at stock with 4 dimms installed:
- Geekbench 5 OpenCL: 7,601 points (+1.12%)
- Geekbench 5 Vulkan: 7,305 points (+0.30%)
- Furmark 1080P: 757 points (+0.00%)
- AI-Benchmark: 1,064 points (+0.00%)
- 3DMark Night Raid: 9,753 marks (+0.13%)
- CS:GO FPS Bench: 28.94 fps (+1.51%)
- Final Fantasy XV: 11.19 fps (+0.36%)
- Handbrake: 343.755 fps (+0.43%)

Overall, the difference falls within the margin of error. However, we are now able to finish the AI Benchmark so for the rest of the guide we’ll stick with 4 memory sticks of 8GB totaling 32GB of DDR4. Also, the relative performance improvements from our overclocking strategies references the 4dimm benchmark performance.
When running Furmark GPU Stress Test, the average GPU clock is 1300 MHz with 1.064 volts and an average memory clock of 1067 MHz. The average GPU temperature is 29 degrees Celsius, and the average GPU power is 12.14 watts.

Now, let us try our first real overclocking strategy.
However, before we get started make sure to locate the CMOS Clear button on the IO panel of your motherboard. In case your system fails to boot up after you configured your settings, pressing this button will force the system reset the BIOS settings. So, you can return to the BIOS easily and make the necessary adjustments.
OC Strategy #1: ABT + MCE + XMP
In our first overclocking strategy we simply unlock some of the performance constraints by enabling Intel ABT, Intel XMP, and ASUS MCE.
There are 3 main differences between the default configuration and this overclocking strategy.
First, Intel ABT allows the CPU to boost to 5.1 GHz when all cores are active whereas the default configuration only allows 5.1GHz for up to 4 active cores and up to 4.8GHz with 8 active cores.

Second, Intel XMP increases the memory frequency to DDR4-4266 up from the stock speed of DDR4-2133. Do note that this will also enable Gear 2 mode. So, for comparison purposes we also tested the performance at DDR4-3200 with Gear 1 mode.

Third, ASUS MCE unlocks the Turbo Boost parameters allowing for essentially unlimited time at the highest performance levels.

Upon entering the BIOS
- Go to the Extreme Tweaker menu
- Set AI Overclock Tuner to XMP I
- Set Intel Adaptive Boost Technology to Enabled
- Set Asus MultiCore Enhancement to Enabled – Remove All Limits
Then save and exit the BIOS.
We re-ran the benchmarks and checked the performance increase compared to the default operation.
With DDR4-3200 and Gear 1 mode:
- Geekbench 5 OpenCL: 7,733 points (+1.74%)
- Geekbench 5 Vulkan: 7,667 points (+4.96%)
- Furmark 1080P: 749 points (-1.06%)
- AI-Benchmark: 1,098 points (+3.20%)
- 3DMark Night Raid: 10,269 marks (+5.29%)
- CS:GO FPS Bench: 35.26 fps (+21.84%)
- Final Fantasy XV: 11.77 fps (+0.81%)
- Handbrake: 346.544 fps (+0.43%)

With DDR4-4266 XMP and Gear 2 mode:
- Geekbench 5 OpenCL: 7,788 points (+2,46%)
- Geekbench 5 Vulkan: 7,765 points (+6.30%)
- Furmark 1080P: 745 points (-1.59%)
- AI-Benchmark: 1,107 points (+4.04%)
- 3DMark Night Raid: 10,394 marks (+6.57%)
- CS:GO FPS Bench: 38.41 fps (+32.72%)
- Final Fantasy XV: 11.82 fps (+5.63%)
- Handbrake: 351.596 fps (+2.28%)

We see performance increases across the board with the most obvious one being CS:GO. In CS:GO we get a performance uplift of more than 30% by increasing the system memory frequency. We also see that the XMP with Gear 2 provides slightly better performance than DDR4-3200 with Gear 1.
When running Furmark GPU Stress Test, the average GPU clock is 1300 MHz with 1.064 volts and an average memory clock of 2133 MHz. The average GPU temperature is 25 degrees Celsius, and the average GPU power is 12.63 watts.

OC Strategy #2: ABT + MCE + XMP + IGP 1500
In our second overclocking strategy we finally get around overclocking the integrated graphics. As it turns out, it’s really quite simple and straight-forward. So, let’s overcomplicate for our own entertainment.
Intel UHD Graphics 750: Architecture
As the term integrated graphics already reveals, the UHD Graphics 750 is integrated in the Rocket Lake CPU die. While it takes a sizeable chunk of the total die, about 21% of the die area, the majority of the chip is used to place the 8 Cypress Cove CPU Cores, its cache, and the Ring bus.

The design of the integrated graphics can be separated into three parts: the “slice”, the “unslice”, and the display block.
The slice is a cluster of sub-slices, each of which contains the elements of the actual graphics compute engine like the execution units. This is the part that powers your games and any compute tasks.
The unslice holds the elements with fixed-function geometry capabilities and fixed-function media capabilities. So, if you’re encoding or decoding a video, or simply watching Netflix, this part ensures proper video encoding. It also contains the connection to the ring bus via which the IGP can send and receive data from the system memory.
The display block contains support for the display outputs like HDMI or DisplayPort.

The slice part of the UHD Graphics 750 inside our Rocket Lake Core i9-11900K contains 2 sub-slices with each 16 execution units. That’s far less than the 6 sub-slices and 96 execution units present in the mobile Tiger Lake counterpart.
That’s the advantage of Tiger Lake being on a smaller process node thus allowing for higher transistor density. Whereas Rocket Lake is built using the 4th generation 14nm process (14nm+++), Tiger Lake comes in a 10nm SuperFin package which is the 3rd generation of Intel 10nm.
Intel UHD Graphics 750: Clocking
When it comes to the clocking, the IGP frequency is based on the base clock frequency or reference clock. At default, the BCLK is 100MHz, but the Rocket Lake PCH (chipset) supports fine grain BCLK overclocking between 95 MHz and 538 MHz. The base clock frequency is first halved, then multiplied by the Graphics Ratio to obtain the final operating frequency.
On Rocket Lake CPUs, the maximum Graphics Ratio Limit is 42. This is lower than on the previous generation Comet Lake where the maximum ratio limit was 60. So, the maximum frequency of a Rocket Lake IGP would be 100 MHz divided by 2 multiplied by 42 so 2100 MHz.
The Rocket Lake IGP supports the Graphics Dynamic Frequency feature. The Dynamic Frequency capability is designed to allow the processor to assess its own thermals, current, and power to come up with a dynamic upper limit on its frequency.
On processors with Graphics Overclocking capability, the integrated graphics cores have the ability to run at frequencies higher when operating conditions allow.
When Graphics Dynamic Frequency is enabled, the graphics cores could be running at any ratio in the inclusive range between the Maximum Dynamic Frequency (RP0) and the Graphics Base Frequency (RP1). In the case of our Core i9-11900K, the graphics base frequency is 350 MHz, and the default maximum dynamic frequency is 1300 MHz. When overclocking, we simply increase this maximum frequency to a higher value.

As mentioned, the graphics frequency is in part function of the available thermal, current, and power headroom. This is managed by the Turbo Boost 2.0 technology we are all too familiar with. Turbo Boost 2.0 will ensure available power budget is distributed among the CPU and Graphics cores depending on the workload. So, if you have a heavy graphics dependent workload and no CPU load, it will decrease the CPU frequency in favor of boosting the Graphics frequency higher.

Of course, knowing the power budget of the Graphics portion of the Rocket Lake CPU is only 15W, we don’t expect this power budgeting to have a great impact on our overall system performance.
One last thing we need to know about Rocket Lake integrated graphics overclocking is that unlike its predecessor architectures, having separate Slice and Unslice frequencies is not supported. So, when increasing the graphics ratio, we will increase both the Slice and Unslice frequency.
Do note that the display output is driven by a 24 MHz fixed clock frequency and is not affected by changing the BCLK frequency or the graphics ratio.
Intel UHD Graphics 750: Voltage
When it comes to providing an operating voltage to the graphics cores, the Rocket Lake processor has a dedicated voltage rail called GT Core Voltage. This voltage relates directly to the maximum frequency capability of the graphics cores. It is by default around 1.05V.

Configuring the voltage for the graphics cores is very similar to the CPU cores. Rocket Lake supports both adaptive and override voltages. When using Adaptive voltage mode, the graphics voltage will be reduced in idle whereas in Override voltage mode the voltage will remain constant.
Generally speaking, adaptive voltage mode is the primary choice when overclocking using air or water cooling, and override voltage mode is the primary choice when extreme overclocking.
In adaptive mode, the CPU will interpolate the required voltage for a given frequency between the base frequency and our set maximum frequency.
If our base frequency is 350 MHz at 0.4V and our maximum boost frequency is 1300 MHz at 1.05V, then the interpolated voltage for 1000 MHz will be somewhere between 0.4V and 1.05V. If the V/f curve is linear, that would be 0.86V
If we overclock our system to 1.75GHz and use an adaptive voltage offset of 350mV, the base frequency will be 350 MHz at 0.75V and thPe maximum boost frequency will be 1750 MHz at 1.4V. The interpolated voltage for 1000 MHz will be somewhere between 0.75V and 1.4V. If the V/f curve is linear, that would be 1.21V.

When it comes to the maximum voltage, there’s a 1.52V upper limit by the SVID controller but no general recommendation on maximum voltage for real-world scenario.
So, now that we have overcomplicated integrated graphics overclocking let’s get started.
In our second strategy we increase the graphics ratio to 30, resulting in a 1.5GHz clock frequency, and use the adaptive voltage offset of 0.275mV to increase the GT Core Voltage.
Now let’s configure the system
- Go to the Extreme Tweaker menu
- Set AI Overclock Tuner to XMP I
- Set Intel Adaptive Boost Technology to Enabled
- Set Asus MultiCore Enhancement to Enabled – Remove All Limits
- Set Max. CPU Graphics Ratio to 30
- Set CPU Graphics Voltage to Offset Mode
- Set Offset Mode Sign to +
- Set CPU Graphics Voltage Offset to 0.275
Then save and exit the BIOS.
We re-ran the benchmarks and checked the performance increase compared to the default operation.
- Geekbench 5 OpenCL: 8,836 points (+16.25%)
- Geekbench 5 Vulkan: 8,873 points (+21.46%)
- Furmark 1080P: 864 points (+14.13%)
- AI-Benchmark: 1,264 points (+18.80%)
- 3DMark Night Raid: 11,464 marks (+17.54%)
- CS:GO FPS Bench: 42.08 fps (+45.40%)
- Final Fantasy XV: 13.12 fps (+17.25%)
- Handbrake: 371.572 fps (+8.09%)

We get a steady performance increase across the board. Compared to stock, the GPU frequency increased by 15% and the memory increased by 100%. The benchmark performance increase ranges from +8% in Handbrake to +45% in CS:GO.
When running Furmark GPU Stress Test, the average GPU clock is 1500 MHz with 1.333 volts and an average memory clock of 2133 MHz. The average GPU temperature is 30 degrees Celsius, and the average GPU power is 17.55 watts.

OC Strategy #3: ABT + MCE + XMP + IGP 1750 + OCTVB
In our third and final overclocking strategy we push the integrated graphics to its max and reach 1.75GHz.
We also overclock our 8 Rocket Lake CPU cores using the same settings we used in SkatterBencher #25 OC Strategy #4. So, we manually tune the CPU ratios and use ASUS’ OCTVB +2 Boost Profile to get frequencies up to 5.5 GHz.
I also tried pushing the memory a little bit more with additional frequency or improved memory timings, but sadly I wasn’t able to get it quite stable. Using 4 memory sticks and relying on the system memory for the integrated graphics makes it a lot more difficult.
Upon entering the BIOS
- Go to the Extreme Tweaker menu
- Set AI Overclock Tuner to XMP I
- Set Intel Adaptive Boost Technology to Disabled
- Set Asus MultiCore Enhancement to Enabled – Remove All Limits
- Set CPU Core Ratio to By Core Usage
- Set 1-Core to 8-Core Ratio Limit to 55, 55, 54, 54, 54, 54, 54, 53.
- Enter the Specific Core submenu
- Set Core0 to Core 1 Specific Ratio Limit to 55, 53, 54, 54, 55, 54, 54, 54.
- Leave the Specific Core submenu
- Enter the Thermal Velocity Boost submenu
- Set Overclocking TVB to +2Boost Profile.
- Leave the Thermal Velocity Boost submenu
- Enter the V/F Point Offset submenu
- Set Offset Mode Sign 4 to minus
- Set V/F Point 4 Offset to 0.075
- Set Offset Mode Sign 5 to minus
- Set V/F Point 5 Offset to 0.035
- Set Offset Mode Sign 6 to minus
- Set V/F Point 6 Offset to 0.025
- Set Offset Mode Sign 8 to plus
- Set V/F Point 8 Offset to 0.050
- Leave the V/F Point Offset submenu
- Enter the AI Features submenu
- Set Package Temperature Threshold to 90
- Set Regulate Temperature Threshold to Enabled
- Leave the AI Features submenu
- Set Max. CPU Graphics Ratio to 35
- Set CPU Graphics Voltage to Offset Mode
- Set Offset Mode Sign to +
- Set CPU Graphics Voltage Offset to 0.350
Then save and exit the BIOS.
We re-ran the benchmarks and checked the performance increase compared to the default operation.
- Geekbench 5 OpenCL: 10,318 points (+35.75%)
- Geekbench 5 Vulkan: 10,118 points (+38.51%)
- Furmark 1080P: 1,005 points (+32.76%)
- AI-Benchmark: 1,446 points (+35.90%)
- 3DMark Night Raid: 12,779 marks (+31.03%)
- CS:GO FPS Bench: 46.44 fps (+60.47%)
- Final Fantasy XV: 14.90 fps (+33.15%)
- Handbrake: /

We see the best benchmark performance results across the board except for Handbrake where our IGP failed to complete the test. We found that 1.5GHz was in fact the highest stable frequency that could pass Handbrake, no matter the additional voltage.
Compared to stock, the GPU frequency increased by 35% and the memory increased by 100%. The benchmark performance increase ranges from +31% in 3DMark Night Raid to +60% in CS:GO.
When running Furmark GPU Stress Test, the average GPU clock is 1750 MHz with 1.398 volts and an average memory clock of 2133 MHz. The average GPU temperature is 36 degrees Celsius, and the average GPU power is 25.19 watts.

Intel UHD Graphics 750: Conclusion
Alright, let us wrap this up.
My plan with this setup was two-fold.
First, I wanted to have a closer look at the second generation EK Delta TEC Evo as it features a higher performance Peltier element. Second, as I had not yet looked at overclocking the Rocket Lake integrated graphics, I figured I’d take the opportunity to check it out.
The second generation EK Delta TEC was certainly much more capable of handling overclocked Rocket Lake CPU cores. The improved Peltier provided me with better temperatures across the board. For example, with the 1st gen Delta TEC I couldn’t see negative temperatures when idling and unregulated mode enabled. With the 2nd generation, however, I very quickly saw minus 8.5 degrees Celsius.
In light workloads I was able to get this Core i9-11900K up to 5.9 GHz with the Delta TEC Evo, compared to only 5.7 GHz with the Delta TEC. That’s an increase of 200 MHz. I’m not sure if I could dial in 5.9 GHz in a daily system, but 5.8 GHz should certainly be within the realms of possibility.
For heavy workloads like an all-core Prime95 Small FFTs with AVX enabled, I was able to increase the frequency by about 150 MHz from 4.26GHz to 4.41GHz with a maximum CPU temperature of 85 degrees Celsius. That is of course with ASUS’ package temperature threshold feature enabled.
In an unconstrained scenario like Prime95 Small FFTs with AVX disabled, Intel Adaptive Boost Technology enabled, and ASUS MultiCore Enhancement enabled, we find that the Delta TEC Evo is still trailing a traditional water block like the EK Magnitude. Whereas the Magnitude can run at the maximum frequency of 5.1 GHz and temperature of 87 degrees Celsius, the Delta TEC Evo stably throttles at 100 degrees Celsius to 4.9GHz. The main limiting factor is of course the 270W Peltier unable to handle a CPU Package Power of 285W.
Overall, the Delta TEC Evo is definitely a step up from the 1st gen Delta TEC and provides more frequency headroom in the more common and gaming workloads.
One last point I want to address with the Delta TEC is the common misunderstanding or misappreciation of this technology.
The argument I see made often is that because the Delta TEC fails to match regular water cooling performance in heavy multi-threaded workloads and because the Delta TEC consumes additional power to get higher frequencies in lighter workloads, therefore it’s not a good product.
But that’s like arguing the Core i9-11900K is not a good product because doesn’t match the Xeon W-3375 performance in Cinebench. And it’s 8 cores at peak frequency use more power. Like, yea. It’s just two different systems for two different use-cases. The 11900K will boost to higher frequencies, and the Xeon W-3375 will nail multi-threading. Just like the Delta TEC give you the opportunity for higher frequencies, while regular water cooling nails the multi-threaded performance. It’s not good or bad … it’s just a choice of how you spend your power budget: few cores, high frequency or many cores, full load.
Overclocking the integrated graphics was … I don’t know, straight-forward?
We managed to increase the frequency by 35% from 1.3 GHz to 1.75GHz. The power consumption during the Furmark GPU Stress test doubled from about 12.5W to 25W.
The maximum performance increase of over 60% in CS:GO was the effect of not only overclocking the graphics cores but also the system memory.
If you’re running the integrated graphics, the main takeaway from this video should be:
- Definitely enable XMP for higher performance
- Overclocking the IGP is really simple and straight-forward and could give you another 15 to 35 percent performance increase
That is all for today. As per usual if you have any questions or comments, feel free to drop them in the comment section below. See you next time!
Update On My 3.1GHz Intel Arc A380 - SkatterBencher
[…] overclocking videos in the past, so if you want more information on that, feel free to check out SkatterBencher #28 (UHD750), SkatterBencher #33 (UHD 770), or SkatterBencher #38 (UHD […]
5 Minute Overclock: Intel UHD Graphics 750 to 1750 MHz - 5 Minute Overclock
[…] I’ll speed run you through the BIOS settings and provide some notes and tips along the way. Please note that this is for entertainment purposes only and most certainly not the whole picture. Please don’t outright copy these settings and apply to your system. If you want to learn how to overclock this system, please check out the longer SkatterBencher article. […]
SkatterBencher #38: Intel UHD Graphics 730 Overclocked to 1800 MHz - SkatterBencher
[…] I already covered how I use AI Benchmark using TensorFlow-DirectML and Handbrake using QuickSync in SkatterBencher #28, where I overclocked the UHD Graphics 750. I use the same methodology for this […]
SkatterBencher #33: Intel UHD Graphics 770 Overclocked to 2378 MHz - SkatterBencher
[…] quite different from what we usually use. I already covered how I use AI Benchmark and Handbrake in SkatterBencher #28 where I overclocked the UHD Graphics 750. I use the same methodology for this […]
Jun
I’m so newbie to this and I don’t even know where to start. I bought a Dell XPS 8940 with i7-11700 with UHD 750 graphics, and I’m thinking maybe I can overclock it to improve gaming performance. Since I’m so ignorant about the topic, I don’t know if I should even attempt to do it.
Pieter
Hi! Welcome to the world of overclocking! Bad news though … Intel has restricted overclocking to the K-SKU CPUs only. So it will be difficult to get started with your i7-11700.