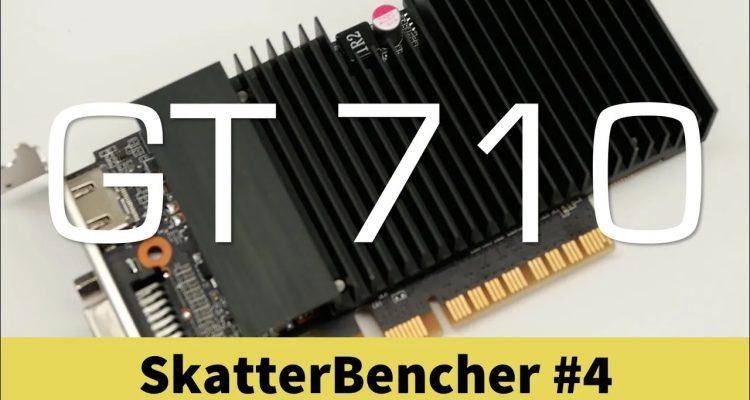
SkatterBencher #4: NVIDIA GeForce GT 710 Overclocked to 1450 MHz
We overclock the NVIDIA GeForce GT 710 processor up to 1450 MHz with the NVIDIA Inspector software tool and a single fan.
For those of you who are new to SkatterBencher, basically it’s a project dedicated to bringing you quick and simple step-by-step guides on how to overclock your PC. In episode #4 we are focusing on a specific hardware component, the GeForce GT 710 graphics card, one of the most affordable GPUs available today. Hopefully by the end of this guide you will see that is actually quite easy to get a solid performance boost when overclocking more affordable hardware like the GT 710. Let’s get started.
Note: The Nvidia GeForce GT 710 is in the fact the graphics card chosen for this season’s inaugural Cheapaz Chips contest on OC-ESPORTS. Anyone who follows this guide will be able to join the contest and make a score submission. Contest closes on August 2016.
Cheapaz Chips contest page: http://oc-esports.io/#!/round/cheapaz_chips_s1
Before We Start – Install Necessary Software
To do the overclocking we’ll be using three different software applications. For the actual overclocking we will be using Nvidia Inspector. For GPU monitoring we will use TechPowerUp’s GPU-Z, and for the competitive benchmarking we will use GPUPI (Note: This is the benchmark for Stage 3 of the Cheapaz Chips contest).
Here are the download links for each app:
- Nvidia Inspector: http://www.guru3d.com/files-details/nvidia-inspector-download.html
- TechPowerUp GPU-Z: https://www.techpowerup.com/gpuz/
- GPUPi Benchmark: https://www.overclockers.at/articles/gpupi-2-1
Step 1: GeForce GT 710 Max GPU Memory

After you have installed the apps mentioned above, open GPU-Z and Nvidia Inspector and line them up side by side on the desktop. Make sure that the GeForce GT 710 is selected in the dropdown menu of GPU-Z. Note that all the relevant monitoring information is shown on the ‘Sensor’ tab in GPU-Z, including GPU and memory clock frequencies as well as the GPU load and temperature.
Next we want to enable the Render Test feature to help us max out the GPU. This is done by simply clicking on the small question mark on the right hand side of the Bus Interface information tab. The Render Test puts a dummy load on the GPU, making it ideal for initial stress testing.
In the Nvidia Inspector app, make sure you have the Overclocking options area set to ‘show’. In the first field set the power state to PO. This is the highest power state, and ensures we are overclocking the card at its highest performance level during high loads, such as games or our case, benchmarks.
There are three main options to configure in Nvidia Inspector. These are:
- Base Clock Offset (for the graphics core)
- Memory Clock Offset (for the memory)
- Voltage Offset (for the graphics core voltage)
For more high-end graphics cards you can also tweak the power and temperature targets as well as the fan speed. Our GT 710 card is passively cooled so we won’t be needing the fan options today.
Click the ‘Start Render Test’ button in GPU-Z to begin stressing your GPU. Now you can see that the clock frequencies of the graphics card have increased. In our case the GPU’s core frequency hit 954 MHz while memory ran at 450 MHz. Once stressed, the GPU temperature sat at a steady 380C. Now we can start overclocking!
First we need to increase the Clock Offset by one step of 20MHz to make the memory frequency increase from 450 MHz to 460 MHz (note: today’s memory is double date rate, or DDR which means when click +20MHz, the memory frequency is in fact raised by 10MHz). Click the ‘+20 button’ on the app, then click ‘Apply Clocks and Voltages’. We have have just raised the memory frequency by 10MHz. We want to find the maximum stable GPU memory frequency, so we keep gradually increasing the Clock Offset until the Render Test begins to creates system instability. At that point we will know the upper limit of our card’s GPU memory clock frequency.
We managed to reach a Clock Offset of +340MHz which pushed the memory from stock settings to 620MHz. At a +340MHz configuration we began to notice small visual imperfections (known as artifacts) in the Render Test. Moving to +360MHz (620MHz) resulted in a system lock up. This means that the upper limit for the GPU memory was +360MHz.
Step #2: GeForce GT 710 Max GPU Core

Now we want to find the upper limit on our card’s GPU core. The process is very similar to GPU memory overclocking we just covered.
We use the same setup as we used earlier, only this time we’re going to adjust the Base Clock Offset. Start by raising the GPU core frequency in 20MHz increments. Keep going until your system begins to experience instability.
Our GeForce GT 710 710 card managed to reach a Base Clock Offset configuration of +480 without issue, but began once we stepped up to +500 the system immediately locked up, and Windows reported that the Display Driver had stopped working. In other words the system was experiencing real instability.
Now here’s where it can get interesting. We can try and push the GPU core further by raising the Voltage Offset. This may well give the GPU core more headroom, but it will also raise the GPU’s temperature. We upped the Voltage Offset to +124mv and then tried raising the GPU again, starting from a safe setting of +440MHz.
Unfortunately the system still crashed at +480MHz. Raising the Voltage Offset to +200mv also failed to have positive effect. An outcome that means we have found the upper frequency limit.
Step 3: GeForce GT 710 Best Combination
Now that we know the upper overclocking limits of our graphics card, it’s time to experiment with a benchmark. This part of the overclocking process will almost always take up the majority of your time as there is no scientific rule that will tell you exactly how much lower the stable frequency is. The rule of thumb is to start off from a considerably safe distance from the upper limit, run the benchmark and verify stability.
It sounds obvious, but always be aware that benchmarks typically output a figure indicating the performance of your system. Keep an eye on that figure. If you see the figure going down, it means that something is negatively affecting performance. One of the most common reasons for this happening is because the GPU is overheating. Graphics cards will automatically decrease the GPU core clock in order to protect the chip. This is something that typically happens at the end of a benchmark run, after a prolonged period of stress. Watch the GPU temperature and adjust voltage settings as minimally as possible to avoid overheating.
The next thing we want to do is open the GPUPI 1B benchmark application. We can leave this open while we start overclocking our system. Open Nvidia Inspector and GPU-Z as before.
To get started, follow the same procedure as earlier and set the Base Clock Offset to +400MHz and +350MHz for the GPU memory. Once the settings are applied, we close Nvidia Inspector and launch the benchmark application. The GPUPI benchmark app has several settings. Select Cuda devices, and make sure the GT 710 is selected. Finally, make sure that the number of digits selected is 1B.
Start the benchmark, and wait for it to either crash or finish successfully. As the benchmark approached Batch 5, it crashed. We aborted the application and opened Nvidia Inspector again. This time we configured the graphics card to +450MHz for the GPU core, +320MHz for the GPU memory and +100 mV voltage offset. If this is also unstable, we know the GPU core frequency is causing problems. If not, it could well have been the GPU memory.
We started the GPUPI 1B benchmark, again. This time it finished, completing a run in 8mins and 5.186sec. From here we can keep increasing the GPU Clock frequency to improve our score.
Step 4: Submit and Compete

Now that we have our initial benchmark score we can now enter the Cheapaz Chips contest on OC-ESPORTS. To do this we will need the benchmark data file, a screenshot with sufficient verification and a system picture.
While we have the benchmark still open, launch GPU-Z once more. This informs the moderators about the graphics card that was used. Next, open CPU-Z twice, firstly to show the CPU information, the second to show the memory information. Different competitions require different type of verification, so be sure to check the competition rules. For the Cheapaz Chips contest for example, the screenshot must also include the competition background.
Once the above is set up, we go back to GPUPI and click the HWBOT menu. We select ‘Submit Online’. This feature allows us to directly submit to the HWBOT page from the benchmark application. Make sure to check Upload screenshot. Leave the bottom options unchecked unless you want to manually select the processor and graphics card categories. To complete the submission, press ‘Submit’.
To check the submission, click on the HWBOT URL hyperlink which will open the submission web page for you. In the sidebar we find the ongoing Cheapaz Chips competition. We learn that a system picture is required to enter the competition. This can be done later by editing the submission.
Going to the Cheapaz Chips contest page on OC-ESPORTS we can find the score we just submitted and the fact that it is ranked 14th in Stage 3. Clearly, there’s still a lot we can do to improve our standing. We can also check out the scores above us, including their GPU and memory configurations.
This concludes our GT 710 Overclocking Guide. We will be back soon with more overclocking content. Until the next time. Thanks for joining us.